SKM 100 G2 / SKM 300 G2 / SKM 500 G2 radiomicrophones
Remove the screw and put it to one side.
Remove the microphone module by pulling it out of the housing as shown. Do not touch the contacts!
Insert the new module.
Secure the capsule by tightening the screw.
Note:
The screw mechanically secures the microphone capsule. If the screw is missing, malfunctions may occur during tough use.
Put on the sound inlet basket and identification ring supplied with the new microphone headand screw it tight.
Insert the batteries/accupack.
Close the radiomicrophone and put it into operation.
Note:
Microphone capsule, sound inlet basket and foam insert form an acoustic unit and must therefore always be exchanged all together. Each microphone head comes with a
Using the radiomicrophone
Switching the radiomicrophone on/off
The radiomicrophone can only be switched off when the standard display is shown on the display panel. When in the operating menu, briefly pressing the ON/OFF button will cancel your entry (ESC func- tion) and return you to the standard display with the last stored settings.
Note:
Remove the batteries or the rechargeable battery when the radi- omicrophone will not be used for extended periods of time.
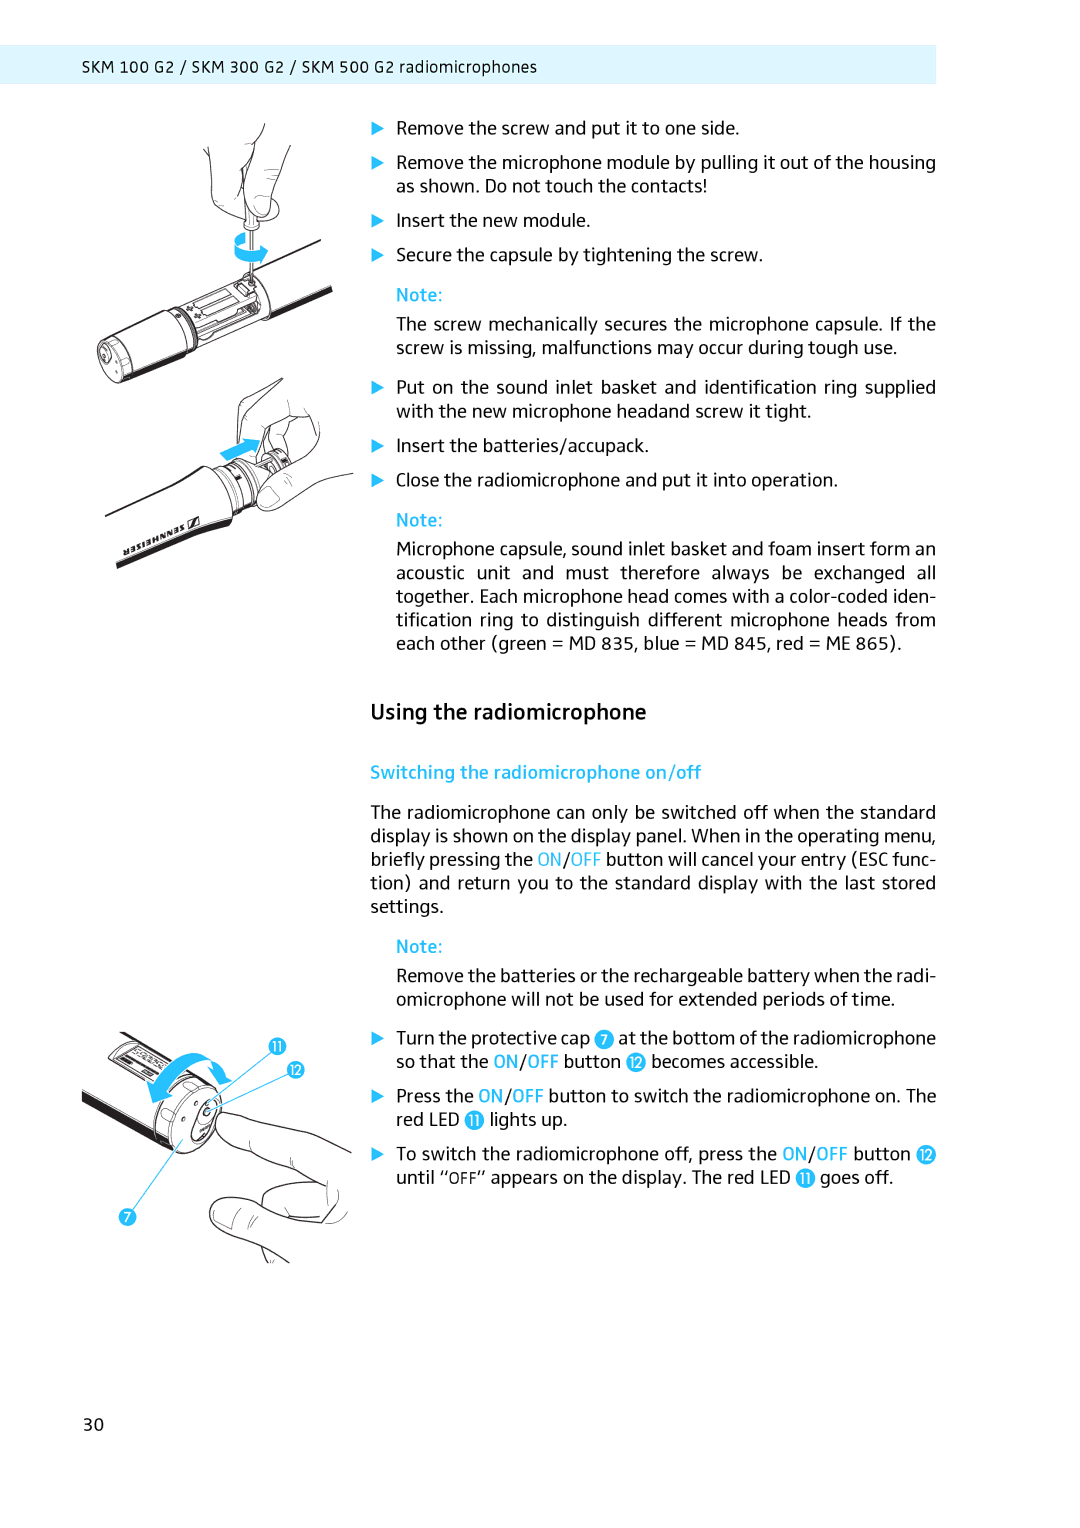
Turn the protective cap at the bottom of the radiomicrophone so that the ON/OFF button becomes accessible.
Press the ON/OFF button to switch the radiomicrophone on. The red LED lights up.
To switch the radiomicrophone off, press the ON/OFF button until “OFF” appears on the display. The red LED goes off.
30