Setup
Using the Adjustment Feet
The height of the projector can be adjusted us- ing the adjustment feet at the front and rear of the projector when the surface the projector is placed on is uneven or when the screen is slanted.
The projection of the image can be made higher by adjusting the projector when it is in a lower place than the screen.
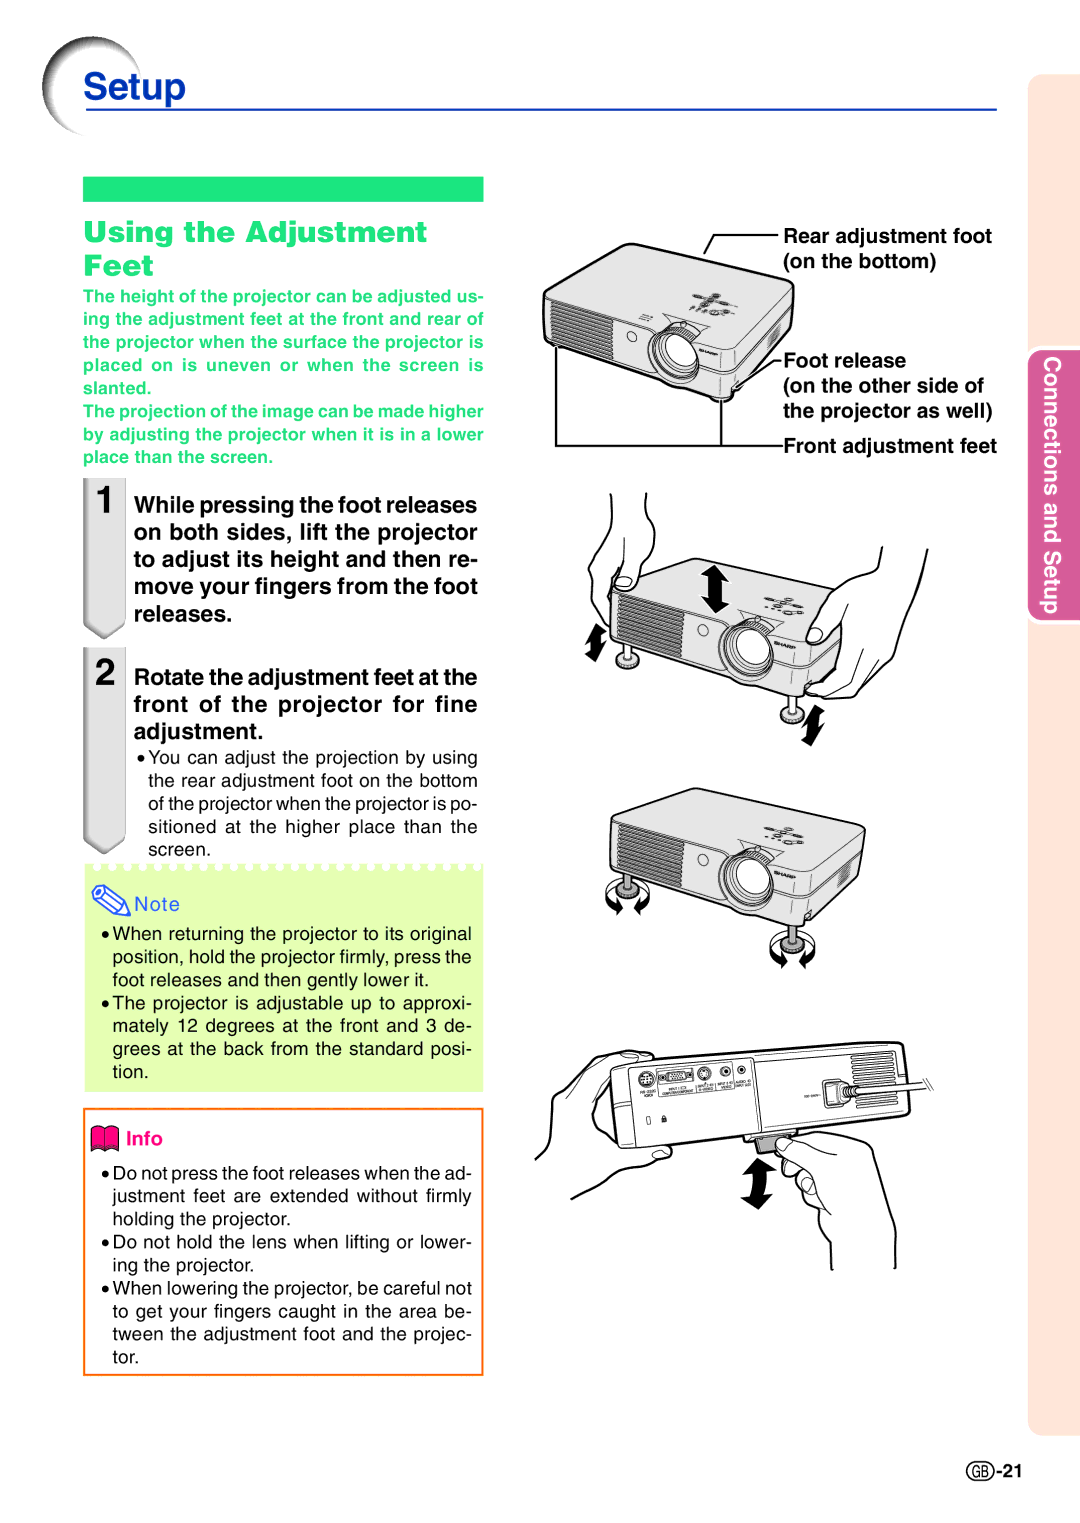
1 While pressing the foot releases on both sides, lift the projector to adjust its height and then re- move your fingers from the foot releases.
2 Rotate the adjustment feet at the front of the projector for fine adjustment.
•You can adjust the projection by using the rear adjustment foot on the bottom of the projector when the projector is po- sitioned at the higher place than the screen.
![]() Note
Note
•When returning the projector to its original position, hold the projector firmly, press the foot releases and then gently lower it.
•The projector is adjustable up to approxi- mately 12 degrees at the front and 3 de- grees at the back from the standard posi- tion.
 Info
Info
•Do not press the foot releases when the ad- justment feet are extended without firmly holding the projector.
•Do not hold the lens when lifting or lower- ing the projector.
•When lowering the projector, be careful not to get your fingers caught in the area be- tween the adjustment foot and the projec- tor.
Rear adjustment foot (on the bottom)
Foot release
(on the other side of the projector as well)
Front adjustment feet
Connections and Setup
![]() -21
-21