Picture Adjustment
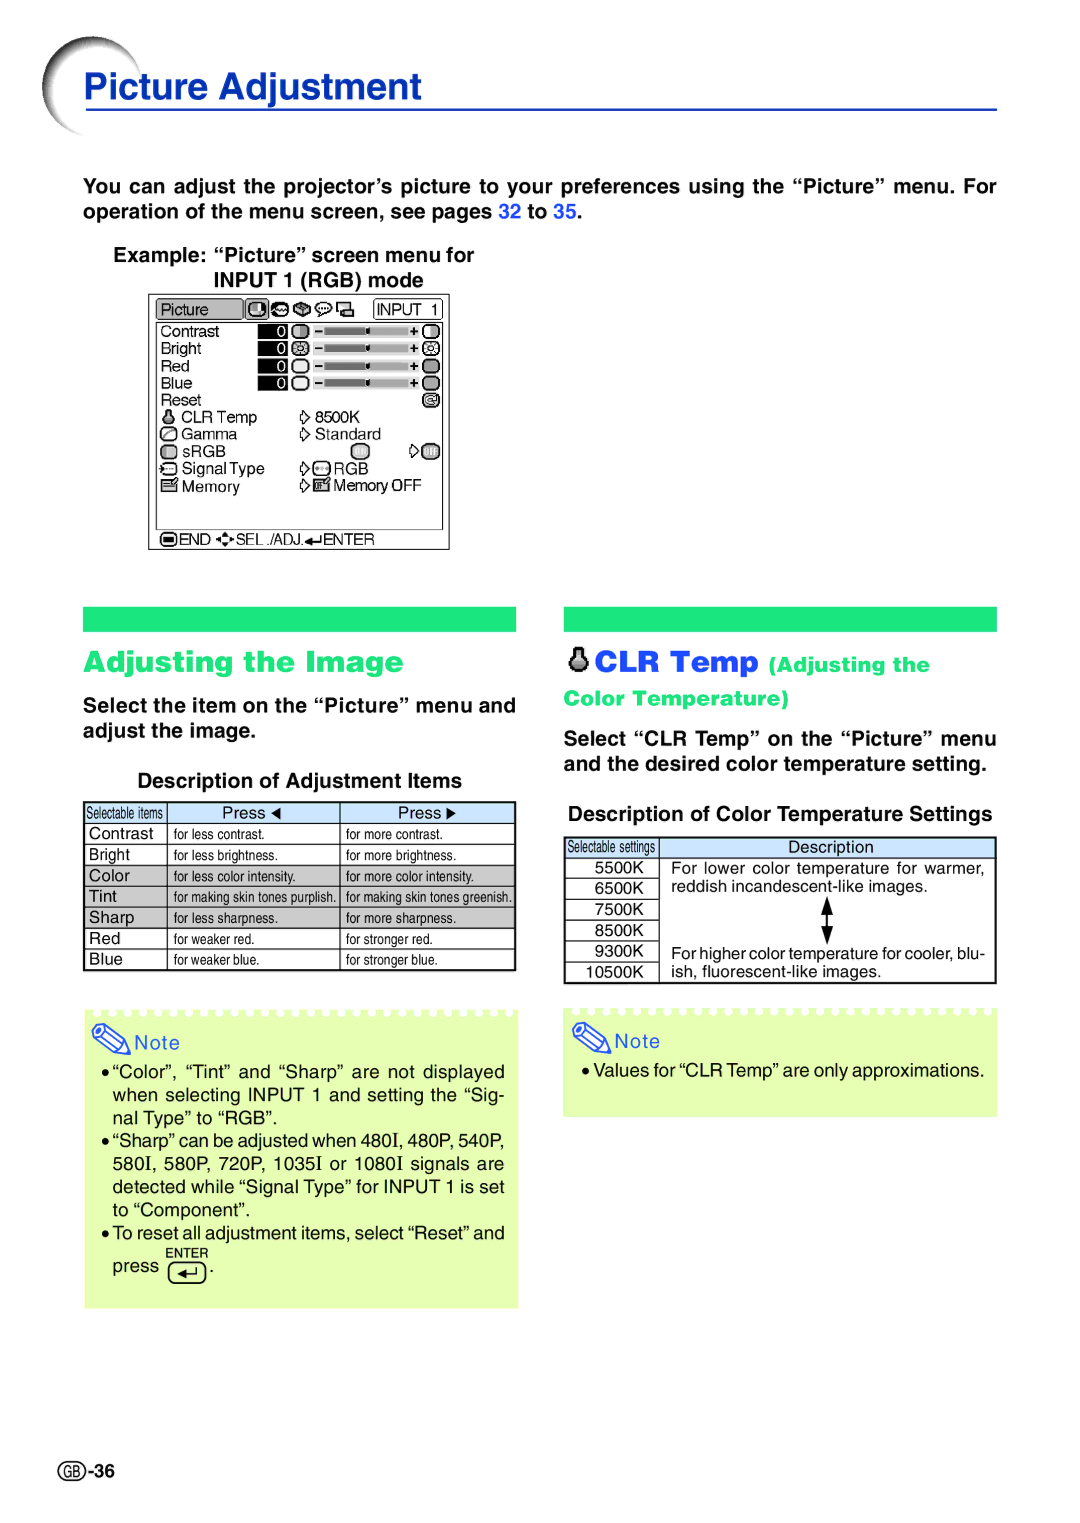
You can adjust the projector’s picture to your preferences using the “Picture” menu. For operation of the menu screen, see pages 32 to 35.
Example: “Picture” screen menu for INPUT 1 (RGB) mode
Adjusting the Image
Select the item on the “Picture” menu and adjust the image.
Description of Adjustment Items
Selectable items | Press \ | Press |
Contrast | for less contrast. | for more contrast. |
Bright | for less brightness. | for more brightness. |
Color | for less color intensity. | for more color intensity. |
Tint | for making skin tones purplish. | for making skin tones greenish. |
Sharp | for less sharpness. | for more sharpness. |
Red | for weaker red. | for stronger red. |
Blue | for weaker blue. | for stronger blue. |
 CLR Temp (Adjusting the
Color Temperature)
Select “CLR Temp” on the “Picture” menu and the desired color temperature setting.
Description of Color Temperature Settings
Selectable settings | Description | |
5500K | For lower color temperature for warmer, | |
6500K | reddish | |
7500K |
|
|
|
| |
8500K |
|
|
|
|
|
9300K | For higher color temperature for cooler, blu- | |
10500K | ish, | |
![]() Note
Note
•“Color”, “Tint” and “Sharp” are not displayed when selecting INPUT 1 and setting the “Sig- nal Type” to “RGB”.
•“Sharp” can be adjusted when 480I, 480P, 540P, 580I, 580P, 720P, 1035I or 1080I signals are detected while “Signal Type” for INPUT 1 is set to “Component”.
•To reset all adjustment items, select “Reset” and
press ![]() .
.
![]() Note
Note
•Values for “CLR Temp” are only approximations.
![]() -36
-36
