PARTS AND THEIR FUNCTIONS
1External View
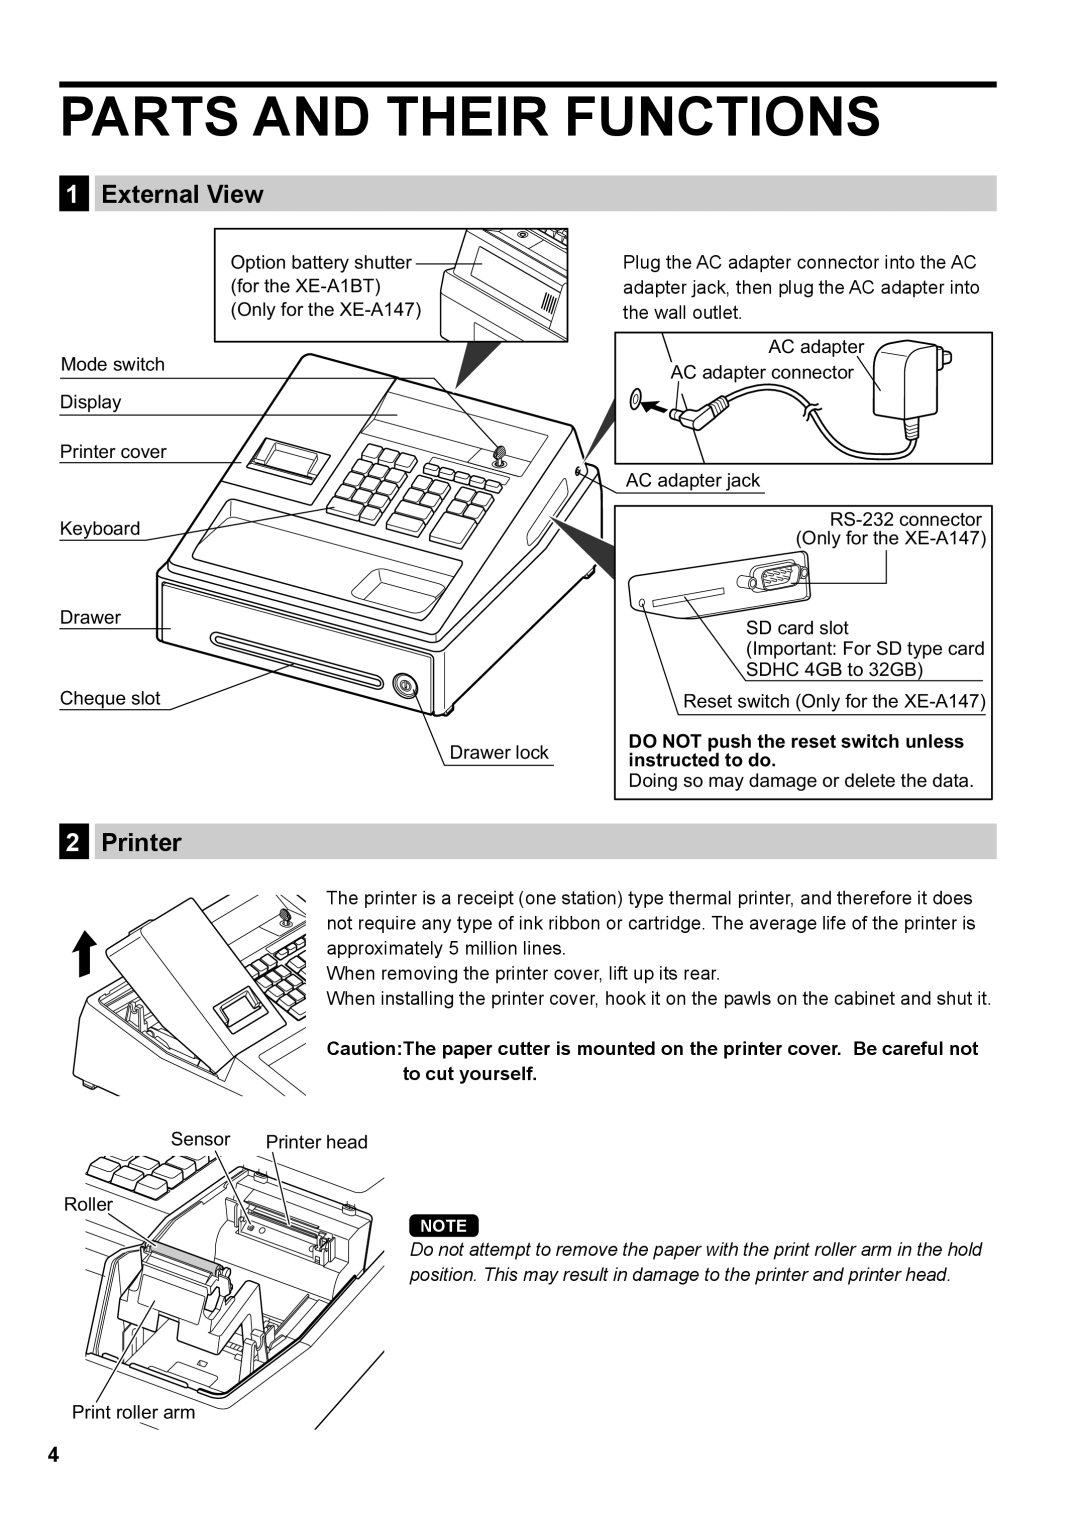
Option battery shutter ![]() (for the
(for the
(Only for the
Mode switch
Display
Printer cover
Keyboard
Drawer
Cheque slot
Drawer lock
Plug the AC adapter connector into the AC adapter jack, then plug the AC adapter into the wall outlet.
AC adapter
AC adapter connector
AC adapter jack
SD card slot
(Important: For SD type card SDHC 4GB to 32GB)
Reset switch (Only for the
DO NOT push the reset switch unless instructed to do.
Doing so may damage or delete the data.
2Printer
The printer is a receipt (one station) type thermal printer, and therefore it does not require any type of ink ribbon or cartridge. The average life of the printer is approximately 5 million lines.
When removing the printer cover, lift up its rear.
When installing the printer cover, hook it on the pawls on the cabinet and shut it.
Caution:The paper cutter is mounted on the printer cover. Be careful not to cut yourself.
Sensor | Printer head |
Roller
NOTE
Do not attempt to remove the paper with the print roller arm in the hold position. This may result in damage to the printer and printer head.
Print roller arm
4
