Manuals
/
Sony
/
Home Audio
/
CD Player
Sony
CX-NA50
user service
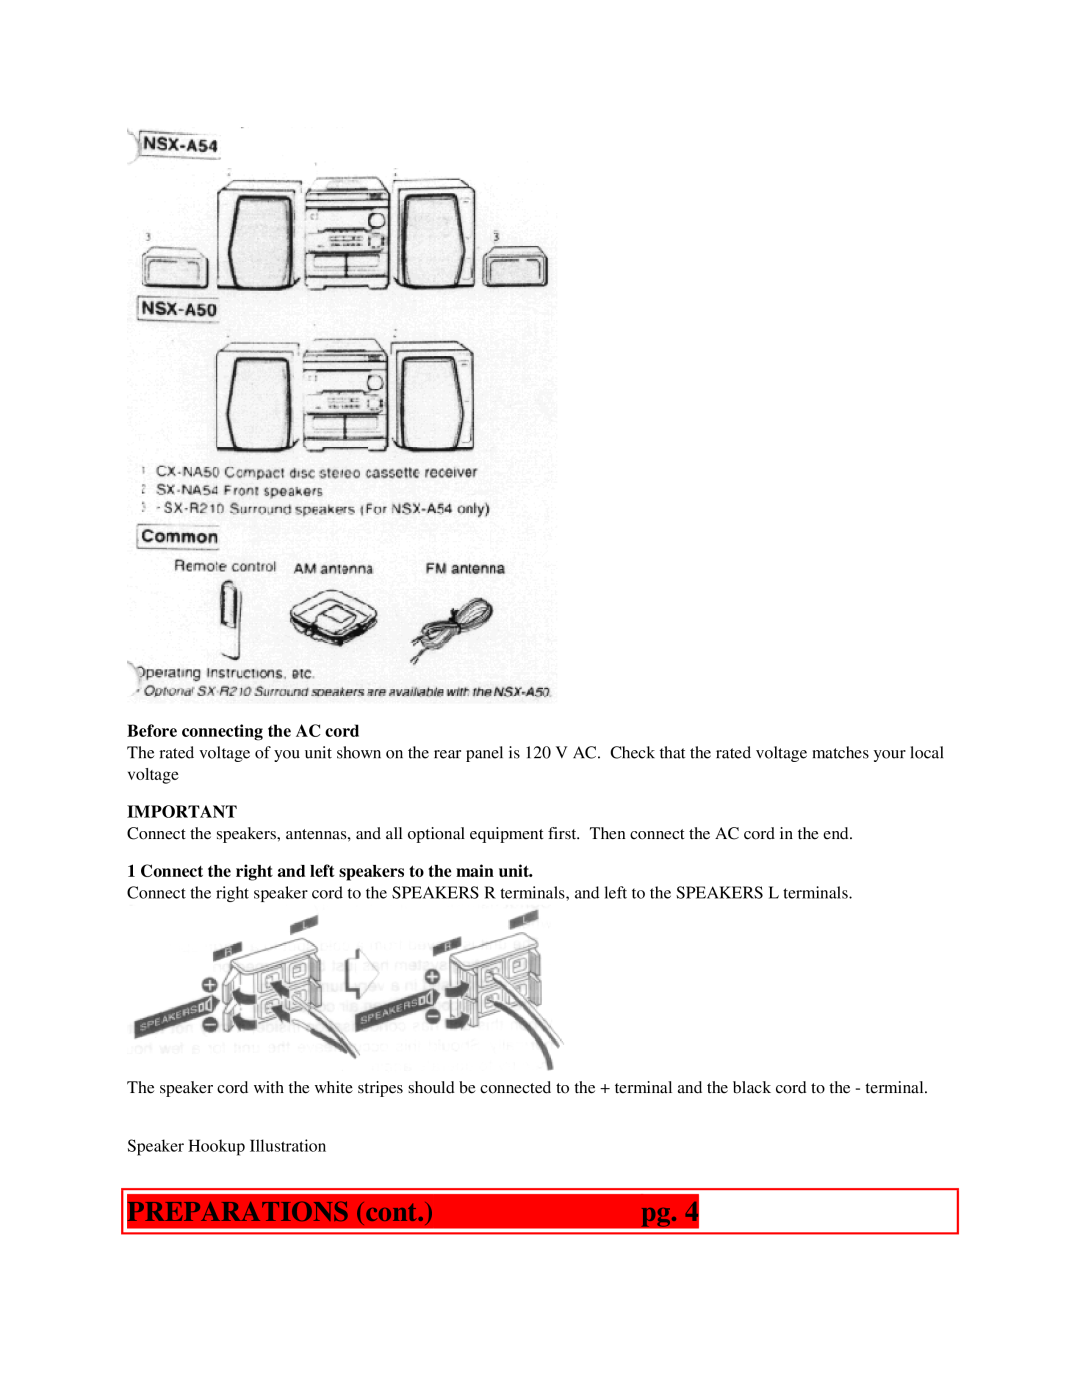
PREPARATIONS cont.pg, Before connecting the AC cord
Models:
CX-NA50
1
5
39
39
Download
39 pages
57.08 Kb
1
2
3
4
5
6
7
8
Troubleshooting
Specifications
Install
Clock And Timer
Before connecting the AC cord
Warranty
Dimension
Maintenance
To clear a preset station
Audio Adjustments
Page 5
Image 5
Page 4
Page 6
Page 5
Image 5
Page 4
Page 6
Contents
aiwa1
English
CX-NA50 For NSX-A54and NSX-A50
COMPACT DISC STEREO SYSTEM
Installation
PRECAUTIONS
Electric Power
3 AC power cord
TABLE OF CONTENTS
PRECAUTIONS cont
Maintenance
Damage requiring Service
CONNECTIONSpg
Check your system and accessories
PREPARATIONS cont.pg
Before connecting the AC cord
4 Connect the AC cord to an AC outlet
3 Connect the supplied antennas
To position the antennas FM feeder antenna
AM loop antenna
POSITIONING THE SPEAKERS NSX-A54only
CONNECTING AN OUTDOOR ANTENNA
Standard Positioning cdFront speaker Right
eFront speaker Left Surround speakers
When to replace the batteries
REMOTE CONTROL
To use the SHIFT button on the remote control
The /PRESET button on the remote control
To cancel DEMO mode
AUDIO ADJUSTMENTS
SOUND
BEFORE OPERATION
GRAPHIC EQUALIZER
VOLUME
BBE SYSTEM
Press the BBE button
Press the GEQ buttons To cancel the selected mode
MANUAL TUNING
To select with the remote control
Using the headphones
To select a band with the remote control
PRESETTING STATIONS
When an FM stereo broadcast contains noise
2 Press the DOWN or UP button to select a station
Selecting a preset number on the main unit
PRESET NUMBER TUNING
To clear a preset station
RADIO RECEPTION cont
CD PLAYING
To change the AM tuning interval
BASIC OPERATIONS
LOADING DISCS
CD PLAYING cont
Selecting a track with the remote control
To check the remaining time
Replacing discs during play
PROGRAMMED PLAY
RANDOM/REPEAT PLAY
RANDOM play
REPEAT play
4 Repeat steps 2 and 3 to program other tracks
TAPE PLAYBACK
5 Press the button to start play
To check the program
MUSIC SENSOR
When tapes are loaded in both decks
2 Press the
button to start play
CONTINUOUS PLAY
TAPE PLAYBACK cont
1 Insert tapes into deck 1 and deck
3 Press the REV MODE button to select
BASIC RECORDING
RECORDING
Preparation
1 Insert the tape to be recorded on into deck
INSERTING BLANK SPACES
RECORDING cont
DUBBING A TAPE MANUALLY
To stop recording, press the button
1 Press the TAPE button
DUBBING THE WHOLE TAPE
3 Press the TAPE/DECK 1/2 button to select deck
To stop dubbing
RECORDING cont
AI EDIT RECORDING
1 Insert the tape into deck
To stop the recording
PROGRAMMED EDIT RECORDING
To clear the edit program
Time on cassette tapes and editing time
3 Press the CD EDIT/CHECK button twice
2 Press the CD button and load the discs
4 Press the
to designate the tape length
MICROPHONE MIXING
KARAOKE
To stop recording
To change the program of each side
VOCAL FADER/MULTIPLEX FUNCTIONS
When not using the microphones
1 Connect your microphone to the MIC jack
Recommended microphones
KARAOKE PROGRAM
gCancel
KARAOKE cont
SETTING THE CLOCK
CLOCK AND TIMER
3 seconds to select a disc
3 Repeat steps 2 to reserve other tracks
To switch to the 24-hourstandard
SETTING THE TIMER
DOWN or
To display the current time
Preparation
CLOCK AND TIMER cont
5 Prepare the source
SETTING THE SLEEP TIMER
TIMER RECORDING
To cancel timer standby mode temporarily
Using the unit while the timer is set
To cancel the sleep timer
CONNECTING OPTIONAL EQUIPMENT
When connecting a turntable
OTHER CONNECTIONSpg
GENERALpg
To adjust the sound level of the external source
LISTENING TO EXTERNAL SOURCES
SUPER WOOFER JACK
To clean the cabinet
CARE AND MAINTENANCE
To clean the heads and tape paths
To demagnetize the heads
To reset
TROUBLESHOOTING GUIDE
GENERAL There is no sound
Sound is emitted from one speaker only
Tuning range
SPECIFICATIONS
Power output
Signal-to-noiseratio
Power consumption
Power requirements
Dimensions of the main unit
Weight of main unit
Problems/Notes
Warranty 1 year parts/labor
Volume Setting Flashes
Endnotes 1 Popup - Popup
Top
Page
Image
Contents