Programmed edit function enables CD recording while check the remaining time on each side of the tape as the tracks are programmed.
NOTE
The programmed edit recording will not start from a point halfway in the tape. The tape must be recorded from the beginning of either side.
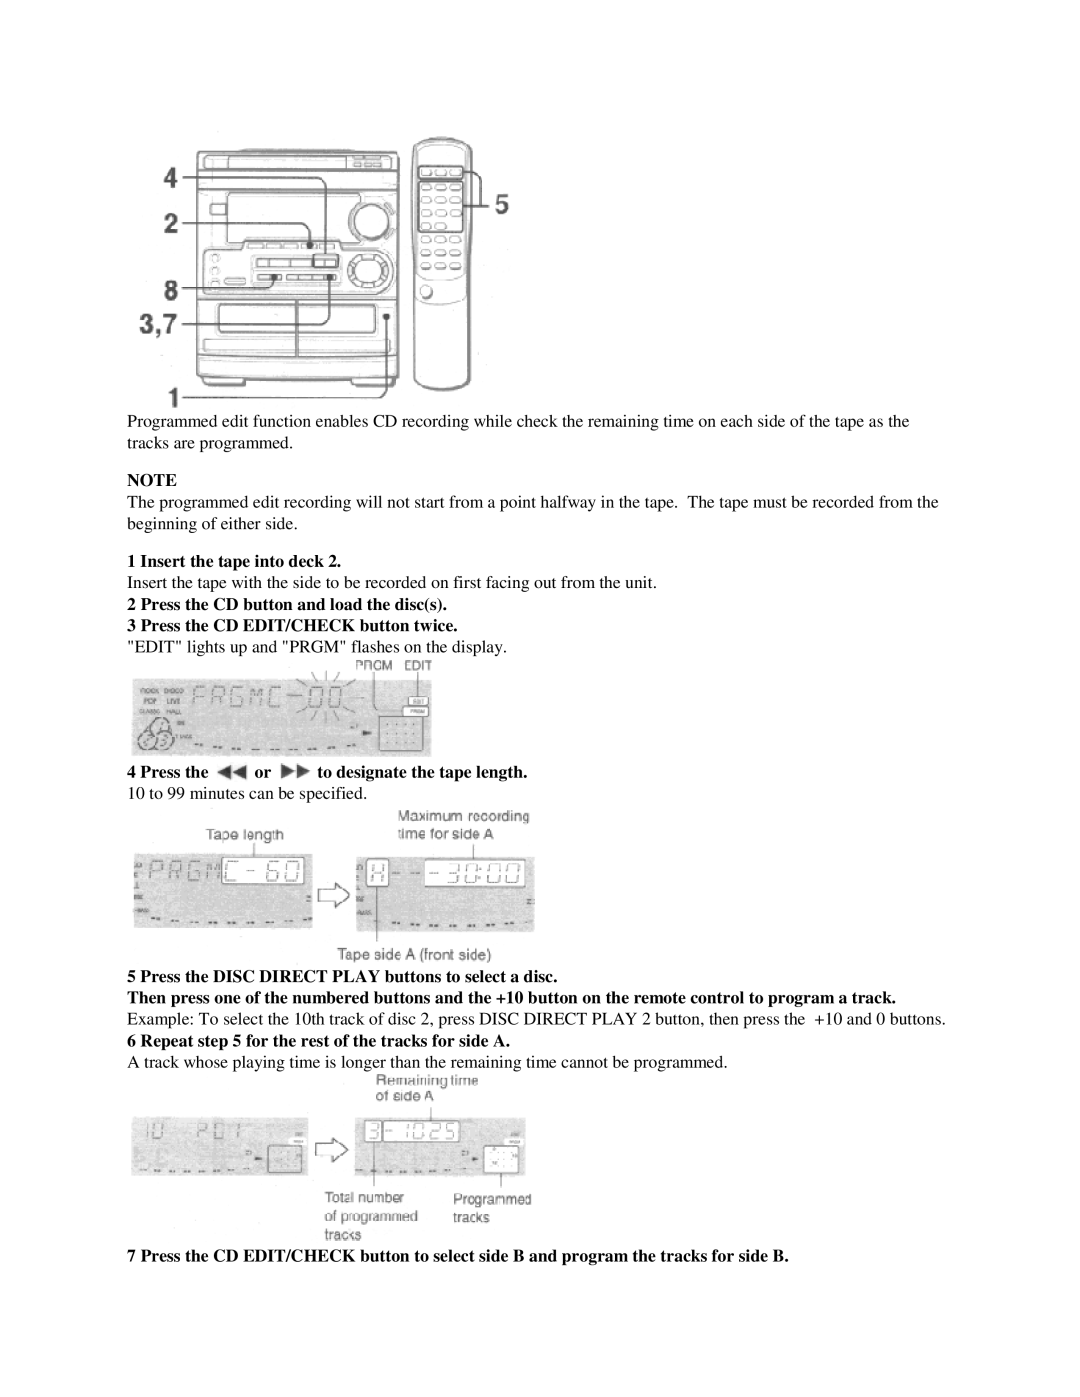
1 Insert the tape into deck 2.
Insert the tape with the side to be recorded on first facing out from the unit.
2 Press the CD button and load the disc(s).
3 Press the CD EDIT/CHECK button twice.
"EDIT" lights up and "PRGM" flashes on the display.
4 Press the | or | to designate the tape length. |
10 to 99 minutes can be specified.
5 Press the DISC DIRECT PLAY buttons to select a disc.
Then press one of the numbered buttons and the +10 button on the remote control to program a track.
Example: To select the 10th track of disc 2, press DISC DIRECT PLAY 2 button, then press the +10 and 0 buttons.
6 Repeat step 5 for the rest of the tracks for side A.
A track whose playing time is longer than the remaining time cannot be programmed.
7 Press the CD EDIT/CHECK button to select side B and program the tracks for side B.