HELP16
Adhesive bond | |
Grease | |
Grease |
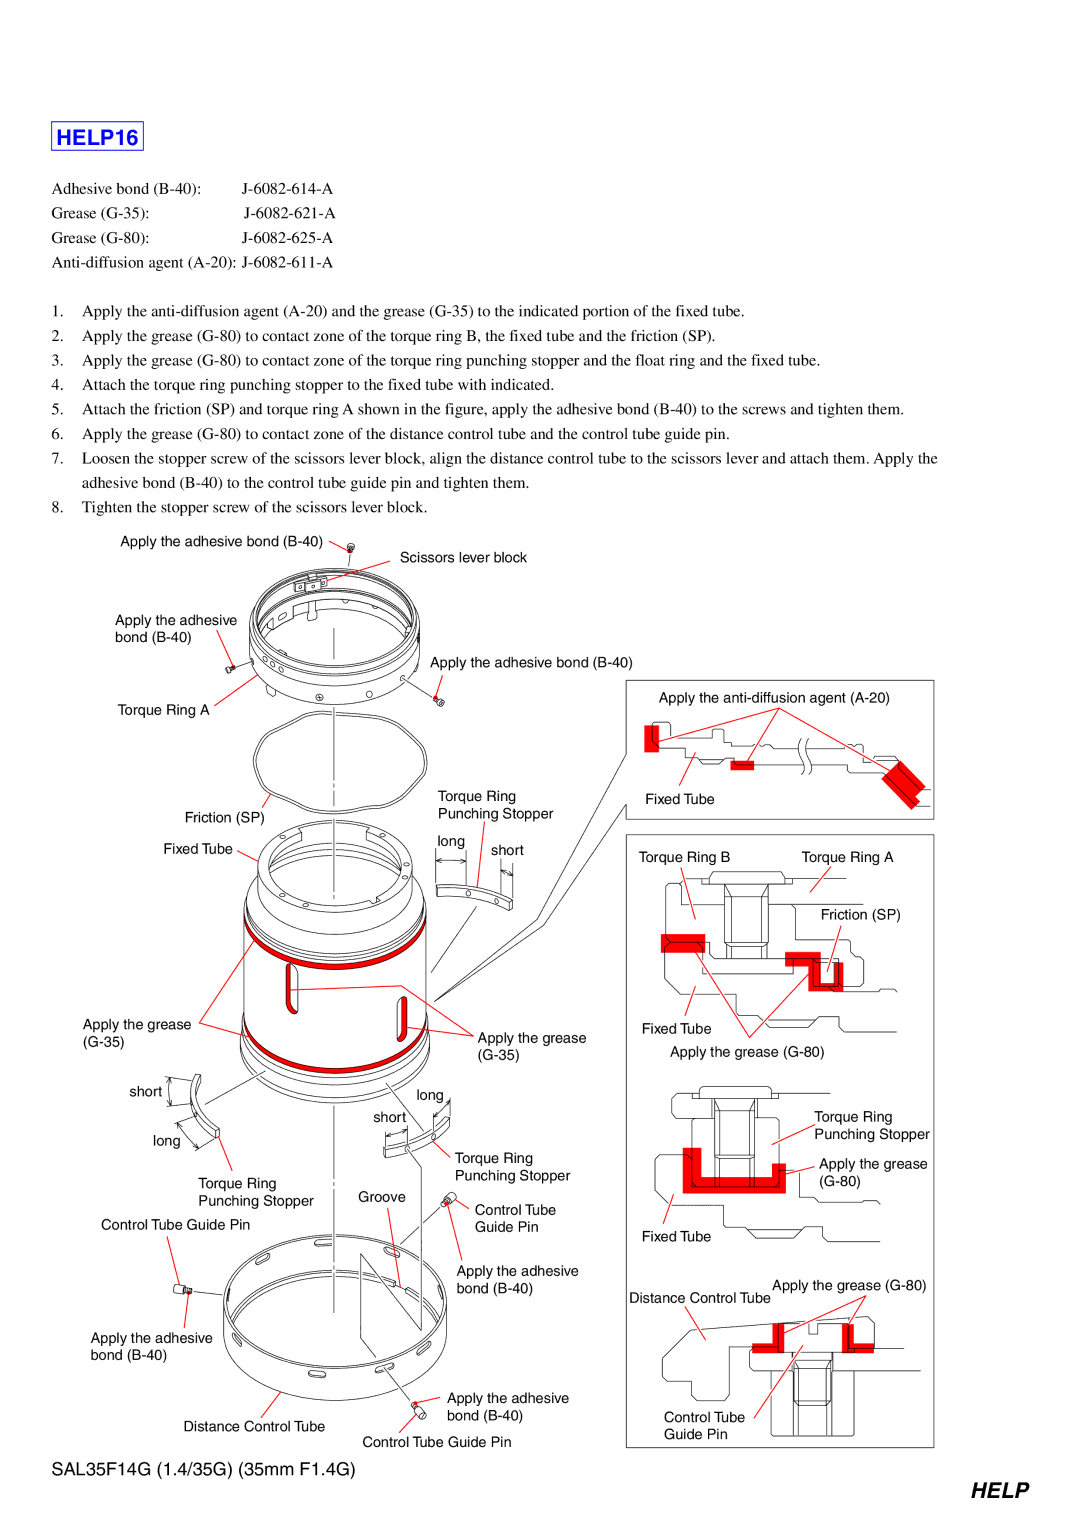
1.Apply the
2.Apply the grease
3.Apply the grease
4.Attach the torque ring punching stopper to the fixed tube with indicated.
5.Attach the friction (SP) and torque ring A shown in the figure, apply the adhesive bond
6.Apply the grease
7.Loosen the stopper screw of the scissors lever block, align the distance control tube to the scissors lever and attach them. Apply the adhesive bond
8.Tighten the stopper screw of the scissors lever block.
Apply the adhesive bond
Apply the adhesive bond
Torque Ring A
Scissors lever block
Apply the adhesive bond
Apply the
Friction (SP)
Fixed Tube
Apply the grease
short
long
Torque Ring
Punching Stopper
Control Tube Guide Pin
Apply the adhesive bond
Distance Control Tube
Torque Ring
Punching Stopper
long
short
Apply the grease
long
short
Torque Ring
Punching Stopper
Groove
Control Tube
Guide Pin
Apply the adhesive bond
Apply the adhesive bond
Control Tube Guide Pin
Fixed Tube
Torque Ring B | Torque Ring A |
Friction (SP)
Fixed Tube
Apply the grease
Torque Ring
![]() Punching Stopper
Punching Stopper
Apply the grease
Fixed Tube
Apply the grease
Distance Control Tube
Control Tube
Guide Pin
SAL35F14G (1.4/35G) (35mm F1.4G)