2. DISASSEMBLY
NOTE FOR REPAIR
•Make sure that the flat cable and flexible board are not cracked of bent at the terminal. Do not insert the cable insufficiently nor crookedly.
•When remove a connector, dont’ pull at wire of connector. It is possible that a wire is snapped.
•When installing a connector, dont’ press down at wire of connector. It is possible that a wire is snapped.
•Do not apply excessive load to the gilded flexible board.
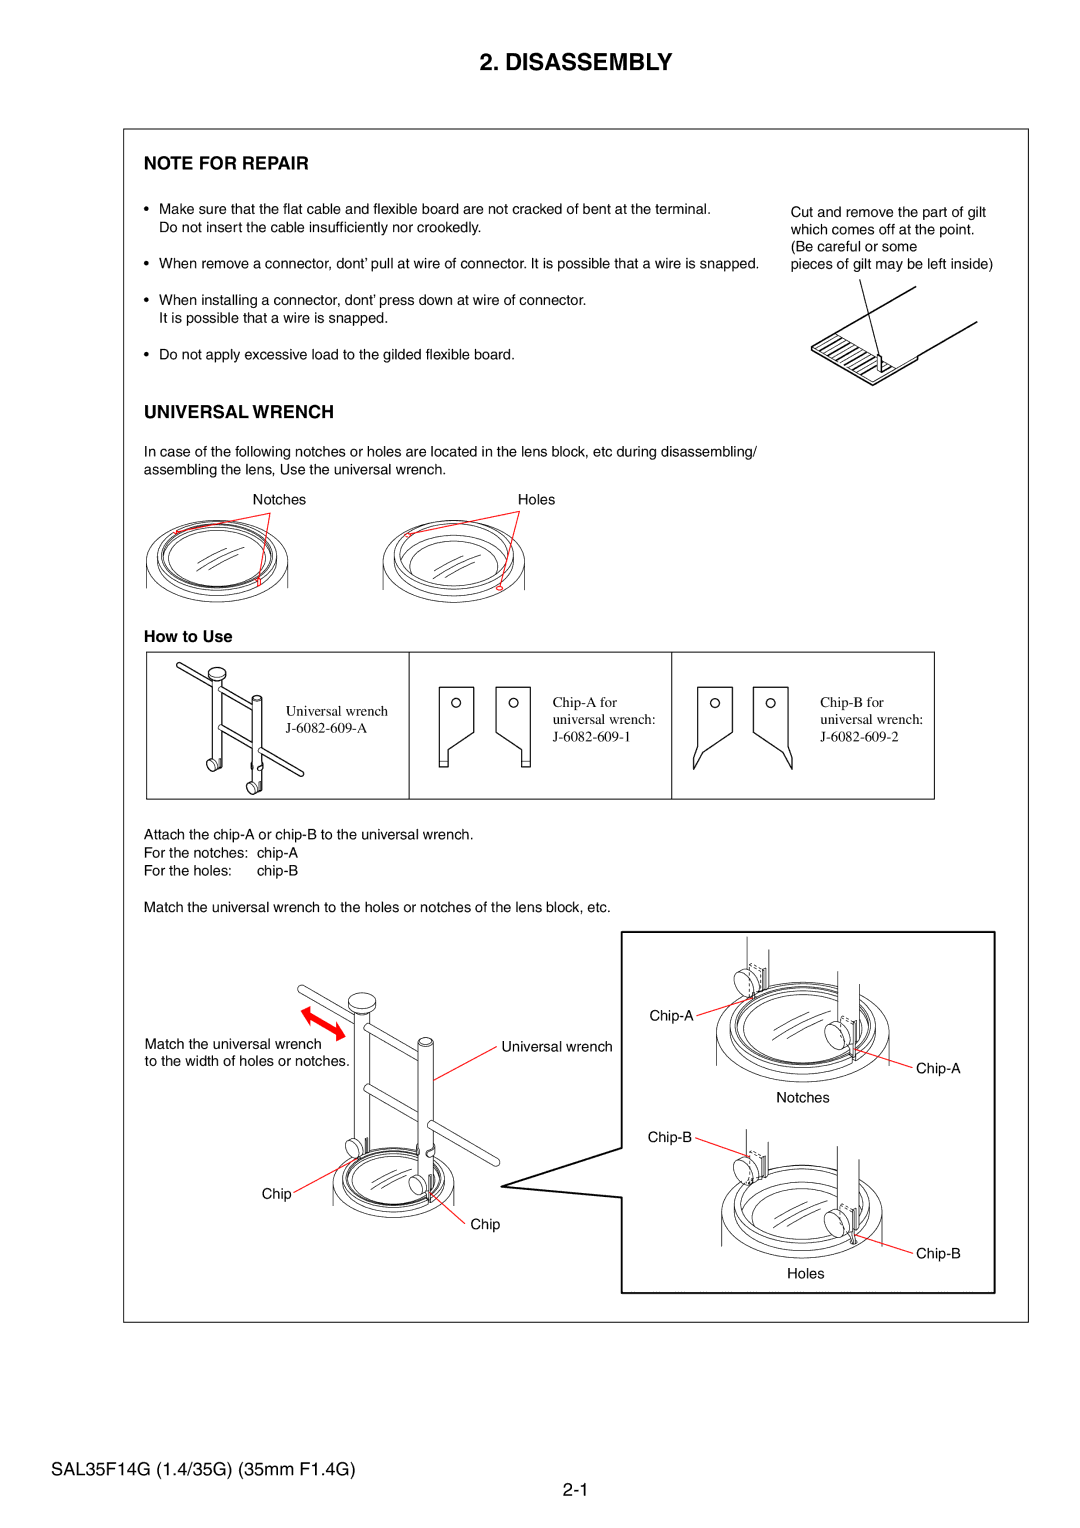
Cut and remove the part of gilt which comes off at the point. (Be careful or some
pieces of gilt may be left inside)
UNIVERSAL WRENCH
In case of the following notches or holes are located in the lens block, etc during disassembling/ assembling the lens, Use the universal wrench.
Notches | Holes |
How to Use
Universal wrench |
|
|
|
| ||
|
| universal wrench: | universal wrench: | |||
|
|
|
| |||
|
| |||||
|
|
|
|
| ||
|
|
|
|
|
|
|
|
|
|
|
|
|
|
Attach the
For the notches:
For the holes:
Match the universal wrench to the holes or notches of the lens block, etc.
| |
Match the universal wrench | Universal wrench |
to the width of holes or notches. | |
| |
| Notches |
|
Chip
Chip
Holes
SAL35F14G (1.4/35G) (35mm F1.4G)