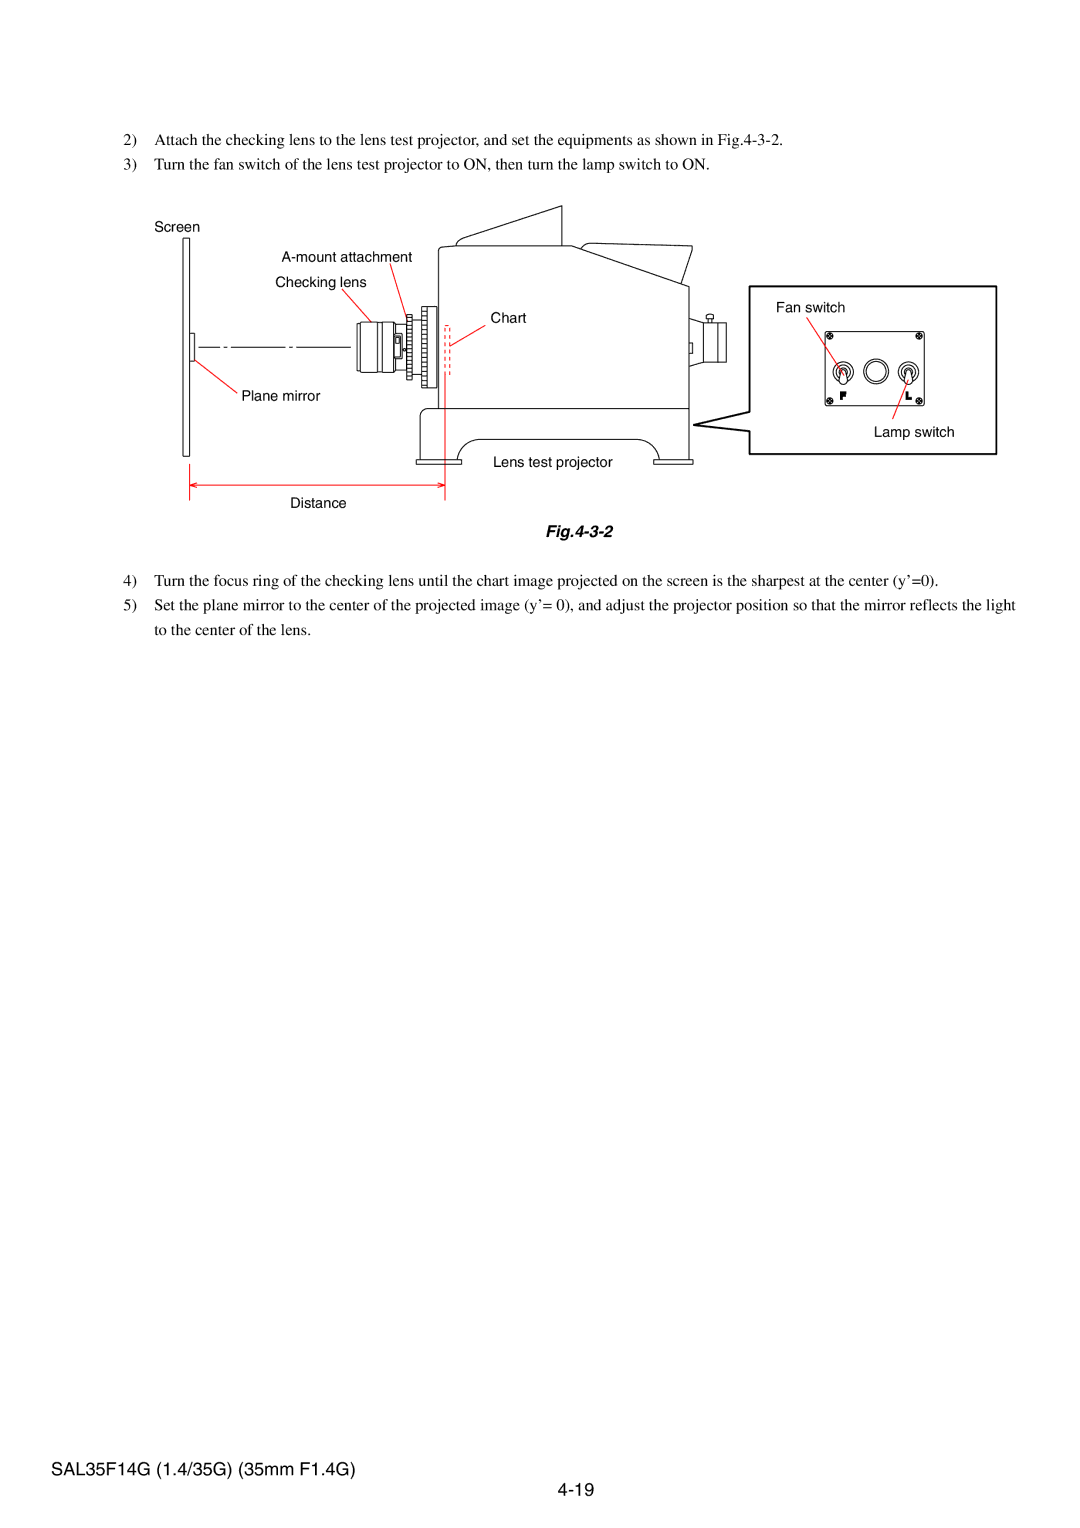
2)Attach the checking lens to the lens test projector, and set the equipments as shown in
3)Turn the fan switch of the lens test projector to ON, then turn the lamp switch to ON.
Screen
Checking lens
Chart
Fan switch
Plane mirror | F | L |
Lamp switch
Lens test projector
Distance
4)Turn the focus ring of the checking lens until the chart image projected on the screen is the sharpest at the center (y’=0).
5)Set the plane mirror to the center of the projected image (y’= 0), and adjust the projector position so that the mirror reflects the light to the center of the lens.