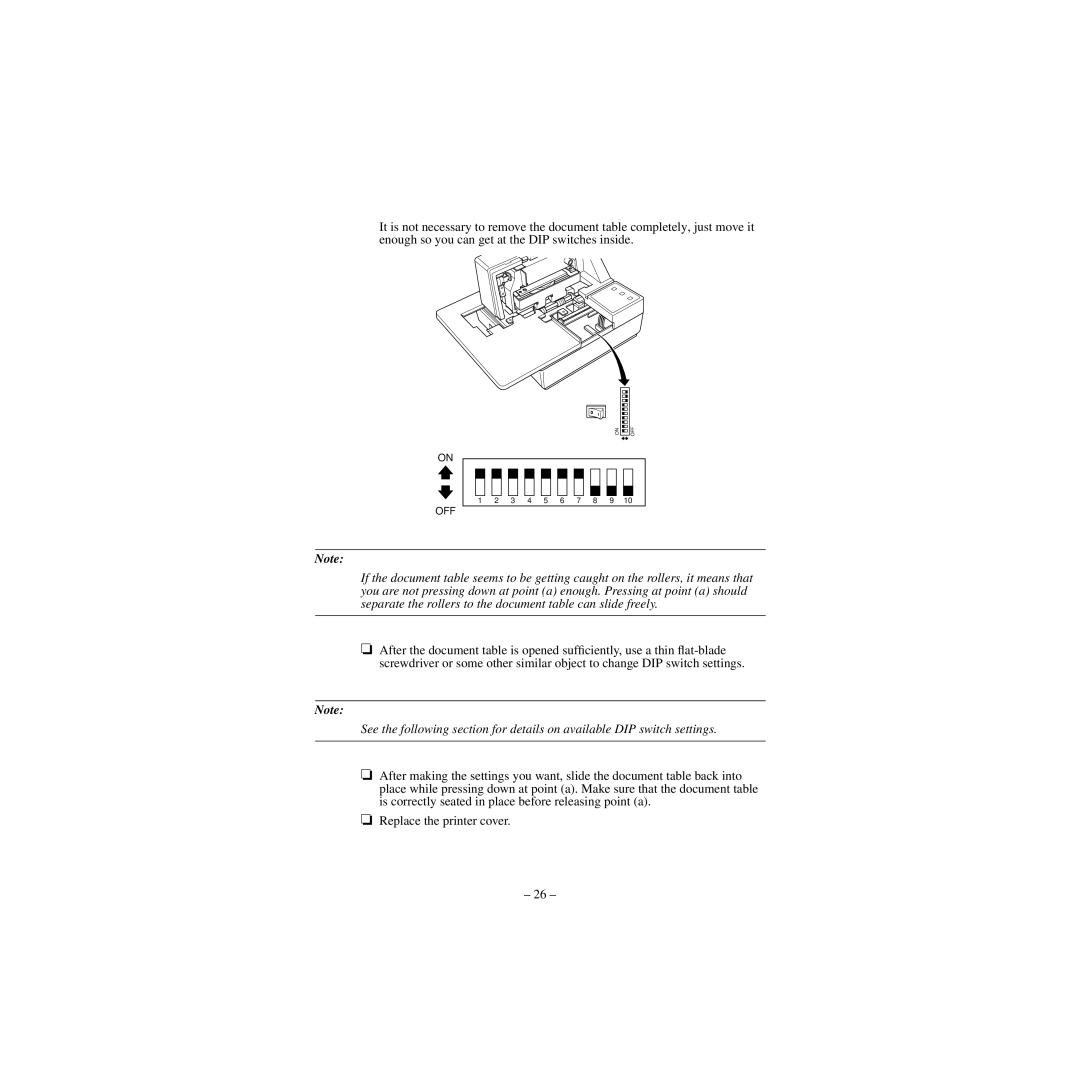
It is not necessary to remove the document table completely, just move it enough so you can get at the DIP switches inside.
ON
OFF
ON |
|
| OFF |
|
| ||
|
| ||
|
| ||
|
| ||
|
| ||
|
| ||
|
| ||
|
| ||
|
| ||
|
| ||
|
| ||
|
| ||
|
| ||
|
| ||
|
| ||
|
| ||
|
| ||
|
| ||
|
|
1 2 3 4 5 6 7 8 9 10
Note:
If the document table seems to be getting caught on the rollers, it means that you are not pressing down at point (a) enough. Pressing at point (a) should separate the rollers to the document table can slide freely.
❏After the document table is opened sufficiently, use a thin
Note:
See the following section for details on available DIP switch settings.
❏After making the settings you want, slide the document table back into place while pressing down at point (a). Make sure that the document table is correctly seated in place before releasing point (a).
❏Replace the printer cover.
– 26 –
