INSTALLATION INSTRUCTIONS
INSTALLATION
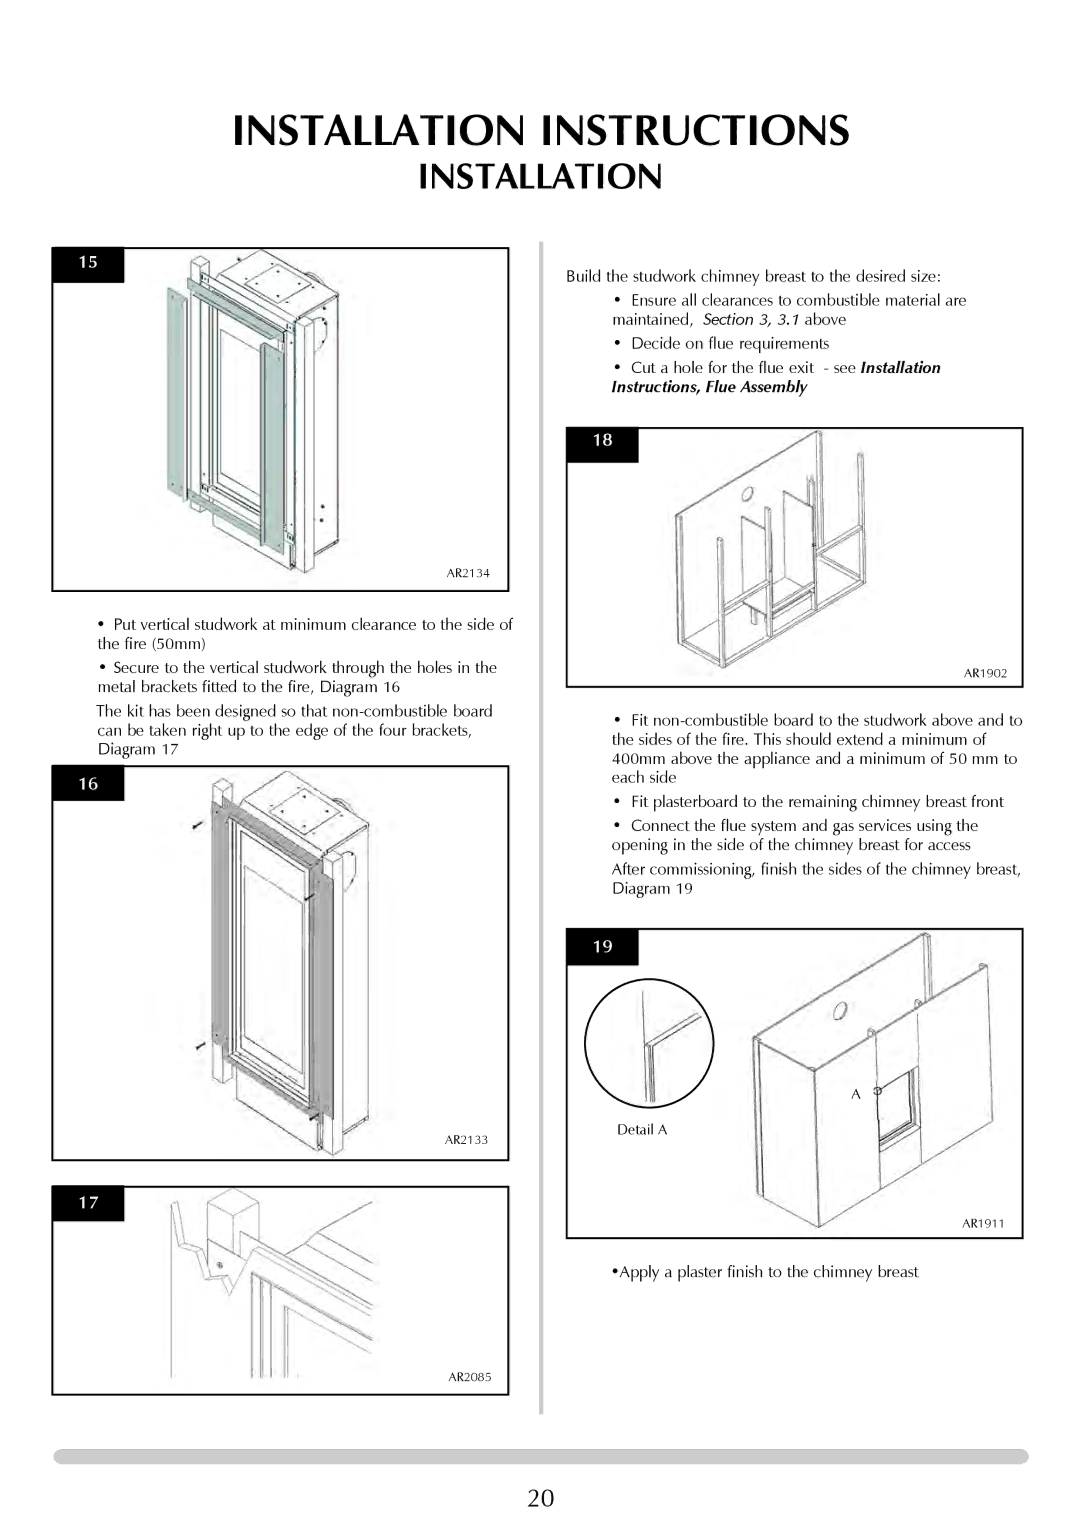
15
AR2134
•Put vertical studwork at minimum clearance to the side of the fire (50mm)
• Secure to the vertical studwork through the holes in the metal brackets fitted to the fire, Diagram 16
The kit has been designed so that
16
AR2133
17
Build the studwork chimney breast to the desired size:
•Ensure all clearances to combustible material are maintained, Section 3, 3.1 above
•Decide on flue requirements
•Cut a hole for the flue exit - see Installation
Instructions, Flue Assembly
18
AR1902
•Fit
•Fit plasterboard to the remaining chimney breast front
•Connect the flue system and gas services using the opening in the side of the chimney breast for access
After commissioning, finish the sides of the chimney breast, Diagram 19
19
A
Detail A
AR1911
•Apply a plaster finish to the chimney breast
AR2085
20