SERVICING INSTRUCTIONS
REPLACING PARTS
5.VERMICULITE PANELS
5.1TAKE CARE WHEN HANDLING THE VERMICULITE PANELS, THEY ARE FRAGILE.
Note: Make sure you support the back panel before removing the second side panel in case the back falls forward
•Undo the clips at the top of the side panels While supporting the rear panel:
•Remove each side panel and place to one side
•Remove the back panel
5
AR2138
• Remove the front lower panels
5.2• Reassemble in reverse order, ensuring the bottom edge of the back panel is behind the Air Baffle, Diagram 6
6
AR2139
•Replace the side panels
6.maIN BURNER
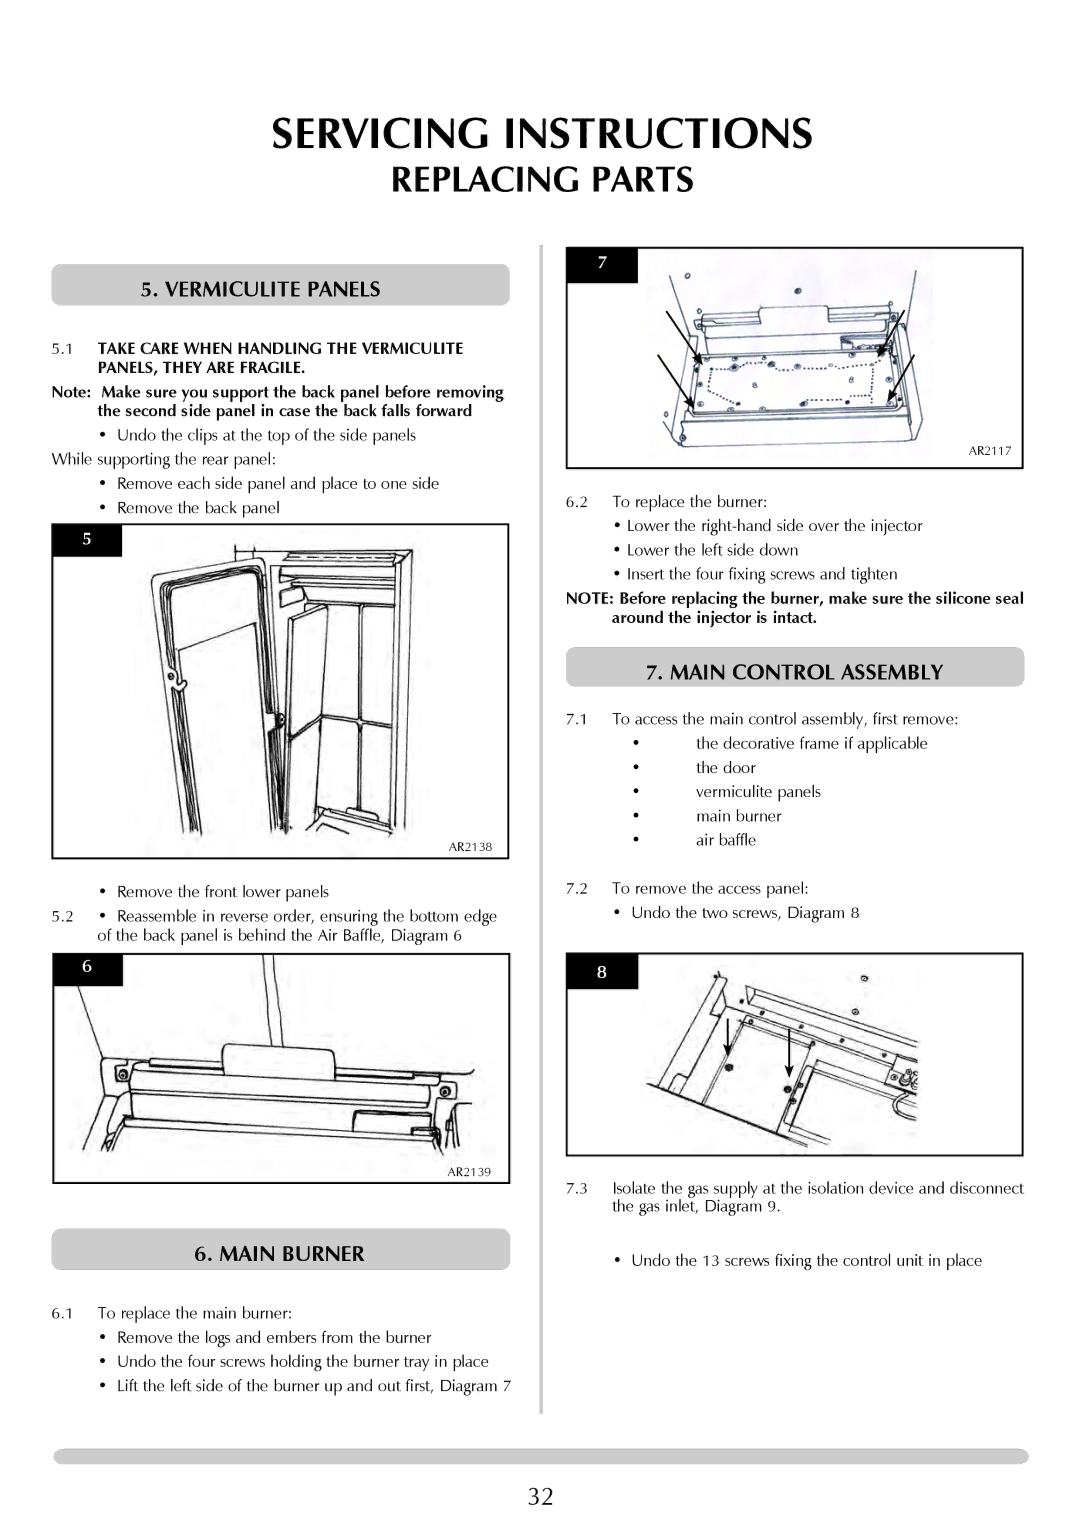
6.1To replace the main burner:
•Remove the logs and embers from the burner
•Undo the four screws holding the burner tray in place
•Lift the left side of the burner up and out first, Diagram 7
7
AR2117
6.2To replace the burner:
•Lower the
•Lower the left side down
•Insert the four fixing screws and tighten
NOTE: Before replacing the burner, make sure the silicone seal around the injector is intact.
7.maIN CONTROL ASSEMBLY
7.1To access the main control assembly, first remove:
•the decorative frame if applicable
•the door
•vermiculite panels
•main burner
•air baffle
7.2To remove the access panel:
•Undo the two screws, Diagram 8
8
AR2129
7.3Isolate the gas supply at the isolation device and disconnect the gas inlet, Diagram 9.
• Undo the 13 screws fixing the control unit in place
32
