4.Simultaneously pull and hold the slide rail release buttons on each mounting bracket while you push the server into the rack. See FIGURE
Continue pushing until the
Caution – Verify that the server is securely mounted in the rack and that the slide- rails locks are engaged with the mounting brackets before continuing.
Installing the Cable Management Assembly
Use this procedure to install an optional cable management assembly (CMA).
1.Unpack the CMA parts.
2.Take the CMA to the rear of the equipment rack and ensure that you have adequate room to work around the rear of the server.
Note – References to “left” or “right” in this procedure assume that you are facing the rear of the equipment rack.
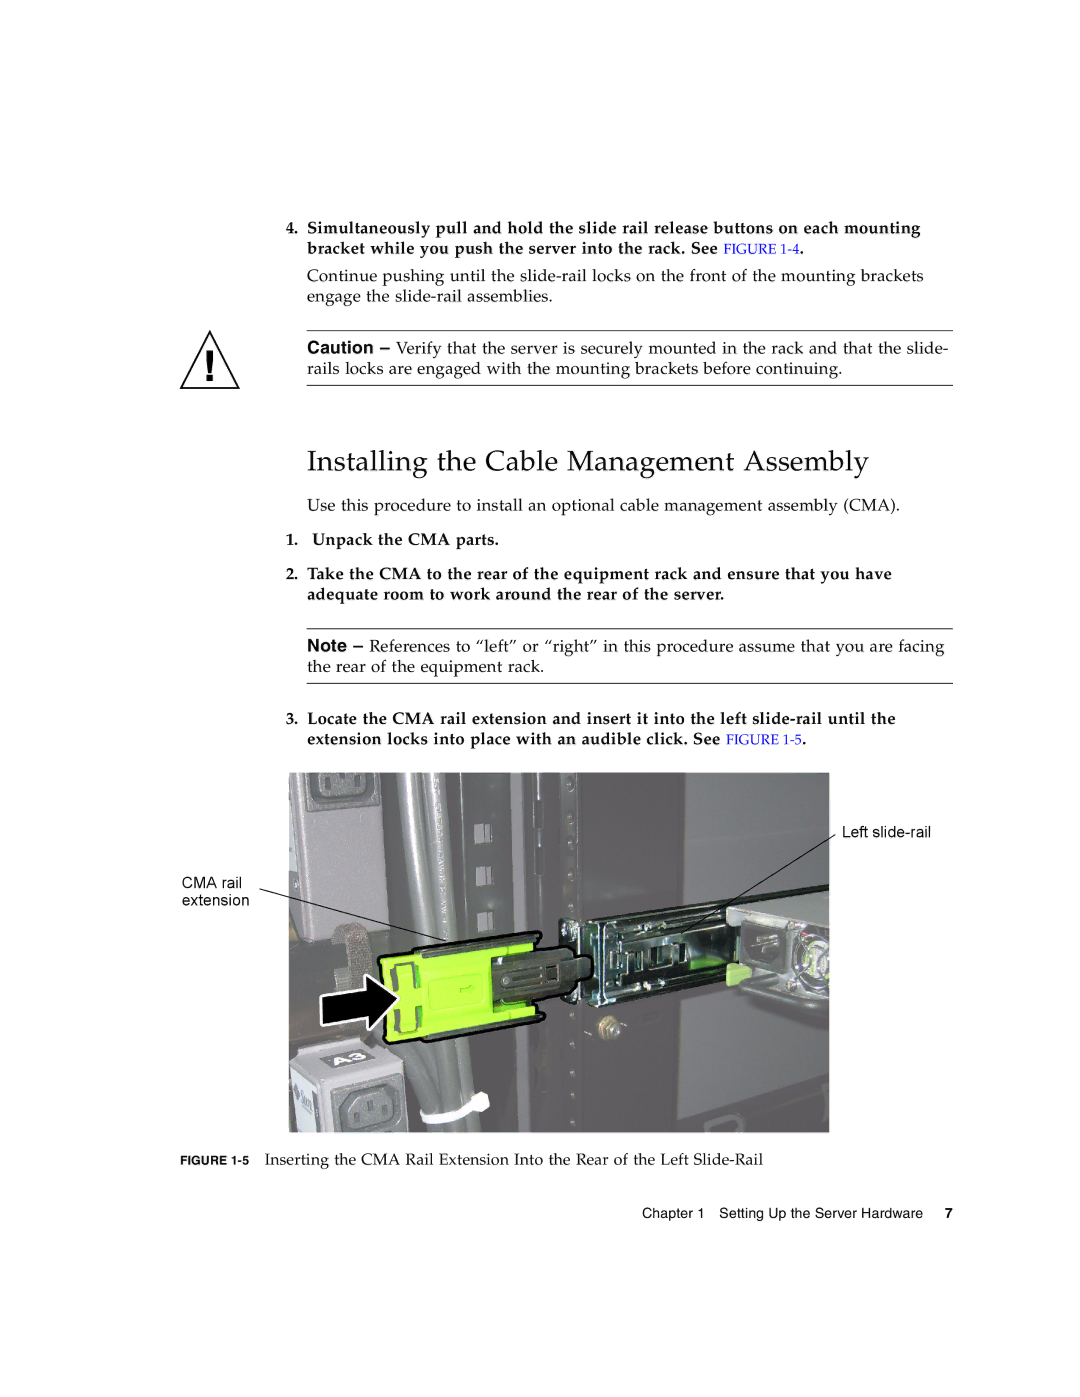
3.Locate the CMA rail extension and insert it into the left
Left
CMA rail extension
FIGURE 1-5 Inserting the CMA Rail Extension Into the Rear of the Left Slide-Rail
Chapter 1 Setting Up the Server Hardware 7