MAINTENANCE
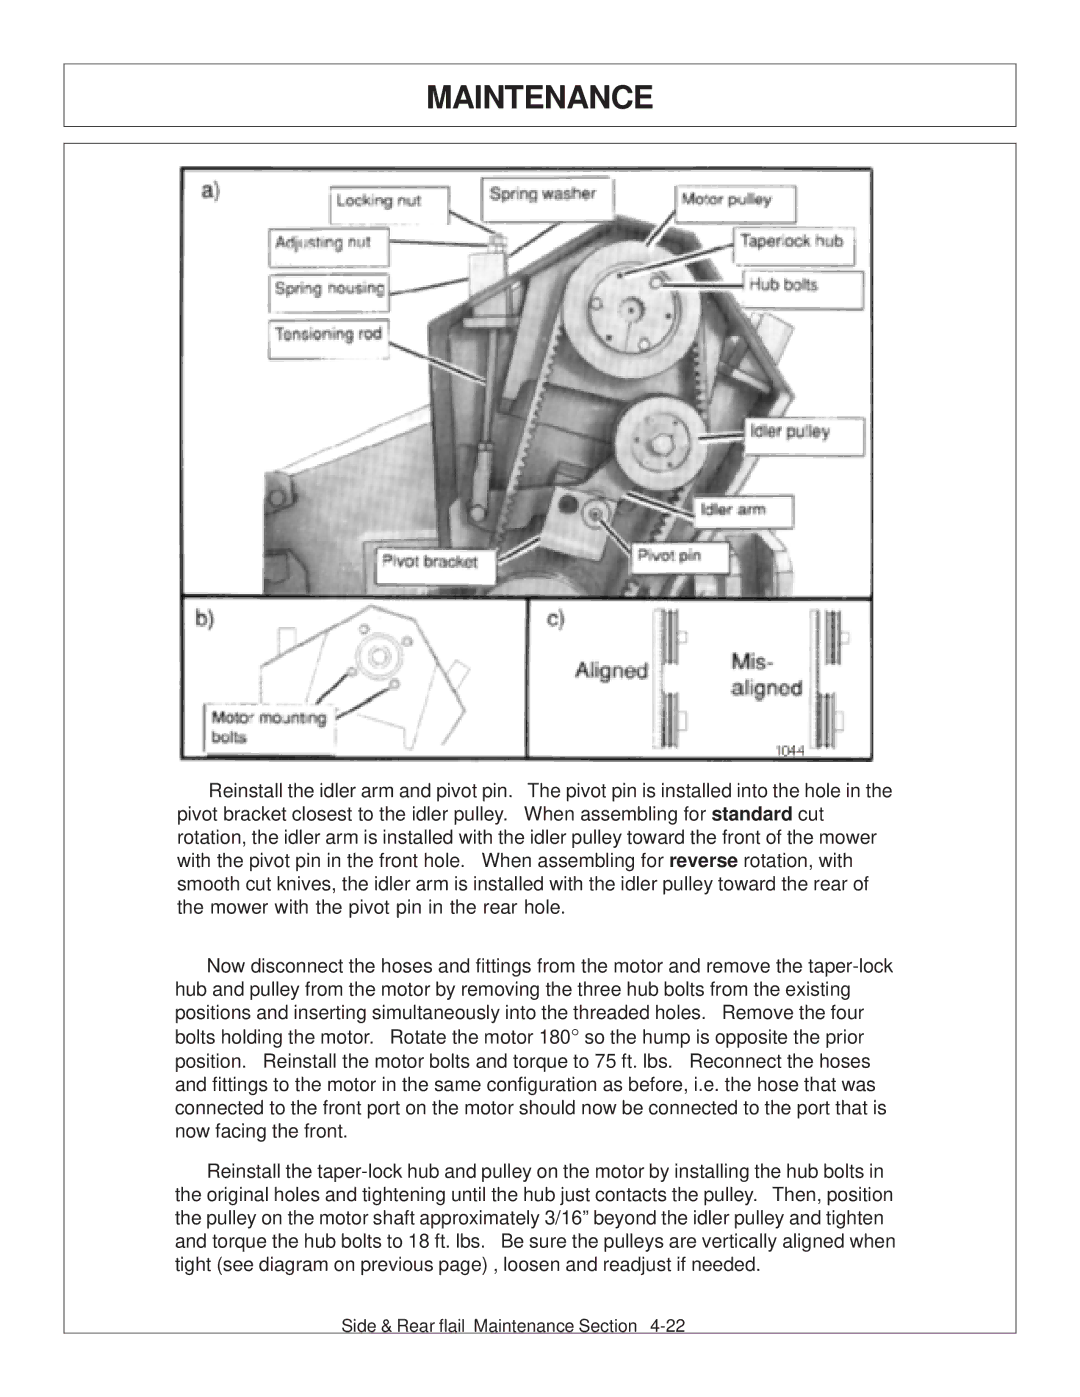
Reinstall the idler arm and pivot pin. The pivot pin is installed into the hole in the pivot bracket closest to the idler pulley. When assembling for standard cut rotation, the idler arm is installed with the idler pulley toward the front of the mower with the pivot pin in the front hole. When assembling for reverse rotation, with smooth cut knives, the idler arm is installed with the idler pulley toward the rear of the mower with the pivot pin in the rear hole.
Now disconnect the hoses and fittings from the motor and remove the taper-lock hub and pulley from the motor by removing the three hub bolts from the existing positions and inserting simultaneously into the threaded holes. Remove the four bolts holding the motor. Rotate the motor 180° so the hump is opposite the prior position. Reinstall the motor bolts and torque to 75 ft. lbs. Reconnect the hoses and fittings to the motor in the same configuration as before, i.e. the hose that was connected to the front port on the motor should now be connected to the port that is now facing the front.
Reinstall the taper-lock hub and pulley on the motor by installing the hub bolts in the original holes and tightening until the hub just contacts the pulley. Then, position the pulley on the motor shaft approximately 3/16” beyond the idler pulley and tighten and torque the hub bolts to 18 ft. lbs. Be sure the pulleys are vertically aligned when tight (see diagram on previous page) , loosen and readjust if needed.
Side & Rear flail Maintenance Section 4-22