6. Operation in Parameter Setup Mode
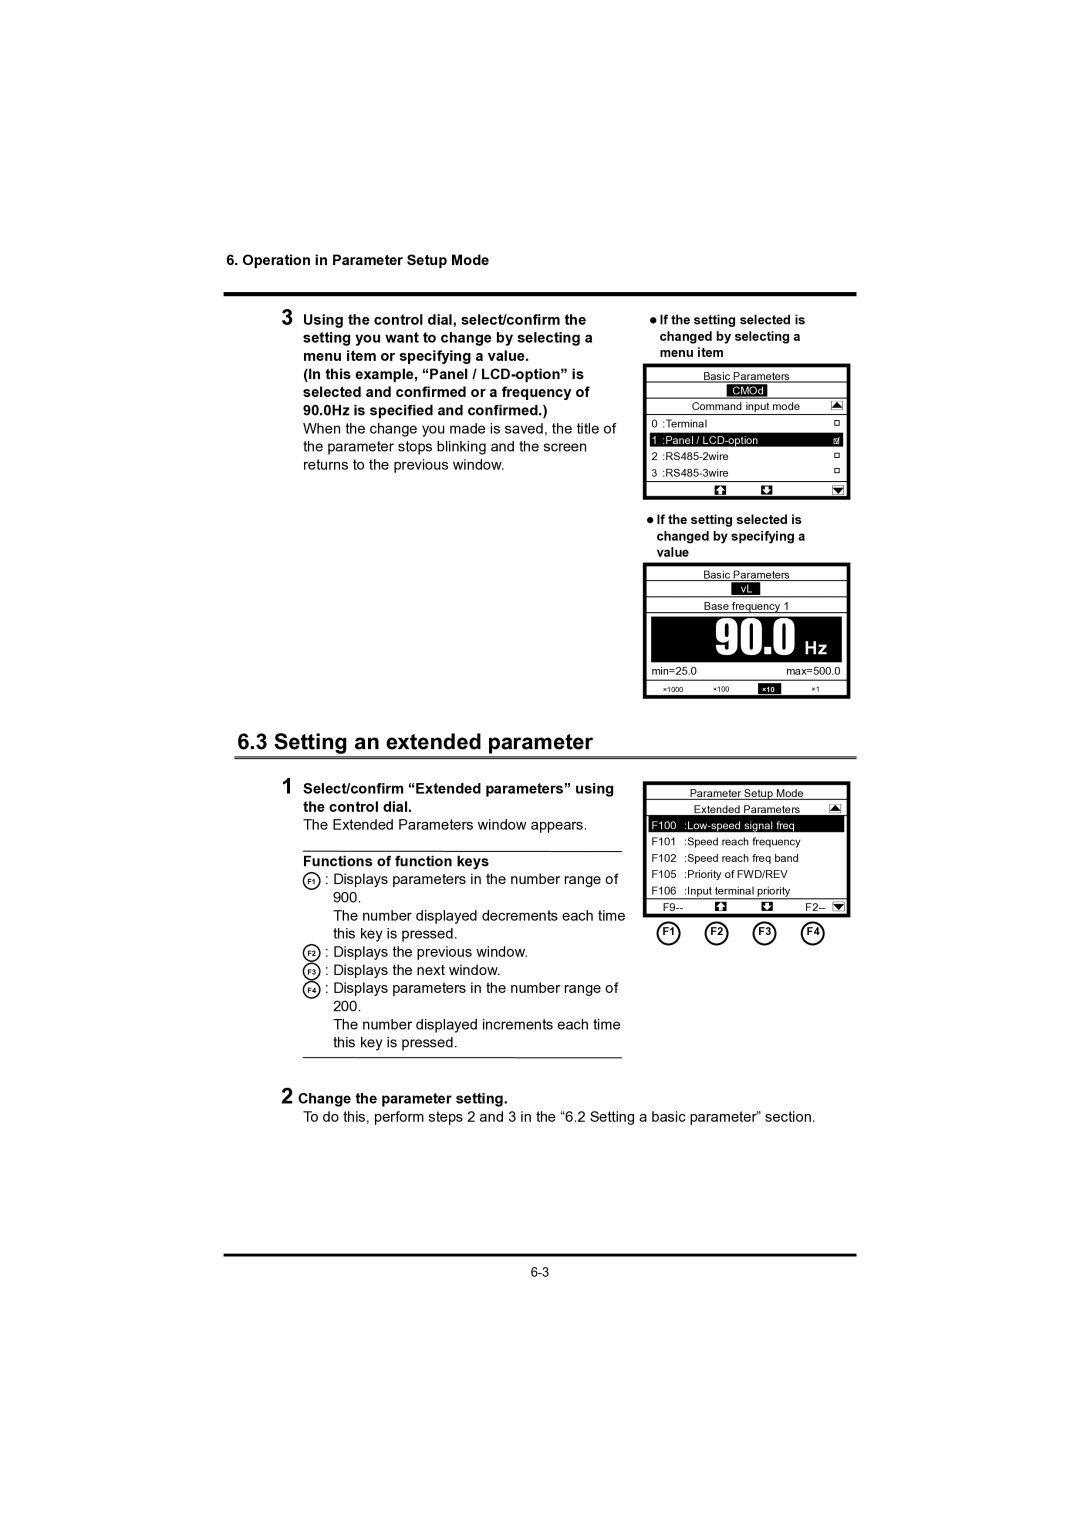
3 Using the control dial, select/confirm the setting you want to change by selecting a menu item or specifying a value.
(In this example, “Panel /
When the change you made is saved, the title of the parameter stops blinking and the screen returns to the previous window.
●If the setting selected is changed by selecting a menu item
Basic Parameters
CMOd
Command input mode
0 :Terminal
1 :Panel /
●If the setting selected is changed by specifying a value
Basic Parameters
vL
Base frequency 1
90.0 Hz
min=25.0max=500.0
×1000 | ×100 | ×10 | ×1 |
6.3 Setting an extended parameter
1 Select/confirm “Extended parameters” using the control dial.
The Extended Parameters window appears.
Functions of function keys
F1 : Displays parameters in the number range of
900.
The number displayed decrements each time this key is pressed.
F2 : Displays the previous window.
F3 : Displays the next window.
F4 : Displays parameters in the number range of
200.
The number displayed increments each time this key is pressed.
|
| Parameter Setup Mode |
|
|
|
|
| ||||
|
| Extended Parameters |
|
|
|
|
| ||||
|
|
|
|
|
|
| |||||
|
|
|
|
|
|
| |||||
| F100 |
|
|
|
|
|
| ||||
| F101 | :Speed reach frequency |
|
|
|
|
| ||||
| F102 | :Speed reach freq band |
|
|
|
|
| ||||
| F105 | :Priority of FWD/REV |
|
|
|
|
| ||||
| F106 | :Input terminal priority |
|
|
|
|
| ||||
|
|
|
|
|
|
|
| ||||
|
|
|
|
|
|
| |||||
|
|
|
|
|
|
|
|
|
|
|
|
| F1 | F2 | F3 | F4 | |||||||
2 Change the parameter setting.
To do this, perform steps 2 and 3 in the “6.2 Setting a basic parameter” section.
