Installation
TCP Wall Section Assembly (Typical)
1Apply the walls and join at the inside angles with number 14
2Apply the
3Before installing the
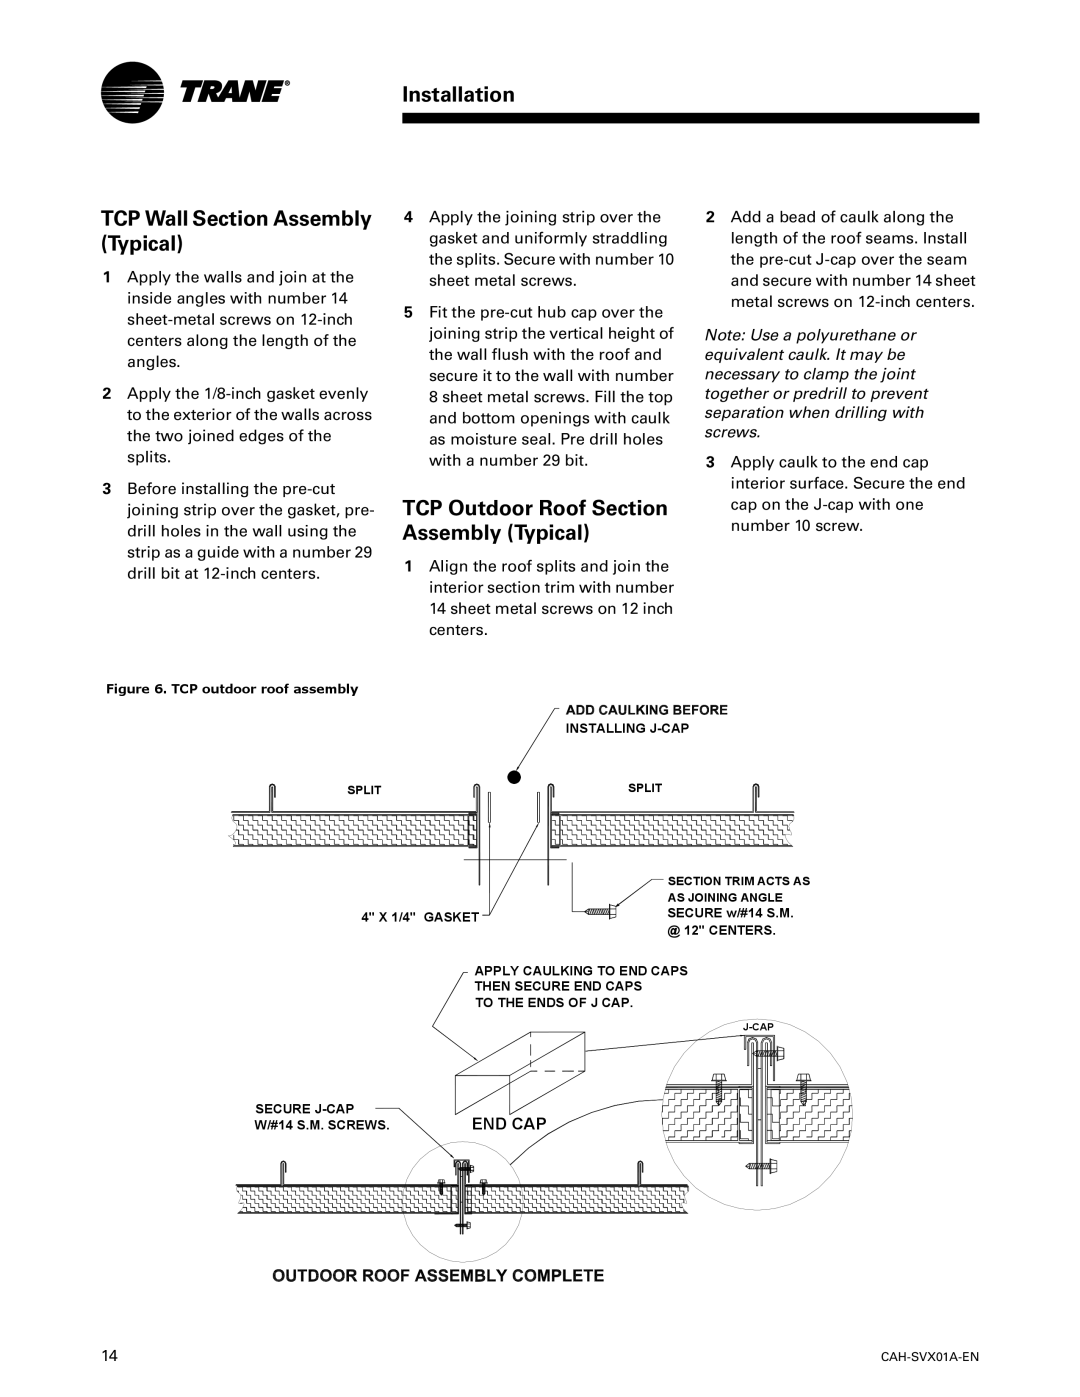
Figure 6. TCP outdoor roof assembly
4Apply the joining strip over the gasket and uniformly straddling the splits. Secure with number 10 sheet metal screws.
5Fit the
TCP Outdoor Roof Section Assembly (Typical)
1Align the roof splits and join the interior section trim with number 14 sheet metal screws on 12 inch centers.
2Add a bead of caulk along the length of the roof seams. Install the
Note: Use a polyurethane or equivalent caulk. It may be necessary to clamp the joint together or predrill to prevent separation when drilling with screws.
3Apply caulk to the end cap interior surface. Secure the end cap on the
INSTALLING
SPLIT |
4" X 1/4" GASKET
SPLIT
SECTION TRIM ACTS AS
AS JOINING ANGLE
SECURE w/#14 S.M. @ 12" CENTERS.
APPLY CAULKING TO END CAPS
THEN SECURE END CAPS
TO THE ENDS OF J CAP.
| |
SECURE | END CAP |
W/#14 S.M. SCREWS. |
14 |
|
