TCC Model
Assembly
Instructions
If your nameplate model number begins with TCC, use the assembly instructions below.
Joining sections - Edge to Edge
Units must be installed level for proper drainage of condensate from the drain pan and for squareness of the sections during installation. In addition, each section in a multi- section unit must be properly supported.
Note: Leveling each section, beginning with the first section, is critical. Failure to level and align the sections immediately creates greater misalignment or even structural damage afterward.
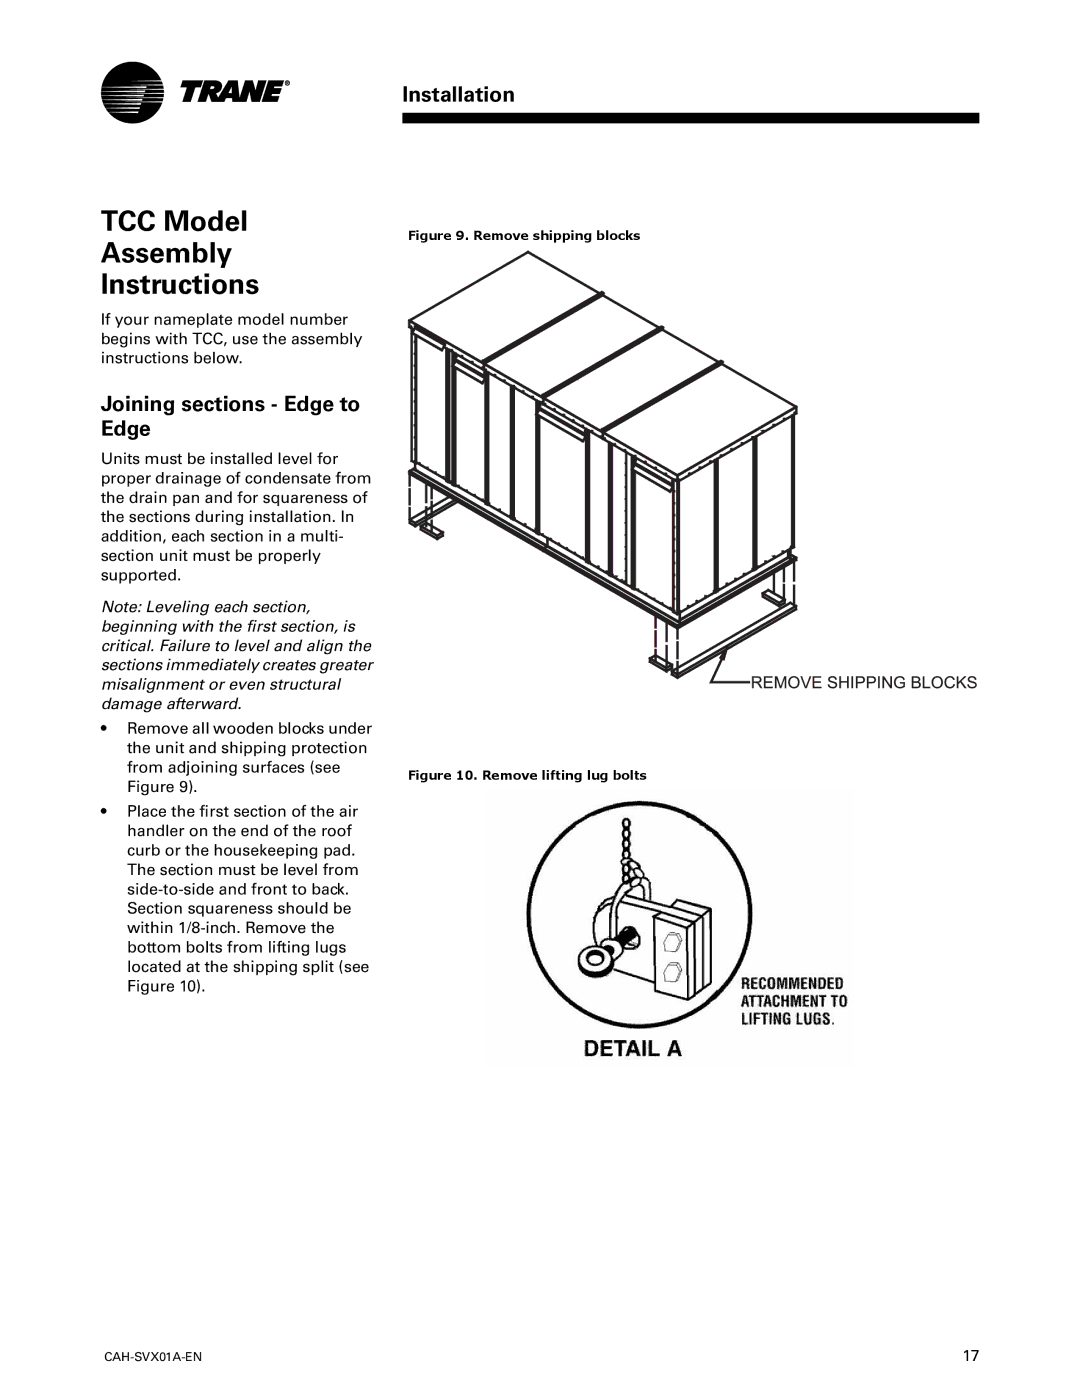
•Remove all wooden blocks under the unit and shipping protection from adjoining surfaces (see Figure 9).
•Place the first section of the air handler on the end of the roof curb or the housekeeping pad. The section must be level from
Section squareness should be within
CAH-SVX01A-EN
Installation
Figure 9. Remove shipping blocks
Figure 10. Remove lifting lug bolts
17