Basic Connection and Start-Up
Quick Start Guide
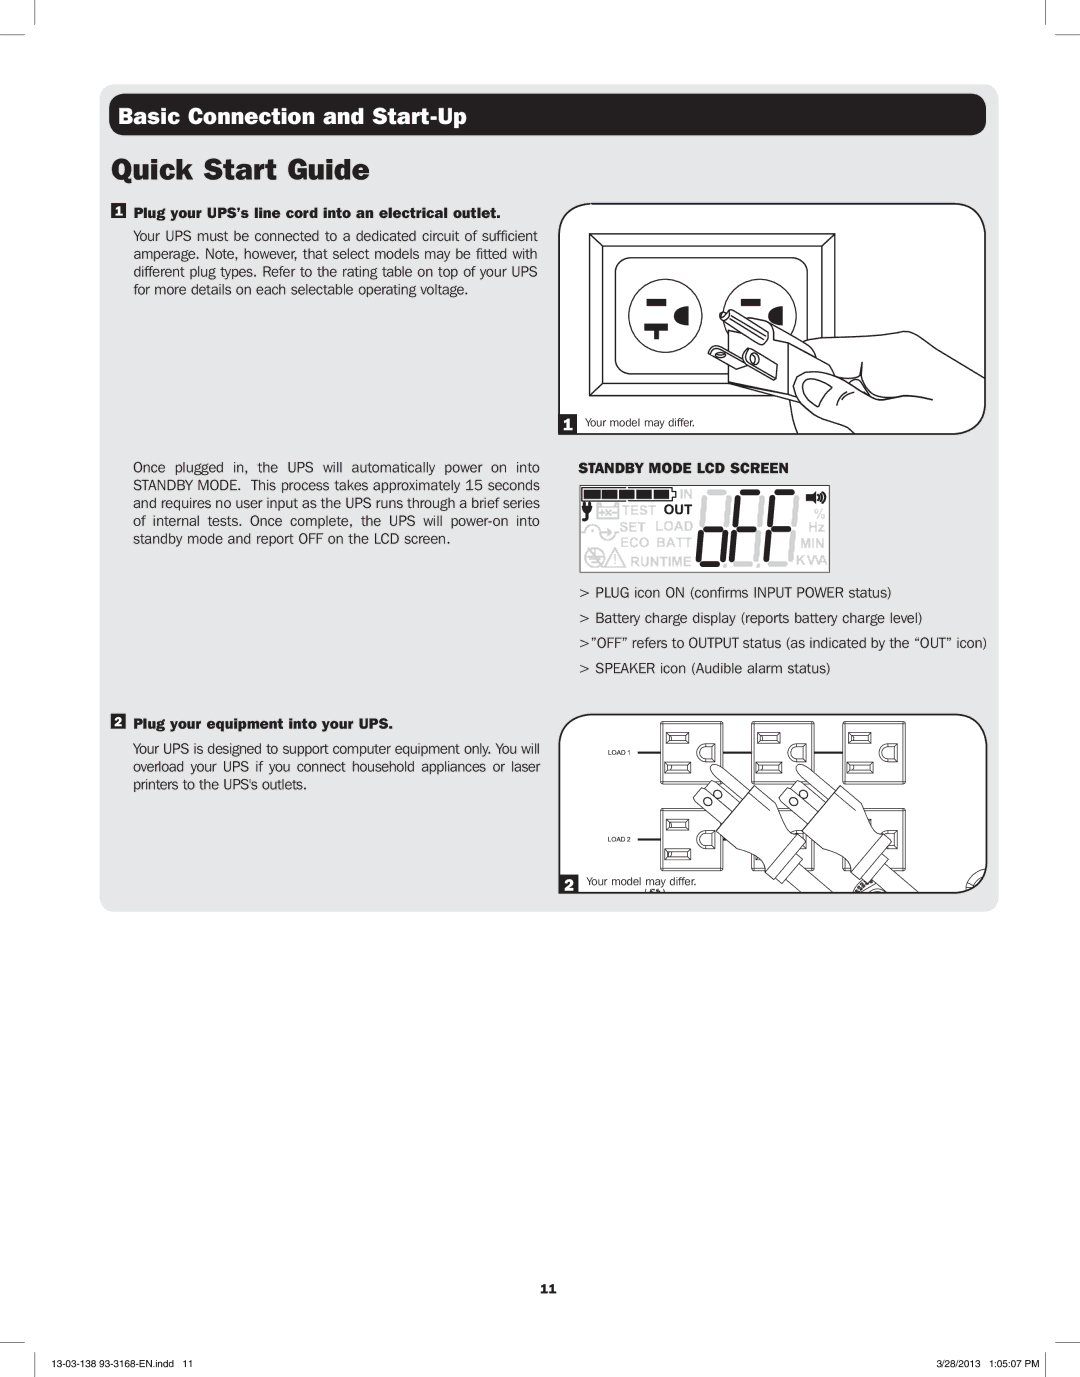
1Plug your UPS’s line cord into an electrical outlet.
Your UPS must be connected to a dedicated circuit of sufficient amperage. Note, however, that select models may be fitted with different plug types. Refer to the rating table on top of your UPS for more details on each selectable operating voltage.
1 Your model may differ.
Once plugged in, the UPS will automatically power on into STANDBY MODE. This process takes approximately 15 seconds and requires no user input as the UPS runs through a brief series of internal tests. Once complete, the UPS will
2Plug your equipment into your UPS.
Your UPS is designed to support computer equipment only. You will overload your UPS if you connect household appliances or laser printers to the UPS's outlets.
11
STANDBY MODE LCD SCREEN
>PLUG icon ON (confirms INPUT POWER status)
>Battery charge display (reports battery charge level)
>”OFF” refers to OUTPUT status (as indicated by the “OUT” icon) > SPEAKER icon (Audible alarm status)
2 Your model may differ.
3/28/2013 1:05:07 PM |
