Installation and Operation Guide
Change the Network Setting — DDNS.
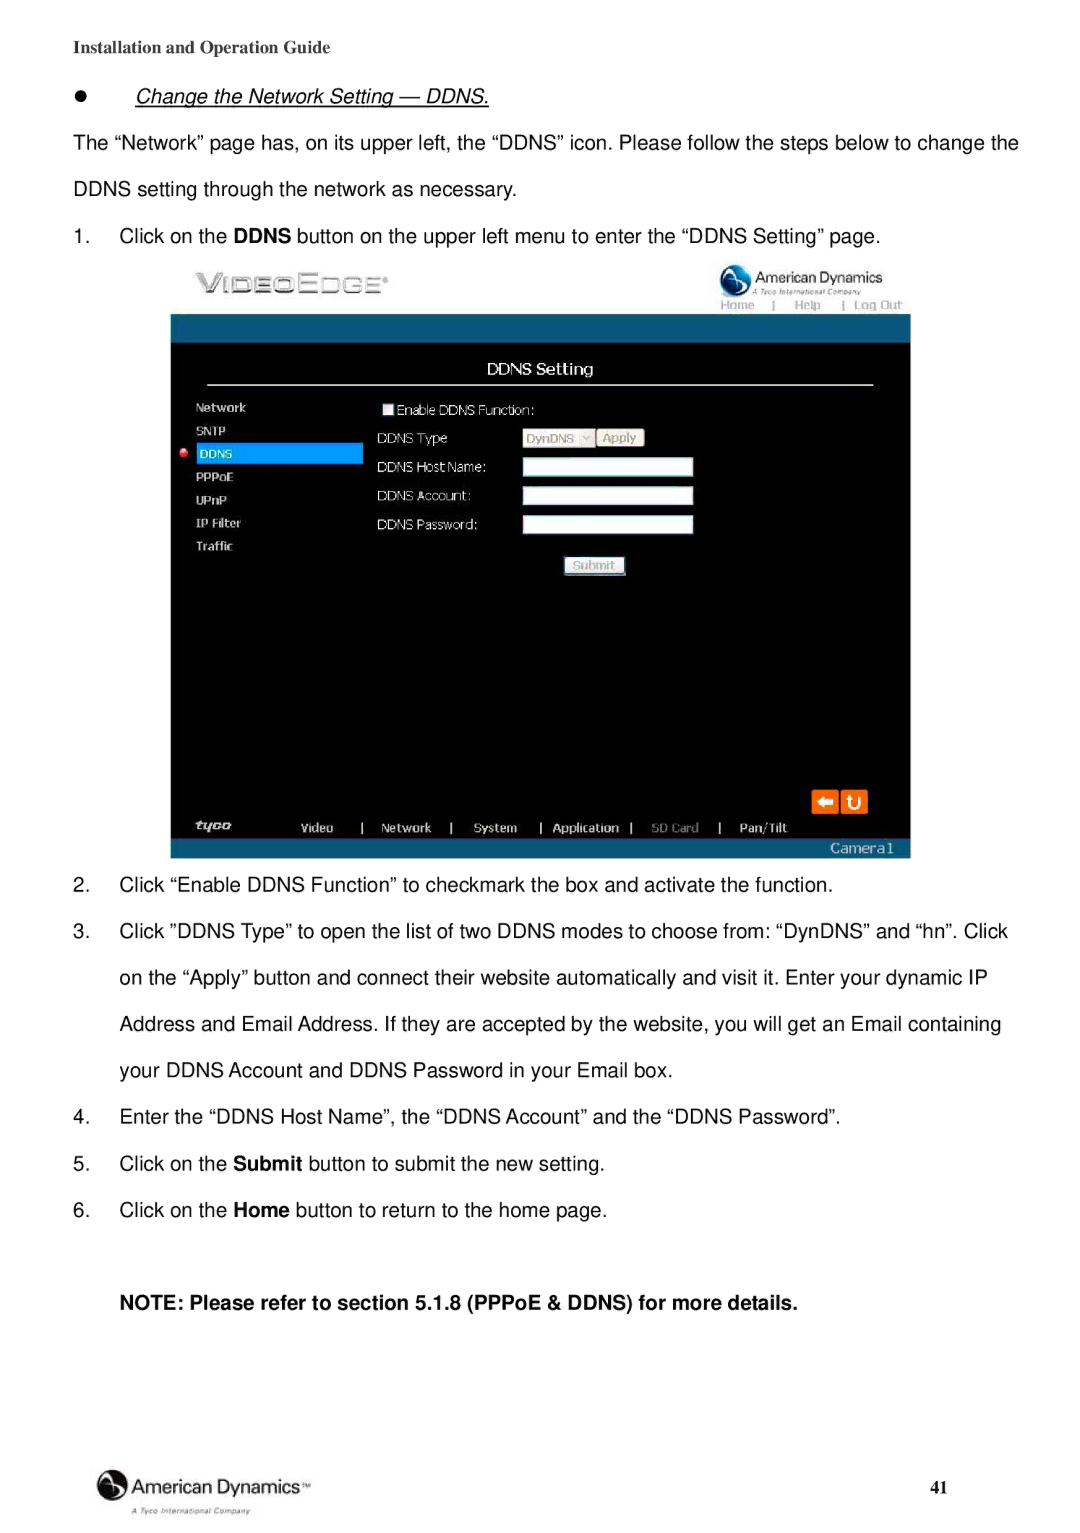
The “Network” page has, on its upper left, the “DDNS” icon. Please follow the steps below to change the DDNS setting through the network as necessary.
1.Click on the DDNS button on the upper left menu to enter the “DDNS Setting” page.
2.Click “Enable DDNS Function” to checkmark the box and activate the function.
3.Click ”DDNS Type” to open the list of two DDNS modes to choose from: “DynDNS” and “hn”. Click on the “Apply” button and connect their website automatically and visit it. Enter your dynamic IP Address and Email Address. If they are accepted by the website, you will get an Email containing your DDNS Account and DDNS Password in your Email box.
4.Enter the “DDNS Host Name”, the “DDNS Account” and the “DDNS Password”.
5.Click on the Submit button to submit the new setting.
6.Click on the Home button to return to the home page.
NOTE: Please refer to section 5.1.8 (PPPoE & DDNS) for more details.
41