WEB PRINTING
In high speed web applications, the distance the web travels at a given speed in
If this situation occurs and the web speed cannot be slowed down to allow more drying time, air blowers can be used to direct heated air on the printed marks to accelerate drying. Preheating the web material slightly with hot air before printing can also be an effective method to decrease the drying time. If either of these techniques are used, it is recommended that the hot air blowers be electrically tied into the web feed motor energizing circuit. This will ensure that the blowers are turned off automatically if the web is stopped.
MOUNTING THE CODER
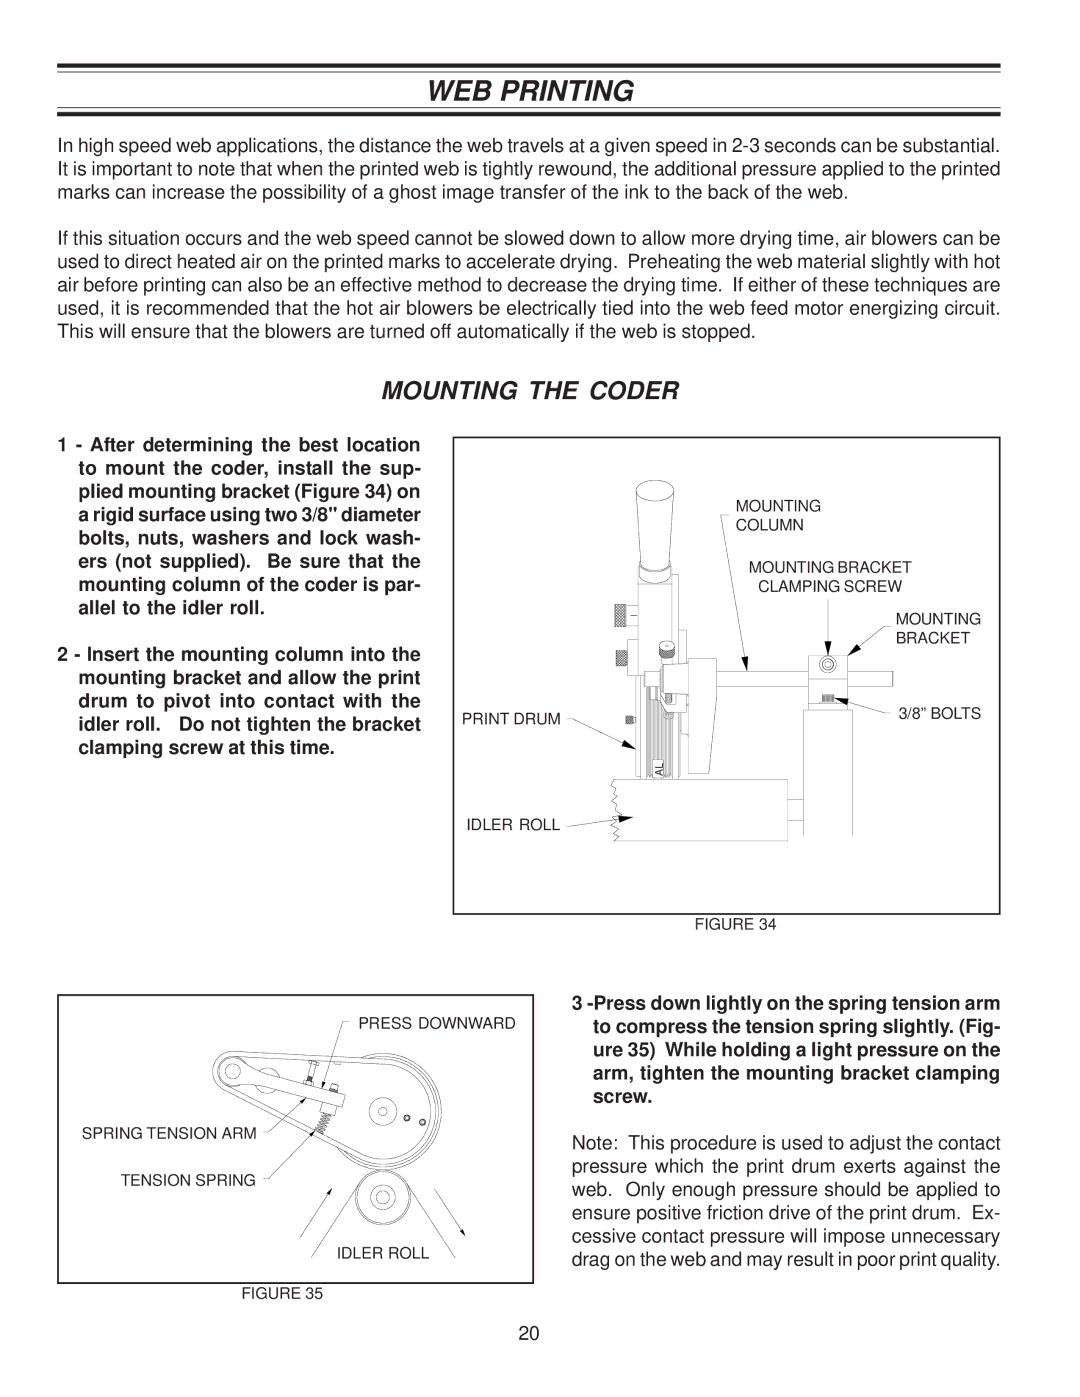
1 - After determining the best location to mount the coder, install the sup- plied mounting bracket (Figure 34) on a rigid surface using two 3/8" diameter bolts, nuts, washers and lock wash- ers (not supplied). Be sure that the mounting column of the coder is par- allel to the idler roll.
2 - Insert the mounting column into the mounting bracket and allow the print drum to pivot into contact with the idler roll. Do not tighten the bracket clamping screw at this time.
| MOUNTING |
| COLUMN |
| MOUNTING BRACKET |
| CLAMPING SCREW |
| MOUNTING |
| BRACKET |
PRINT DRUM | 3/8” BOLTS |
| |
| AL |
IDLER ROLL |
|
FIGURE 34
PRESS DOWNWARD |
SPRING TENSION ARM |
TENSION SPRING |
IDLER ROLL |
FIGURE 35
3
Note: This procedure is used to adjust the contact pressure which the print drum exerts against the web. Only enough pressure should be applied to ensure positive friction drive of the print drum. Ex- cessive contact pressure will impose unnecessary drag on the web and may result in poor print quality.
20
