You can also install the projector in two other viewing setups: rear projection onto a
If you project from overhead or the rear of the screen, you’ll need to select the appropriate Projection setting in the projector’s Extended menu to orient the image correctly (see page 62).
Keep these considerations in mind as you position the projector:
■Place the projector on a sturdy, level surface.
■Make sure there is plenty of space for ventilation around and under the projector.
■Make sure the projector is within 5.9 feet (1.8 meters) of a grounded electrical outlet or extension cord.
Determining Projection Distance
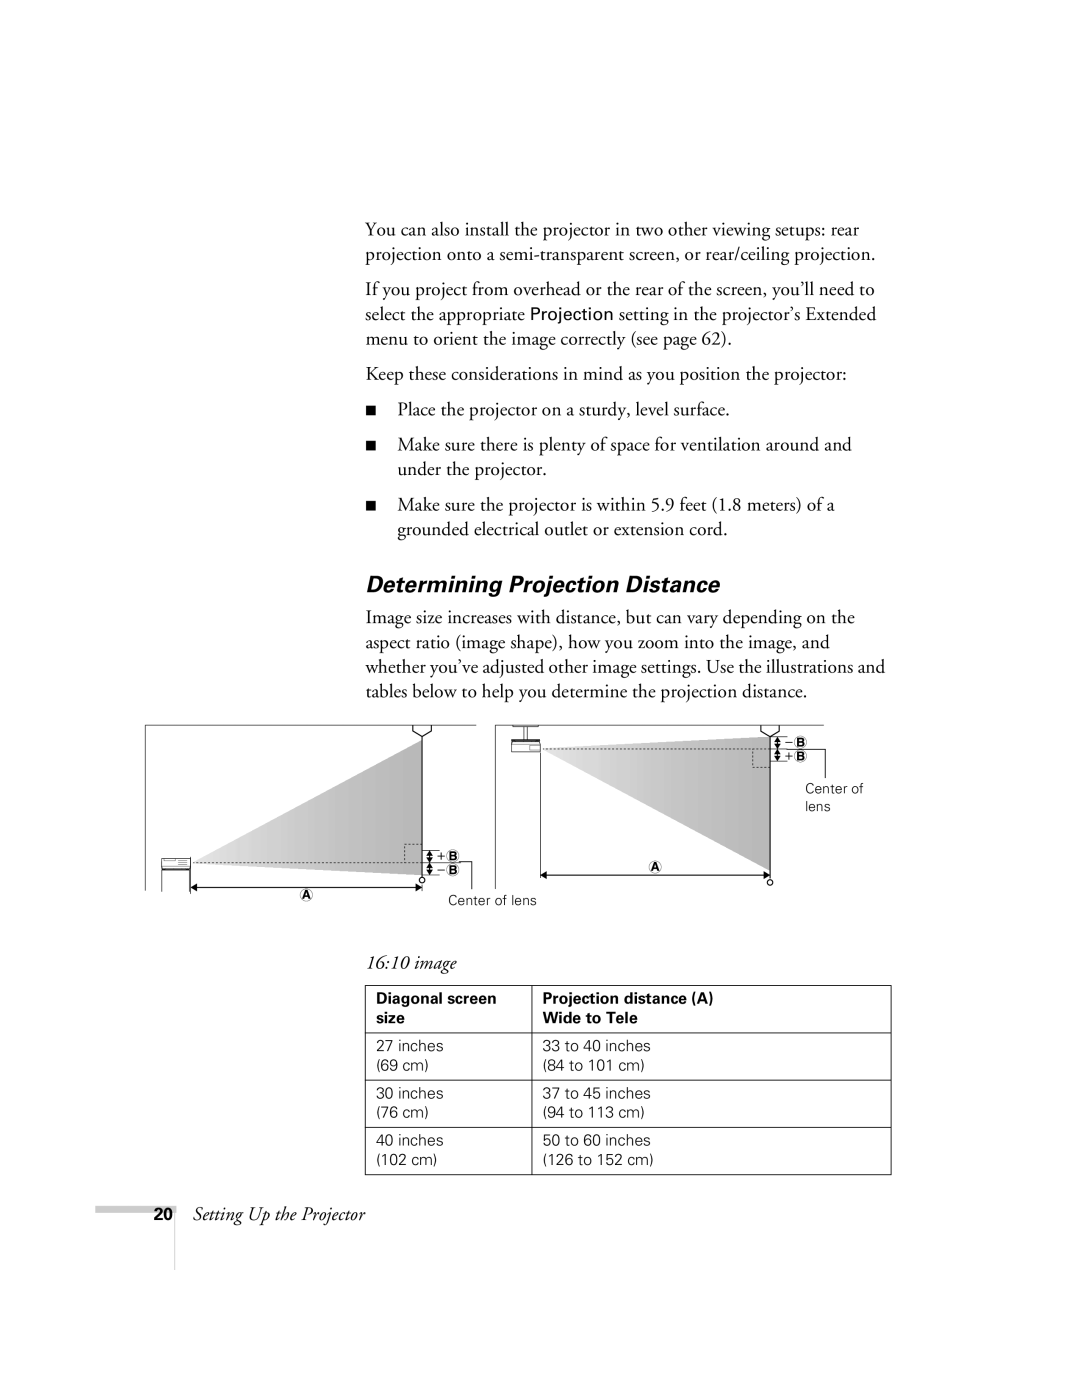
Image size increases with distance, but can vary depending on the aspect ratio (image shape), how you zoom into the image, and whether you’ve adjusted other image settings. Use the illustrations and tables below to help you determine the projection distance.
Center of |
lens |
Center of lens
16:10 image
Diagonal screen | Projection distance (A) |
size | Wide to Tele |
|
|
27 inches | 33 to 40 inches |
(69 cm) | (84 to 101 cm) |
|
|
30 inches | 37 to 45 inches |
(76 cm) | (94 to 113 cm) |
|
|
40 inches | 50 to 60 inches |
(102 cm) | (126 to 152 cm) |
|
|
20
Setting Up the Projector