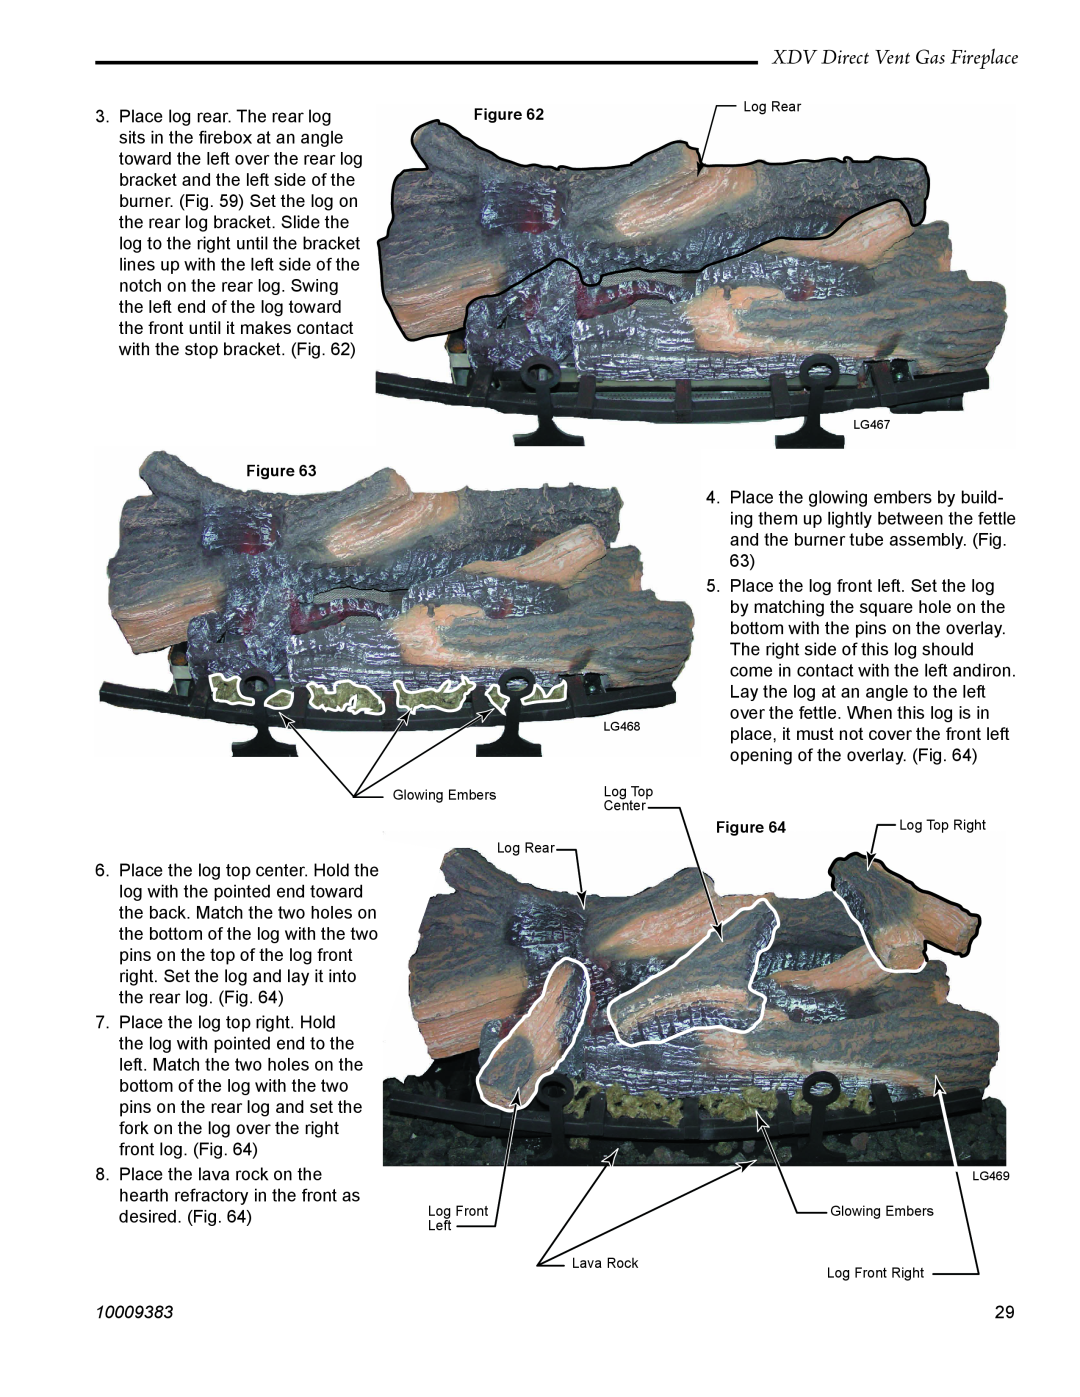
3. Place log rear. The rear log | Figure 62 |
sits in the firebox at an angle |
|
toward the left over the rear log |
|
bracket and the left side of the |
|
burner. (Fig. 59) Set the log on |
|
the rear log bracket. Slide the |
|
log to the right until the bracket |
|
lines up with the left side of the |
|
notch on the rear log. Swing |
|
the left end of the log toward |
|
the front until it makes contact |
|
with the stop bracket. (Fig. 62) |
|
Figure 63
XDV Direct Vent Gas Fireplace
Log Rear
LG467
6.Place the log top center. Hold the log with the pointed end toward the back. Match the two holes on the bottom of the log with the two pins on the top of the log front right. Set the log and lay it into the rear log. (Fig. 64)
7.Place the log top right. Hold the log with pointed end to the left. Match the two holes on the bottom of the log with the two pins on the rear log and set the fork on the log over the right front log. (Fig. 64)
8.Place the lava rock on the hearth refractory in the front as desired. (Fig. 64)
| LG468 |
Glowing Embers | Log Top |
| Center |
| Log Rear |
Log Front
Left
Lava Rock
4.Place the glowing embers by build- ing them up lightly between the fettle and the burner tube assembly. (Fig. 63)
5.Place the log front left. Set the log by matching the square hole on the bottom with the pins on the overlay. The right side of this log should come in contact with the left andiron. Lay the log at an angle to the left over the fettle. When this log is in place, it must not cover the front left opening of the overlay. (Fig. 64)
Figure 64 | Log Top Right |
LG469
Glowing Embers
Log Front Right
10009383 | 29 |
