

M8200 specifications
Woods Equipment M8200 is a versatile and robust piece of machinery designed for a variety of agricultural and landscaping tasks. Known for its durability and performance, the M8200 offers users a range of advanced features and technologies that enhance its efficiency and ease of use.One of the standout characteristics of the M8200 is its powerful engine. It is equipped with a high-performance engine that delivers impressive horsepower, ensuring it can handle demanding tasks such as mowing, tilling, and snow removal with ease. The engine's engineering not only provides power but also emphasizes fuel efficiency, which is crucial in reducing operational costs.
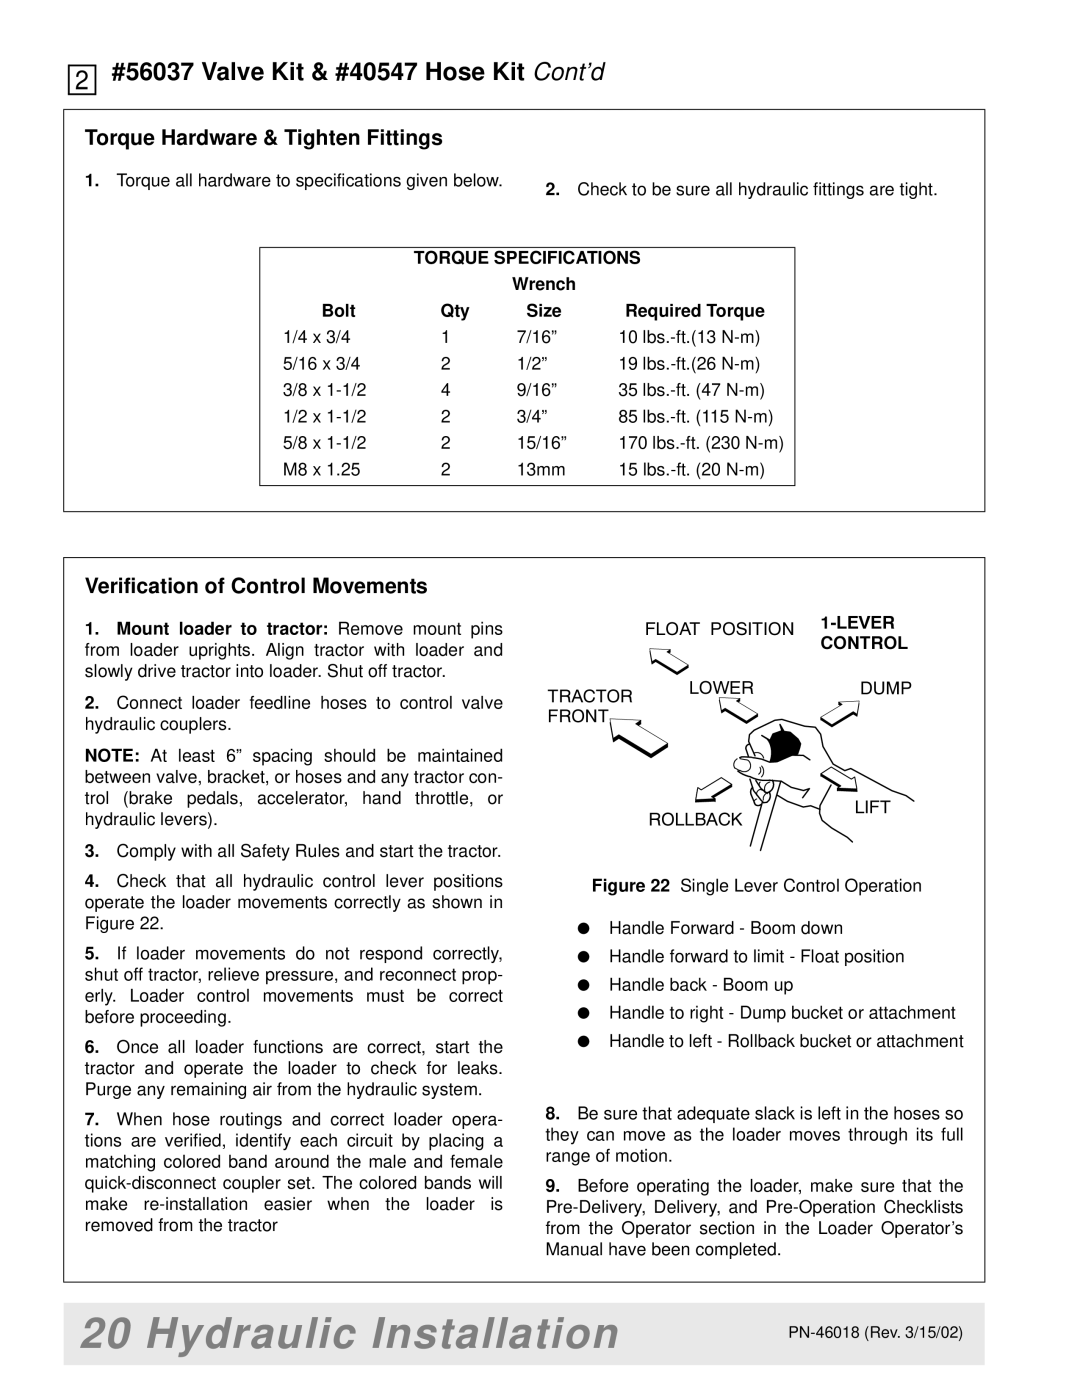
The M8200 is designed with user comfort in mind. It features an ergonomic operator station that allows for easy access to controls, reducing operator fatigue during long hours of use. The spacious cabin provides good visibility, allowing operators to maintain awareness of their surroundings while working. Additionally, the superior suspension system absorbs shocks and vibrations, ensuring a smoother ride over uneven terrains.
Technology plays a vital role in the M8200's performance. The machine is equipped with cutting-edge precision agriculture technology that allows for optimal field mapping and efficient resource management. This technology helps farmers and landscapers achieve maximum productivity by ensuring that every inch of land is utilized effectively.
Another significant feature of the Woods Equipment M8200 is its attachment compatibility. The M8200 can easily accommodate a wide range of attachments, including rotary cutters, plows, and box blades, making it multifunctional. This adaptability is beneficial for users who need to perform different tasks throughout the year, as it saves costs and space.
The safety features of the M8200 are also commendable. It comes with a roll-over protective structure (ROPS), seatbelts, and strategically placed controls that minimize the risk of accidents. Enhanced lighting systems improve visibility during nighttime operations, ensuring that users can work safely around the clock.
In summary, the Woods Equipment M8200 is a powerful and versatile machine, perfect for agricultural and landscaping tasks. Its strong engine, operator-friendly design, advanced technology, attachment compatibility, and robust safety features make it a valuable asset for any operator focused on efficiency and performance. This tractor continues to be a preferred choice among professionals looking for reliability and innovation in their equipment.