TC2 204060 Series BattChg Owners Guide.book Page 23 Friday, July 8, 2011 11:44 AM
Installing the Truecharge 2 Battery Charger
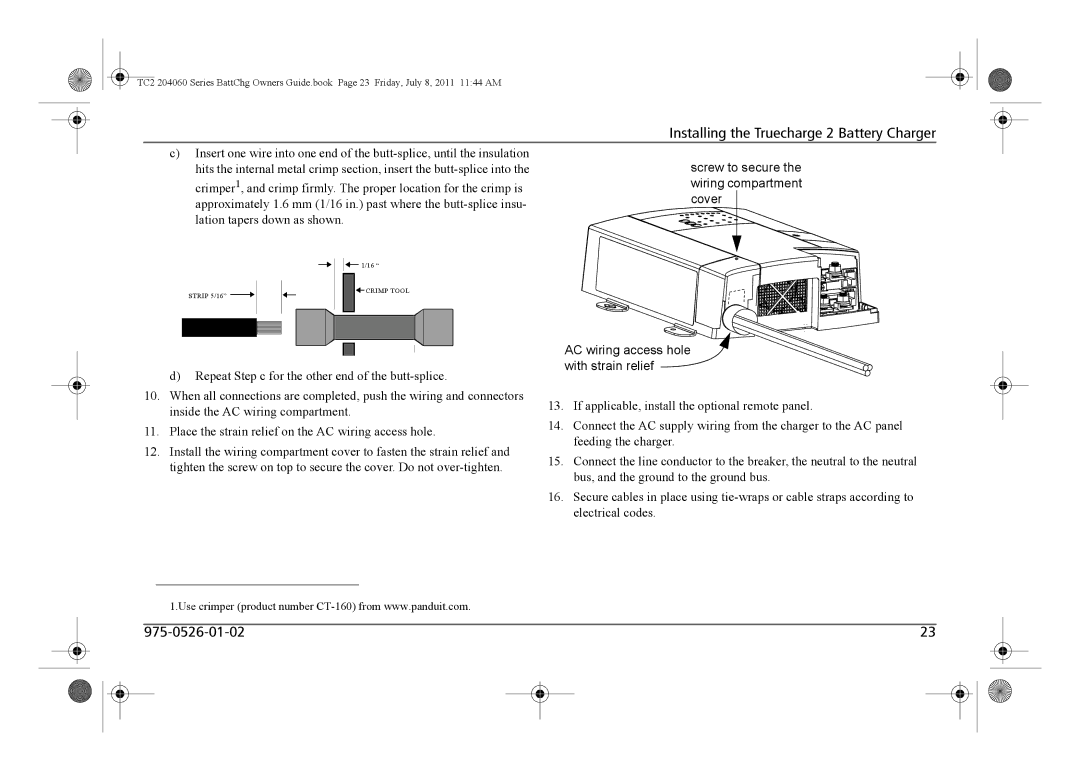
c)Insert one wire into one end of the
![]()
![]() 1/16 “
1/16 “
STRIP 5/16” | CRIMP TOOL |
|
screw to secure the wiring compartment cover
d)Repeat Step c for the other end of the
10.When all connections are completed, push the wiring and connectors inside the AC wiring compartment.
11.Place the strain relief on the AC wiring access hole.
12.Install the wiring compartment cover to fasten the strain relief and tighten the screw on top to secure the cover. Do not
AC wiring access hole with strain relief 
13.If applicable, install the optional remote panel.
14.Connect the AC supply wiring from the charger to the AC panel feeding the charger.
15.Connect the line conductor to the breaker, the neutral to the neutral bus, and the ground to the ground bus.
16.Secure cables in place using
1.Use crimper (product number
23 |
