TC2 204060 Series BattChg Owners Guide.book Page 18 Friday, July 8, 2011 11:44 AM
Installing the Truecharge 2 Battery Charger
Step 3: Installing DC Wiring | 4. | Install a DC circuit breaker or fused disconnect in each positive cable | |||
|
| that is as close to the battery positive terminal as possible. | |||
|
|
|
| ||
The procedure for installing the DC wiring applies to a single battery, as |
|
| Consult your local electrical codes regarding the distance allowed | ||
|
| between the battery and the fuse or breaker. For example, for most | |||
well as multiple batteries or battery banks. |
|
| |||
|
| situations ABYC standard | |||
|
|
|
| ||
|
|
|
| (17.8 cm). Be sure the breaker or fused disconnect is open. | |
|
|
|
| ||
|
| 5. | Route the wiring to the batteries and to the Truecharge2 Battery | ||
|
| ||||
|
|
|
| Charger. Avoid routing wiring through an electrical distribution panel, | |
ACCIDENTAL SHORT OR SPARK HAZARD |
|
| |||
Leave the DC disconnects or breakers in the Off position or DC fuses |
|
| battery isolator, or other device that will add voltage drops. | ||
removed from their fuse holders until installation is complete. |
|
|
|
| |
Failure to follow these instructions can result in death or serious |
|
|
|
| |
|
|
|
| ||
injury. |
|
|
|
| |
| SHOCK HAZARD | ||||
|
|
| |||
1. Remove the DC compartment cover. See “Front Panel” on page 3. |
| The rubber boots must be installed over the Truecharge2 Battery Charger | |||
| DC terminals to keep water off of live parts and to maintain the chargers' | ||||
2. Plan the route that the DC wires will follow, keeping it as short as |
| ||||
possible. Measure and cut the required wire length, after allowing |
| Failure to follow these instructions can result in death or serious | |||
some extra length for connections and to provide slack in the wires for |
| injury. | |||
strain relief. |
|
|
|
| |
3.Identify the positive wires, by using
IMPORTANT: You may find it helpful to label each cable, associating it with the battery bank it is connected to. For example, bank 1
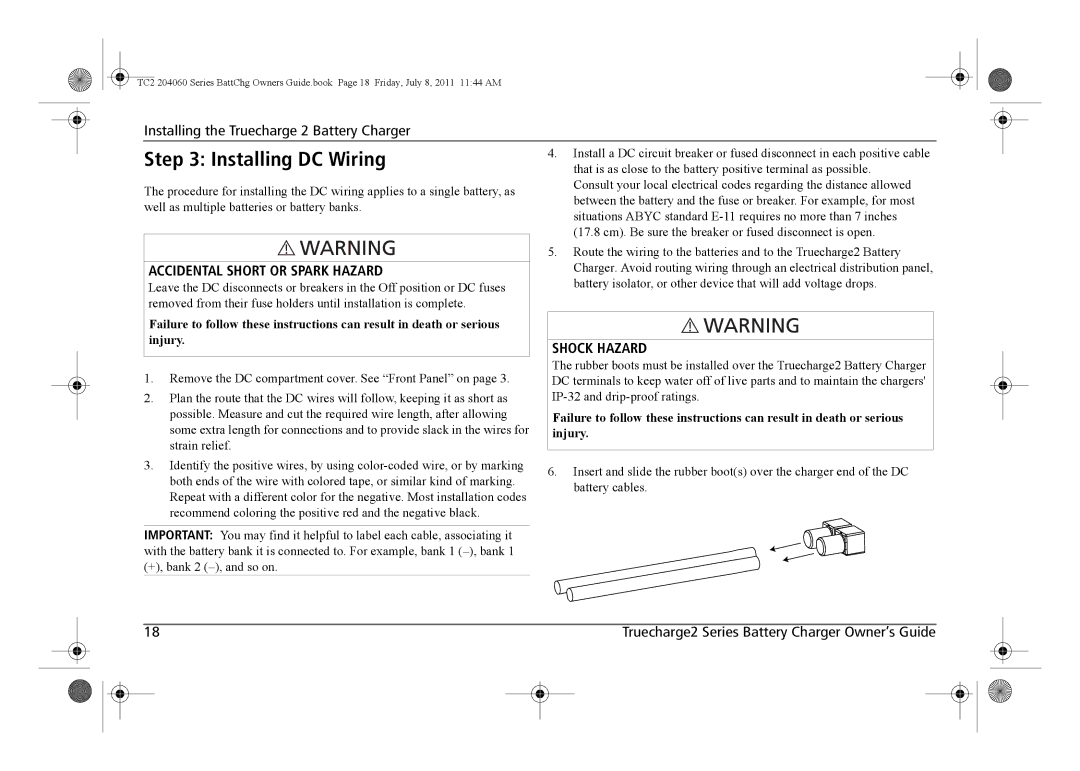
6.Insert and slide the rubber boot(s) over the charger end of the DC battery cables.
|
| 18 |
|
| Truecharge2 Series Battery Charger Owner’s Guide |
|
| ||
|
|
|
|
|
|
|
|
|
|
|
|
|
|
|
|
|
|
|
|
|
|
|
|
|
|
|
|
|
|