4Make sure that “SETUP” is set to “AUTO” and the pointer is pointing at “START”.
y
You can also select the following setup methods. In this case, press G k to select “SETUP”, press G l / h to
select the one of the following choises and then select “START”.
Choices: AUTO, RELOAD, UNDO, DEFAULT
•Select “AUTO” to automatically run the entire “AUTO SETUP” procedure.
•Select “RELOAD” to reload the last “AUTO SETUP” settings and override the previous settings.
•Select “UNDO” to undo the last “AUTO SETUP” settings and restore the previous settings.
•Select “DEFAULT” to reset the “AUTO SETUP” parameters to the initial factory settings.
Note
“RELOAD” or “UNDO” is available only when you have previously run “AUTO SETUP” and confirmed the results.
5Press D AMP and then press G ENTER to start the setup procedure.
This unit starts the auto setup procedure. Loud test tones are output from each speaker during the auto setup procedure. Once all items are set, the “AUTO:RESULT” display appears in the OSD.
Notes
•During the auto setup procedure, do not perform any operation on this unit.
•We recommend getting out of the room while this unit is in the auto setup procedure. It takes approximately 3 minutes for this unit to complete the auto setup procedure.
This unit performs the following checks:
Speaker wiring/volume level WIRING/LEVEL
Checks which speakers are connected and the polarity of each speaker. Also checks and adjusts the volume level of each speaker.
Speaker distance DISTANCE
Checks the distance of each speaker from the listening position and adjusts the timing of each channel.
Speaker size SIZE
Checks the frequency response of each speaker and sets the appropriate
Optimizing the speaker setting for your listening room
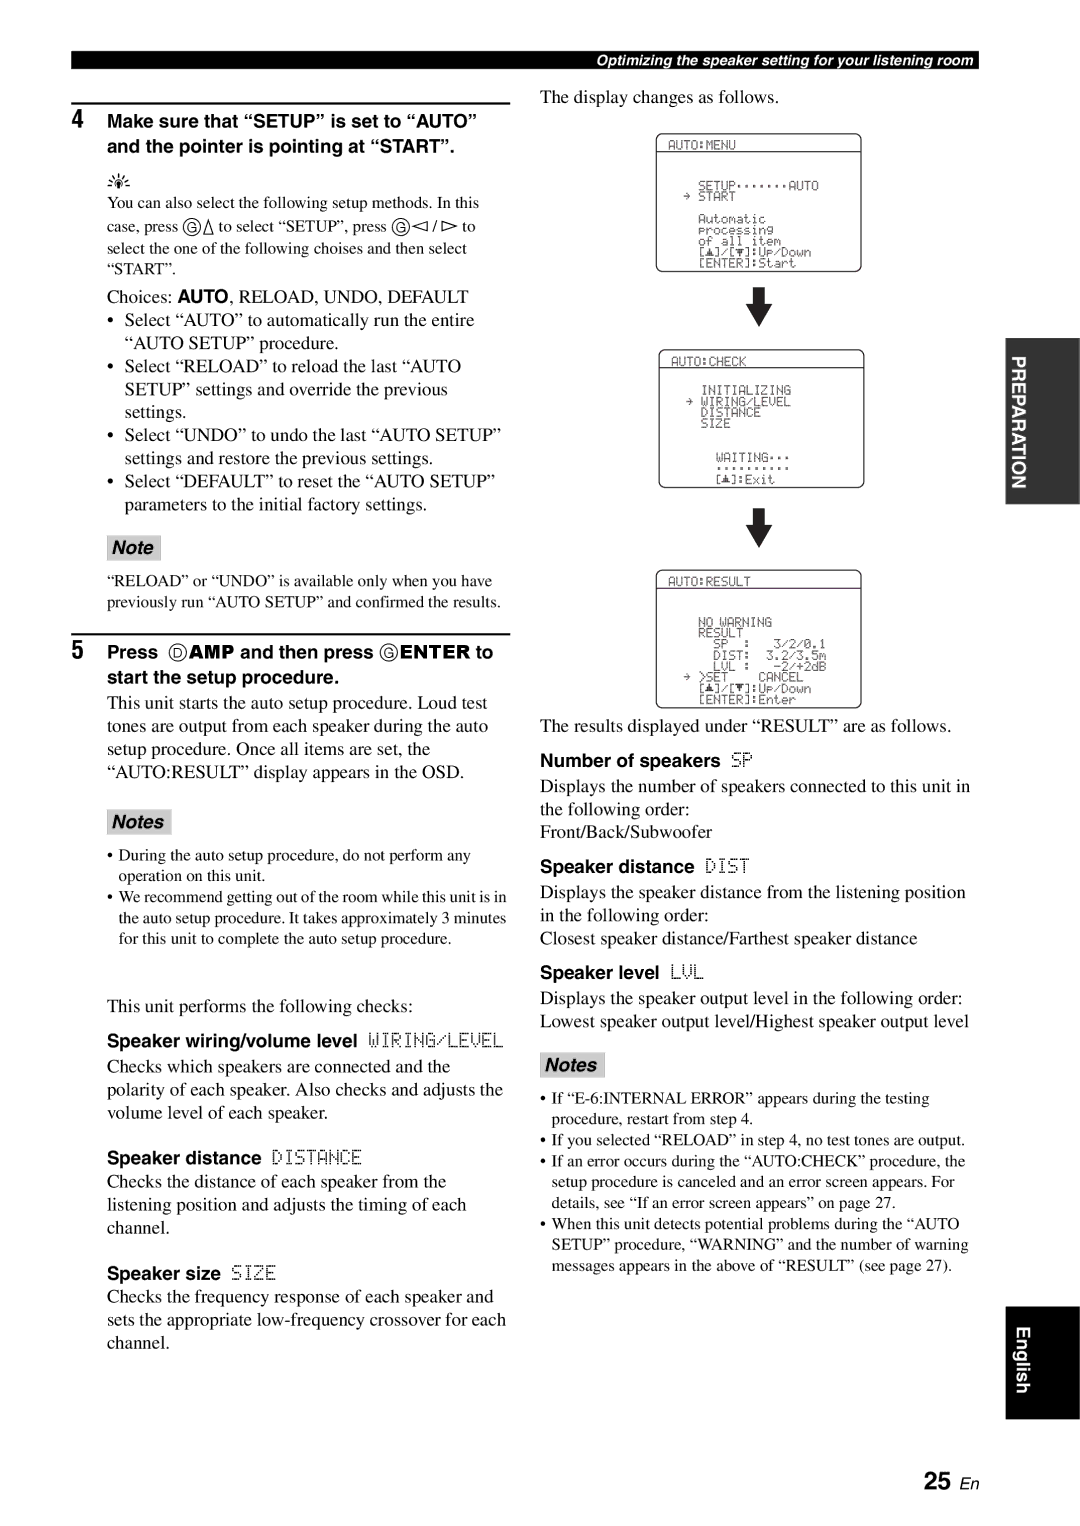
The display changes as follows.
AUTO:MENU
SETUP;;;;;;;AUTO
. START
Automatic processing of all item
[p]/[p]:Up/Down [ENTER]:Start
AUTO:CHECK
INITIALIZING
. WIRING/LEVEL DISTANCE SIZE
WAITING;;;
;;;;;;;;;;
[[
AUTO:RESULT
NO WARNING RESULT
SP : 3/2/0.1
DIST: 3.2/3.5m
LVL :
. >SET CANCEL [![]() ]/[
]/[![]() ]:Up/Down [ENTER]:Enter
]:Up/Down [ENTER]:Enter
The results displayed under “RESULT” are as follows.
Number of speakers SP
Displays the number of speakers connected to this unit in the following order:
Front/Back/Subwoofer
Speaker distance DIST
Displays the speaker distance from the listening position in the following order:
Closest speaker distance/Farthest speaker distance
Speaker level LVL
Displays the speaker output level in the following order: Lowest speaker output level/Highest speaker output level
Notes
•If
•If you selected “RELOAD” in step 4, no test tones are output.
•If an error occurs during the “AUTO:CHECK” procedure, the setup procedure is canceled and an error screen appears. For details, see “If an error screen appears” on page 27.
•When this unit detects potential problems during the “AUTO SETUP” procedure, “WARNING” and the number of warning
messages appears in the above of “RESULT” (see page 27).
PREPARATION
English