BenQ MS521 user manual Magnifying and searching for details, Selecting the aspect ratio

Page 33

Magnifying and searching for details

If you need to find the details on the projected picture, magnify the picture. Use the direction arrow keys for navigating the picture.

Using the remote control

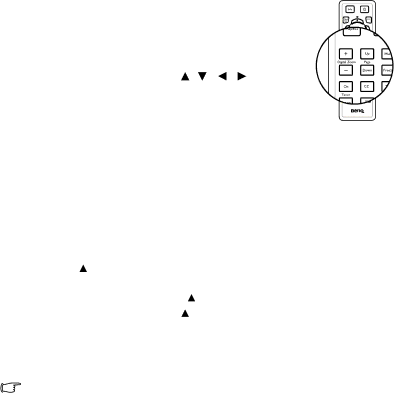
1.Press Digital Zoom +/- to display the Zoom


bar.


2.

Press Digital Zoom + to magnify the center


of the picture. Press the key repeatedly until


the picture size is suitable for your need.


3.

Use the directional arrows ( ,

,

,

)


on the projector or remote control to


navigate the picture.


4.

To restore the picture to its original size,


press AUTO. You can also press Digital


Zoom -. When the key is pressed again, the


picture is further reduced until it is restored to the original size.

Using the OSD menu

1.Press MENU/EXIT and then press / until the DISPLAY menu is highlighted.

2.Press to highlight Digital Zoom and press MODE/ENTER. The Zoom bar displays.

3.Repeat steps 2-4 in the section of "Using the remote control" above. Or if you are using the projector control panel, continue to the following steps.

4.Press on the projector repeatedly to magnify the picture to a desired size.

5.To navigate the picture, press MODE/ENTER to switch to the paning mode and press the directional arrows ( , , , ) to navigate the picture.

6.Use the directional arrows ( , , , ) on the projector or remote control to navigate the picture.

7.To reduce size of the picture, press MODE/ENTER to switch back to the zoom in/ out functionality, and press AUTO to restore the picture to its original size. You can also press repeatedly until it is restored to the original size.

The picture can only be navigated after the picture is magnified. You can further magnify the picture while searching for details.

Selecting the aspect ratio

The 'aspect ratio' is the ratio of the image width to the image height. Most analog TV and computers are in 4:3 ratio,and digital TV and DVDs are usually in 16:9 or 16:10 ratio.

With the advent of digital signal processing, digital display devices like this projector can dynamically stretch and scale the image output to a different aspect than that of the image input signal.

To change the projected image ratio (no matter what aspect the source is):

Using the remote control

1.Press ASPECT to show the current setting.

2.Press ASPECT repeatedly to select an aspect ratio to suit the format of the video signal and your display requirements.

Using the OSD menu

Operation 33

Image 33
Contents User Man ual Table of contents Your projector through a power Areas where the mains voltageUninterruptible power supply Refer servicing to qualified service personnelSafety Instructions Do not block the ventilation holes Safety Instructions Projector features Shipping contents Rear/lower side Projector exterior viewControls and functions Ceiling mounting the projector Remote control Setting Volume +Source MuteReplacing the remote control battery Choosing a location Front TableFront Ceiling Projection dimensions Obtaining a preferred projected image sizeMS521/MX522/MS511H 762 646 404 MW523/TW523Connection Connecting a computer Connecting a computer or monitorConnecting a monitor To connect the projector to a notebook or desktop computerConnecting Video source devices To connect the projector to a Hdmi source device Connecting a Hdmi source deviceTo connect the projector to a Component Video source device Connecting a Component Video source deviceTo connect the projector to an S-Video/Video source device Connecting an S-Video/composite source deviceStarting up the projector OperationAdjusting the projected image Adjusting the projection angleAuto-adjusting the image Use build-in test pattern Fine-tuning the image size and clarityCorrecting keystone Using the menus Utilizing the password function Using a security cable lockSetting a password Securing the projectorIf you forget the password Entering the password recall procedureChanging the password Disabling the password function Changing Color Space Switching input signalSelecting the aspect ratio Magnifying and searching for detailsAbout the aspect ratio Setting the User 1/User 2 mode Selecting a picture modeGo to the Picture Picture Mode menu Optimizing the imageFine-tuning the image quality in user modes Using Wall ColorAbout color temperatures Setting a preferred color temperature3D Color Management Press MODE/ENTER and the 3D Color Management page displaysMagenta Cyan Setting the presentation timer Selection DescriptionTop-Left Bottom-Left Top-Right Bottom-Right To cancel the timer, perform the following steps How to use the Timer On key?Remote paging operations Freezing the image Hiding the imageAdjusting the sound level Adjusting the soundTo activate the High Altitude Mode Operating in a high altitude environmentUse Teaching Template Until the System Setup Advanced menu is highlighted Select the lamp saver modeLamp Mode Description Personalizing the projector menu displayShutting down the projector Menu operation Menu systemMain menu Sub-menu Options Picture System Setup Basic Advanced SetupDescription of each menu Template TeachingPicture menu Picture ModeReference ModeTemperature Fine Tuning 3D Color Temperature ColorReset Picture SettingInstallation TimerSettings PresentationOperation Basic menuPanel Key LockHigh Altitude System Setup Advanced menuAudio LampClosed Reset AllCaption StandbyCurrent Information menuSystem StatusCleaning the projector case Cleaning the lensCare of the projector Storing the projectorSetting Auto Power Off Setting Lamp mode eco function as Economic or SmartEco modeLamp information Getting to know the lamp hourPage Status Message Timing of replacing the lampReplacing the lamp Page Resetting the lamp timer Indicators Green Green Flashing Flashing Off Password is incorrect Remote control does not workProjector does not turn on No pictureSpecifications Dimensions Ceiling mount installation301.6 219.2 111.3 Timing chart Resolution Mode Vertical Horizontal Pixel Frequency KHz MHzSupported timing for PC input Supported timing for Hdmi Hdcp input HDMI/DVI Supported timing for Video and S-Video input Supported timing for Component-YPbPr inputSupported 3D signal for Hdmi Hdcp input Video timingPC timing SXGA85 Supported 3D signal for D-SUB inputSupported 3D signal for Video and S-Video input Patents Limited warrantyCopyright DisclaimerFCC statement for the United States only Warranty and Copyright information For UK only CE DOC KONFORMITÄTSERKLÄRUNG Konformitetsdeklaration Uyum Beyani Deklaracija O Usklaĉenosti Overensstemmelseserklæring Vaatimustenmukaisuusvakuutus Weee directive Directiva Weee Ⱦɢɪɟɤɬɢɜɚ Weee Dyrektywa Weee Directiva REE Weee direktiva ȄįȘȖȓĮ Weee For Korea WLAN/BT module Warranty and Copyright information Weee UAE Singapore