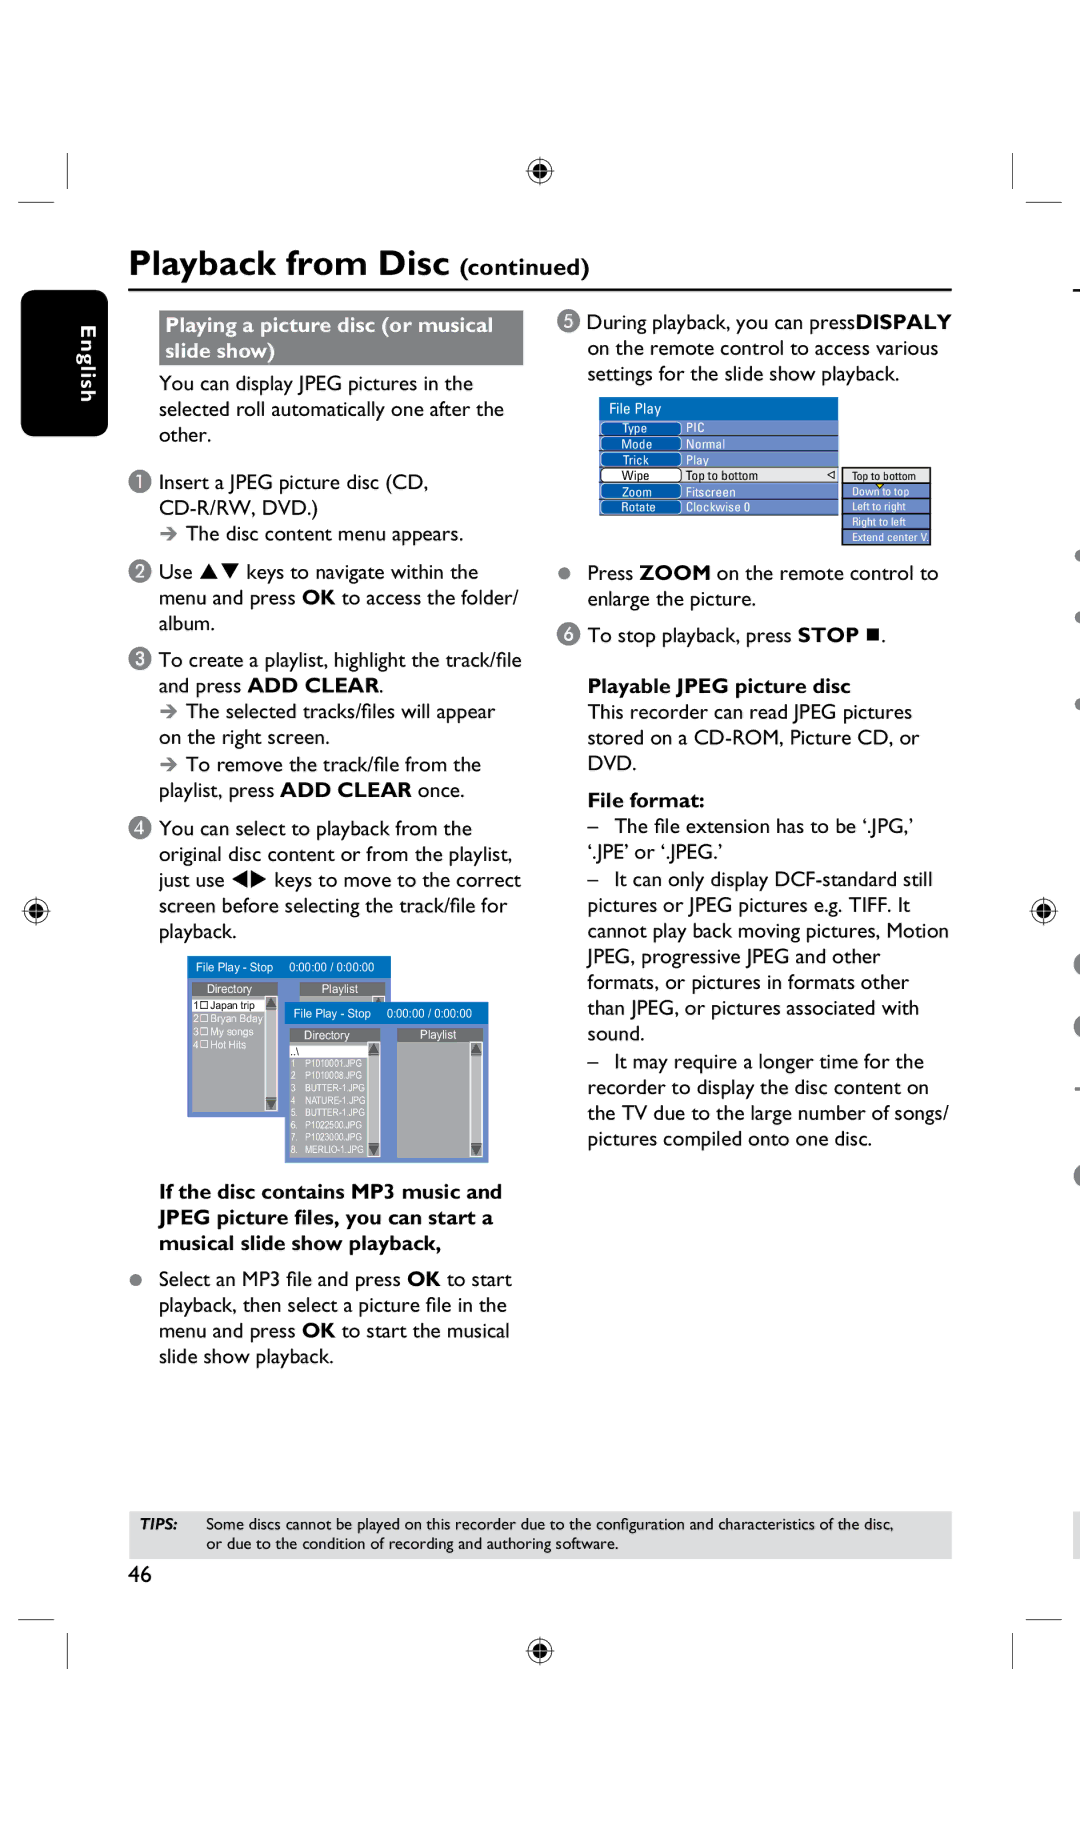
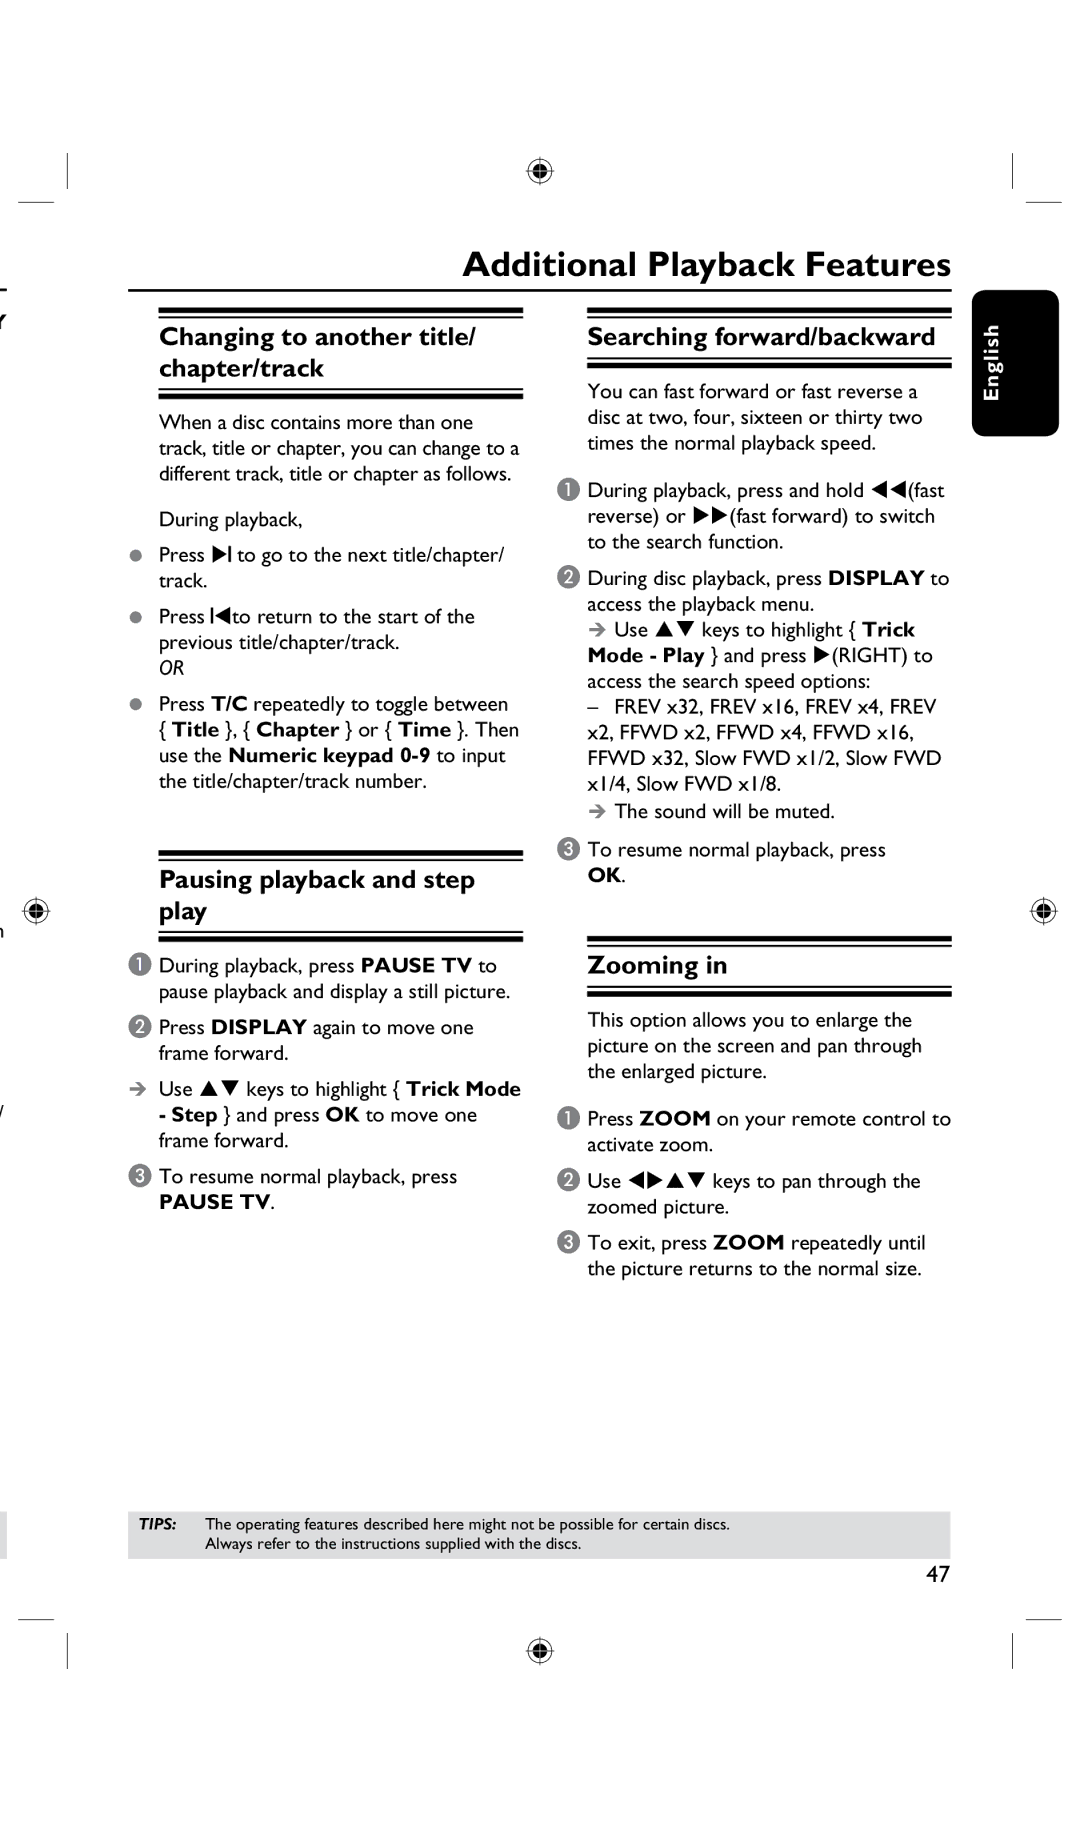
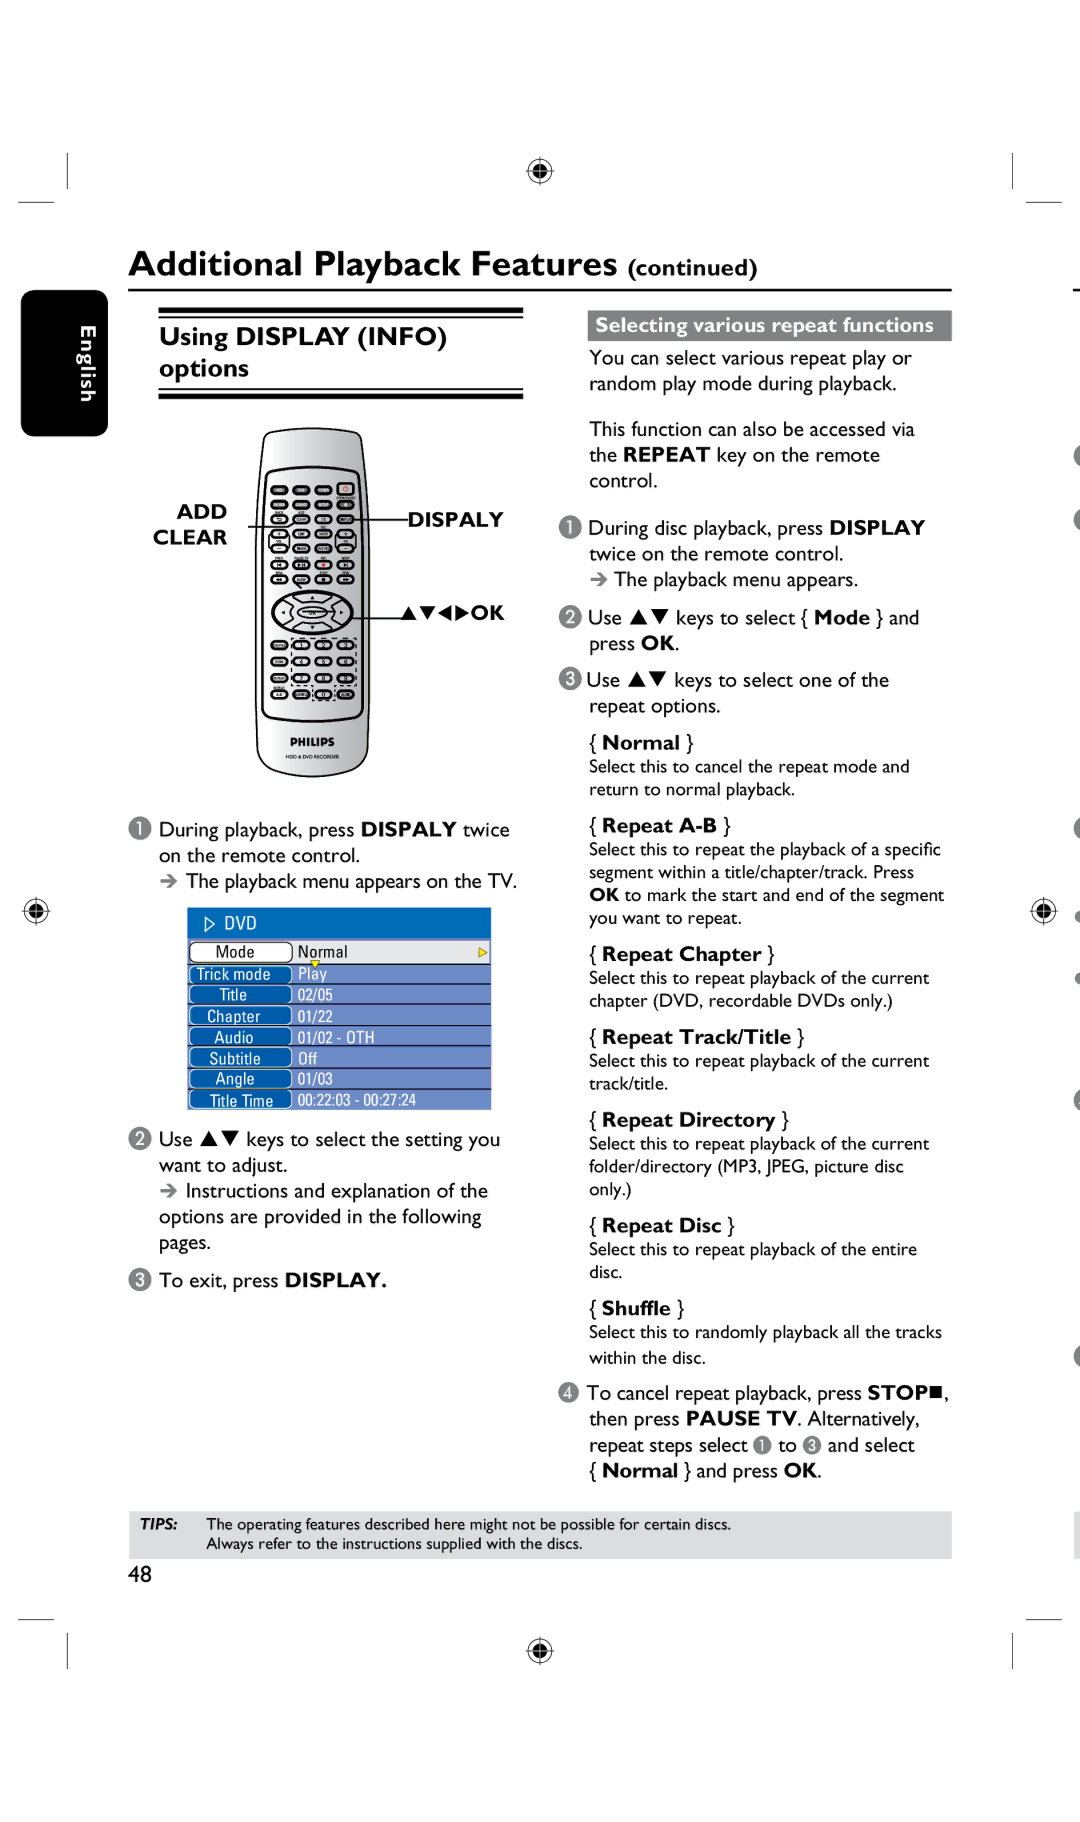
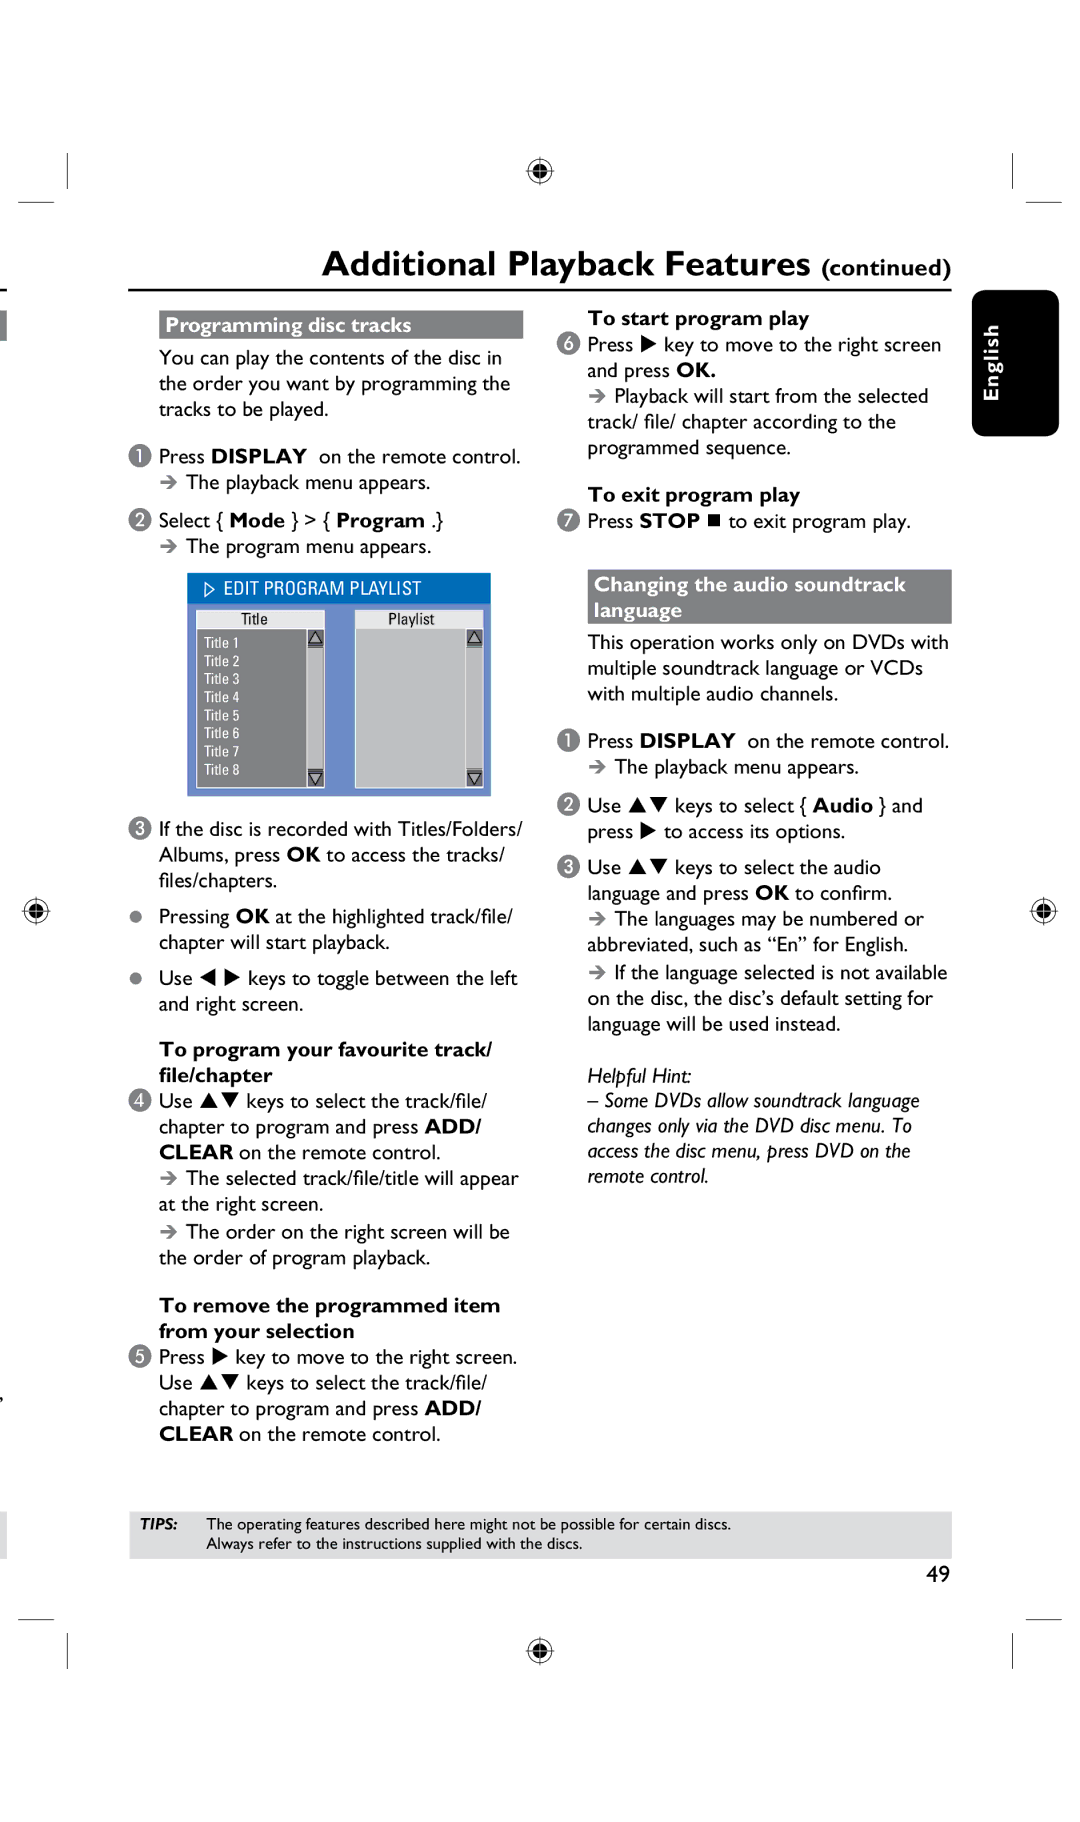
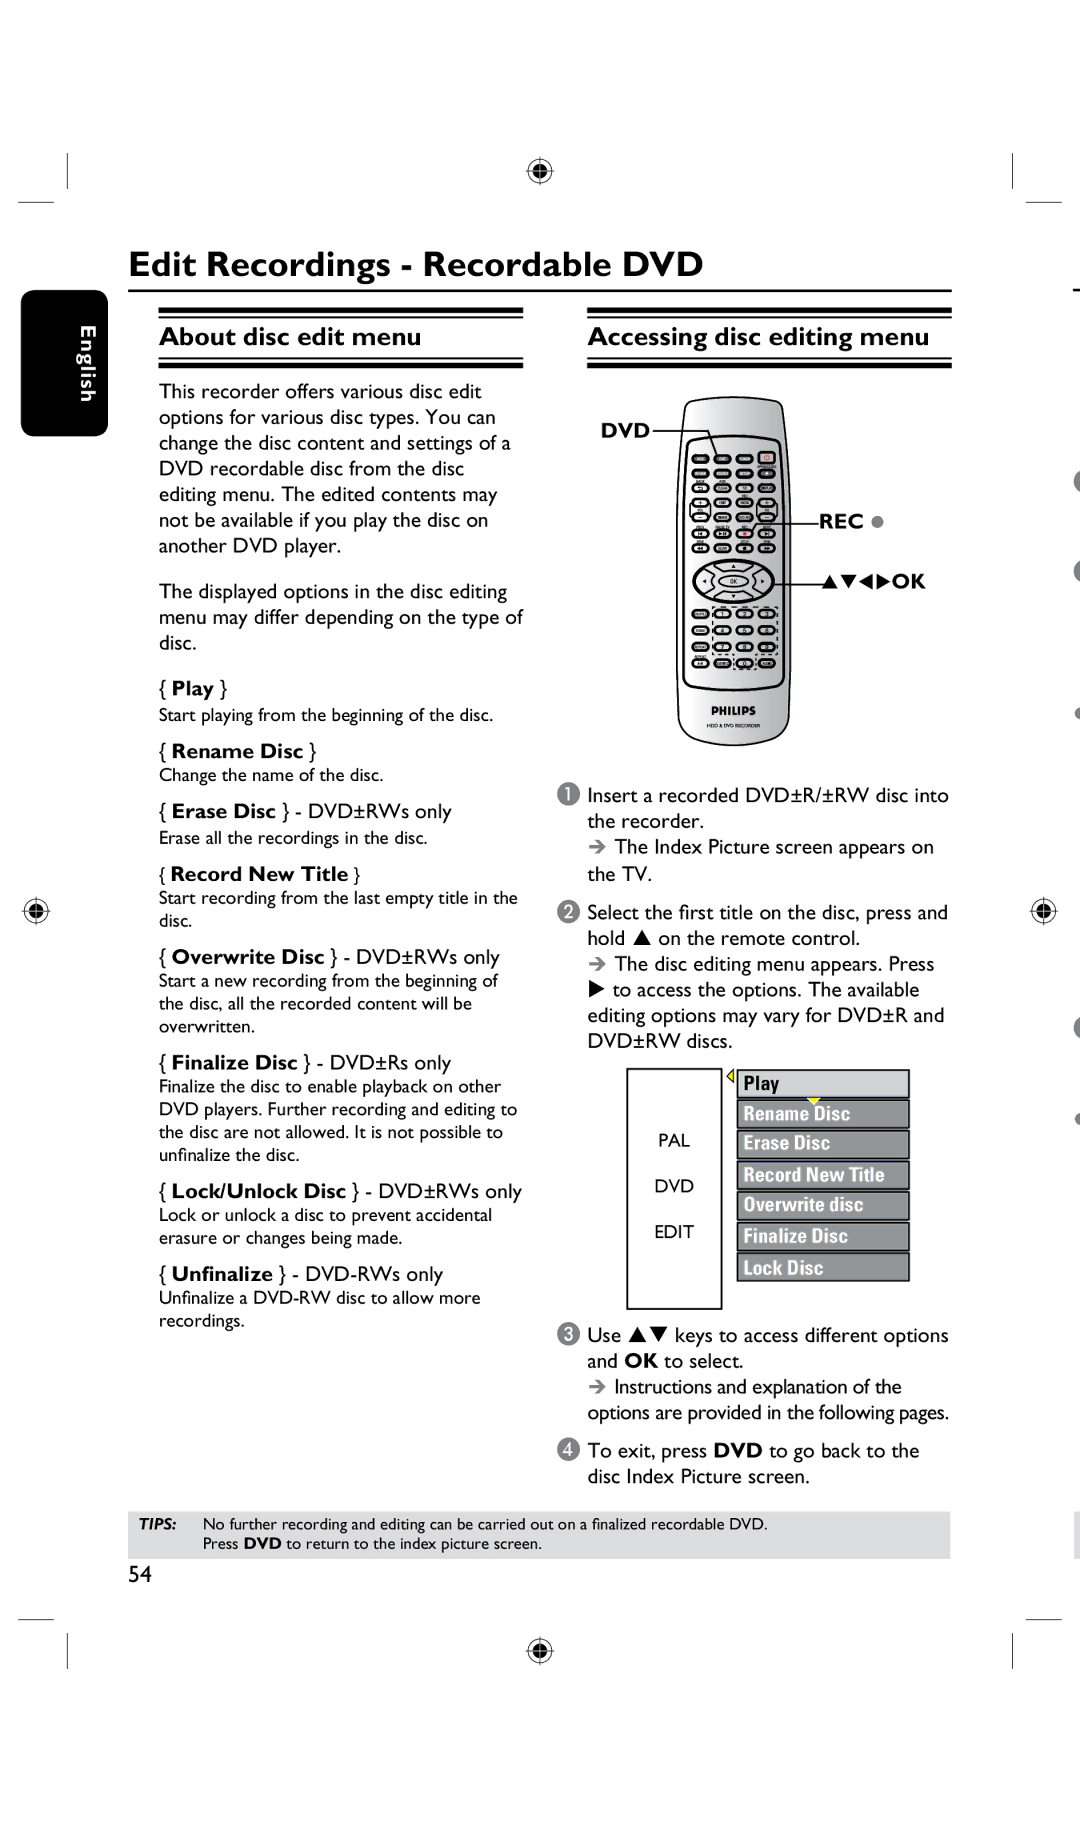
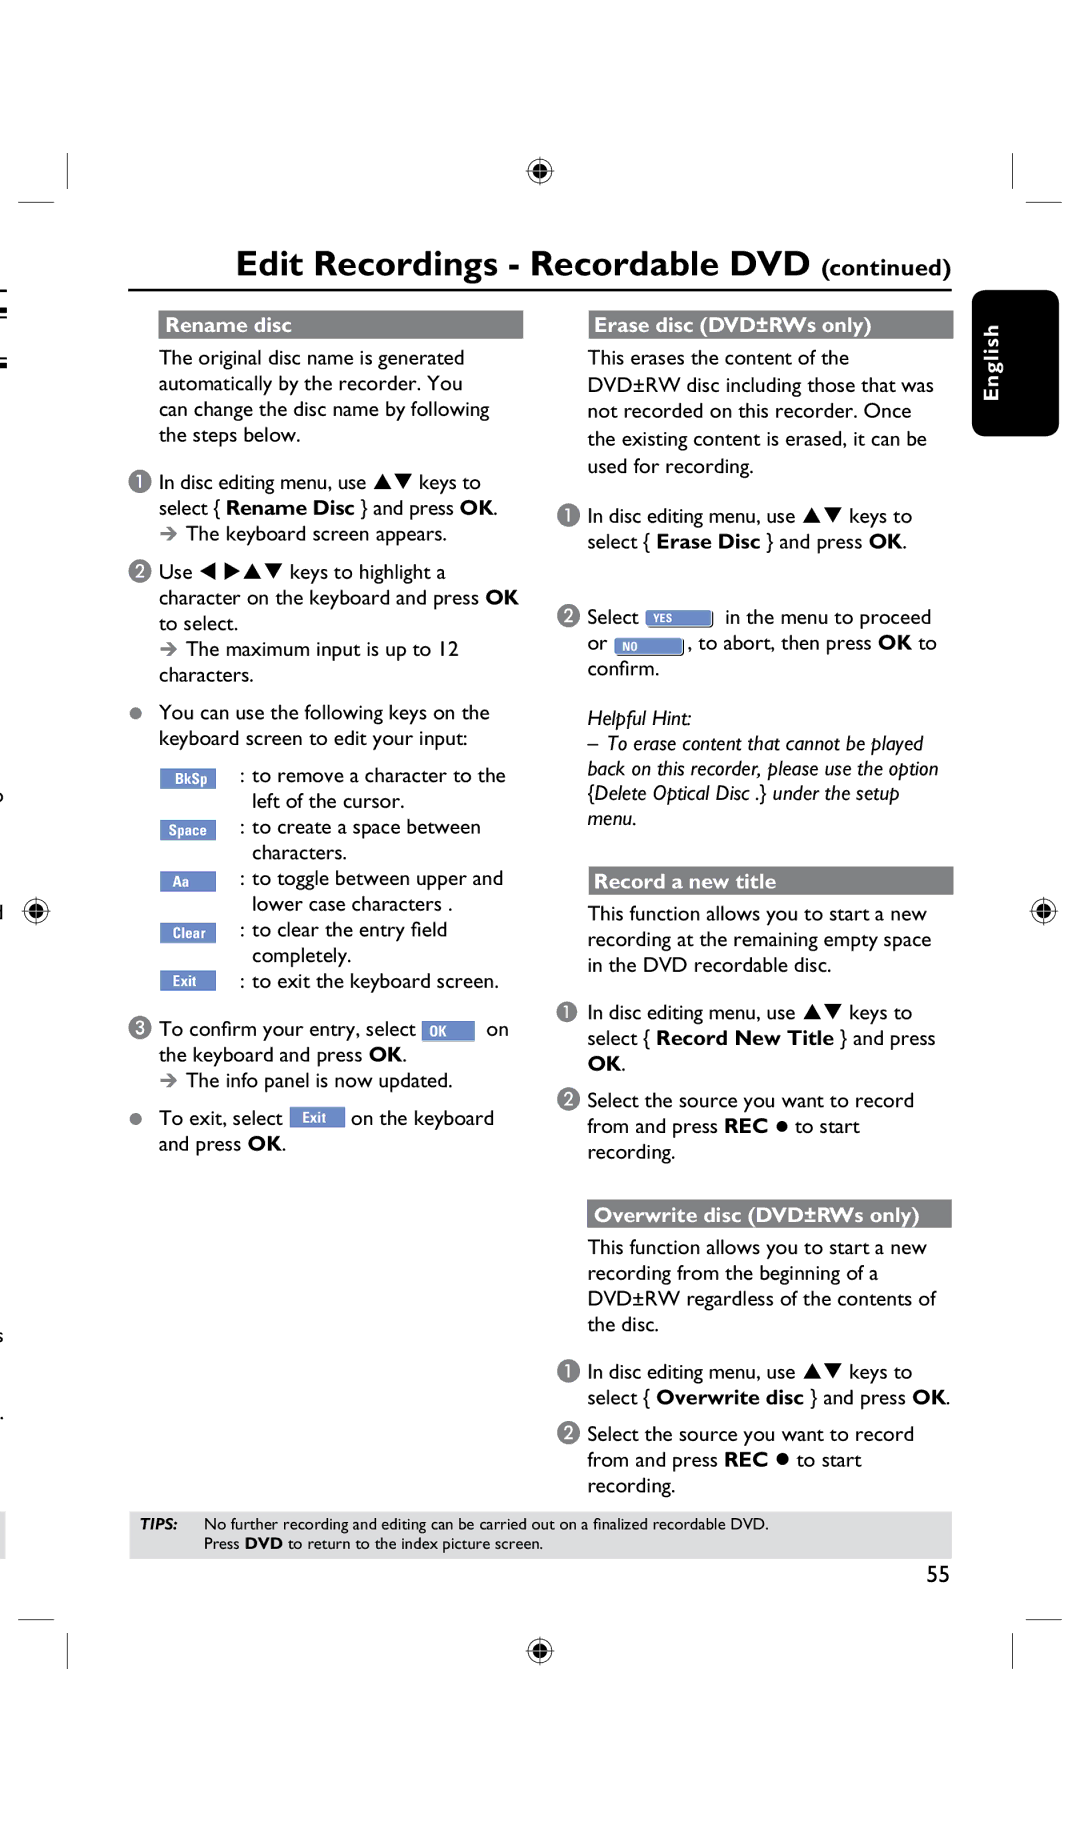
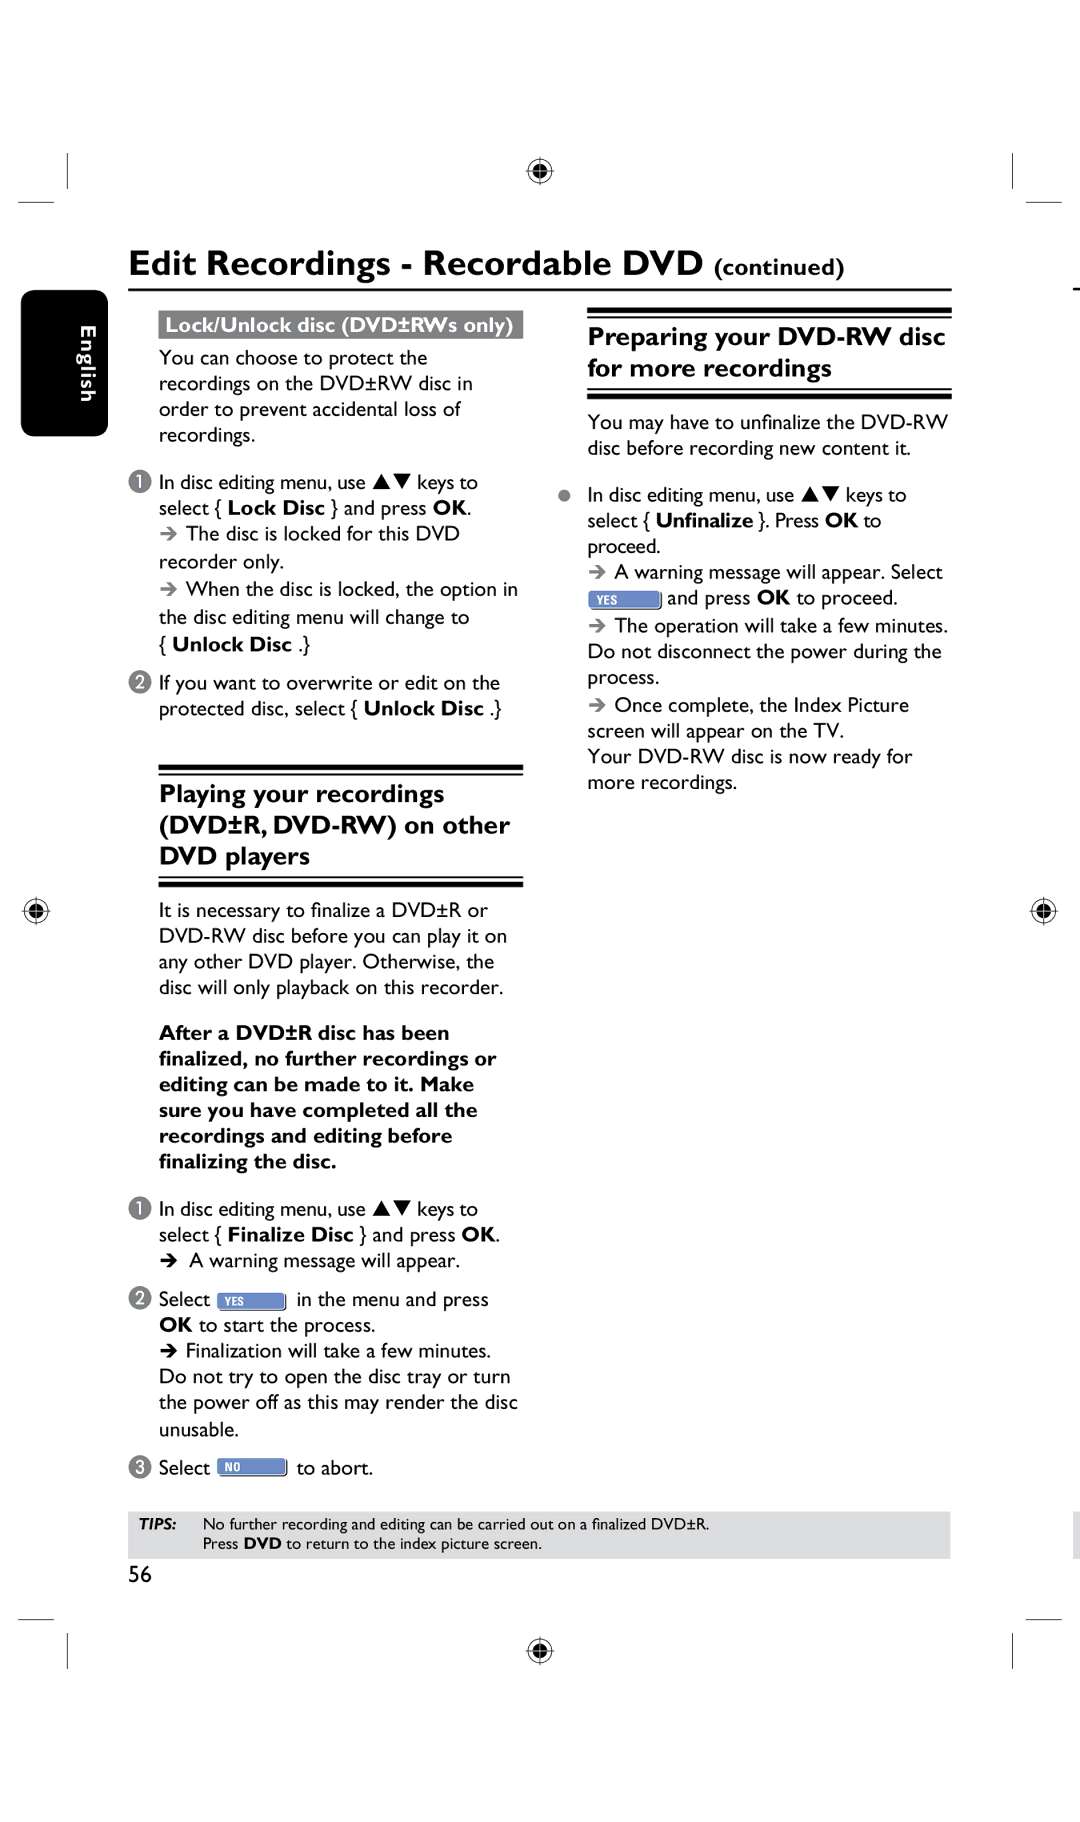
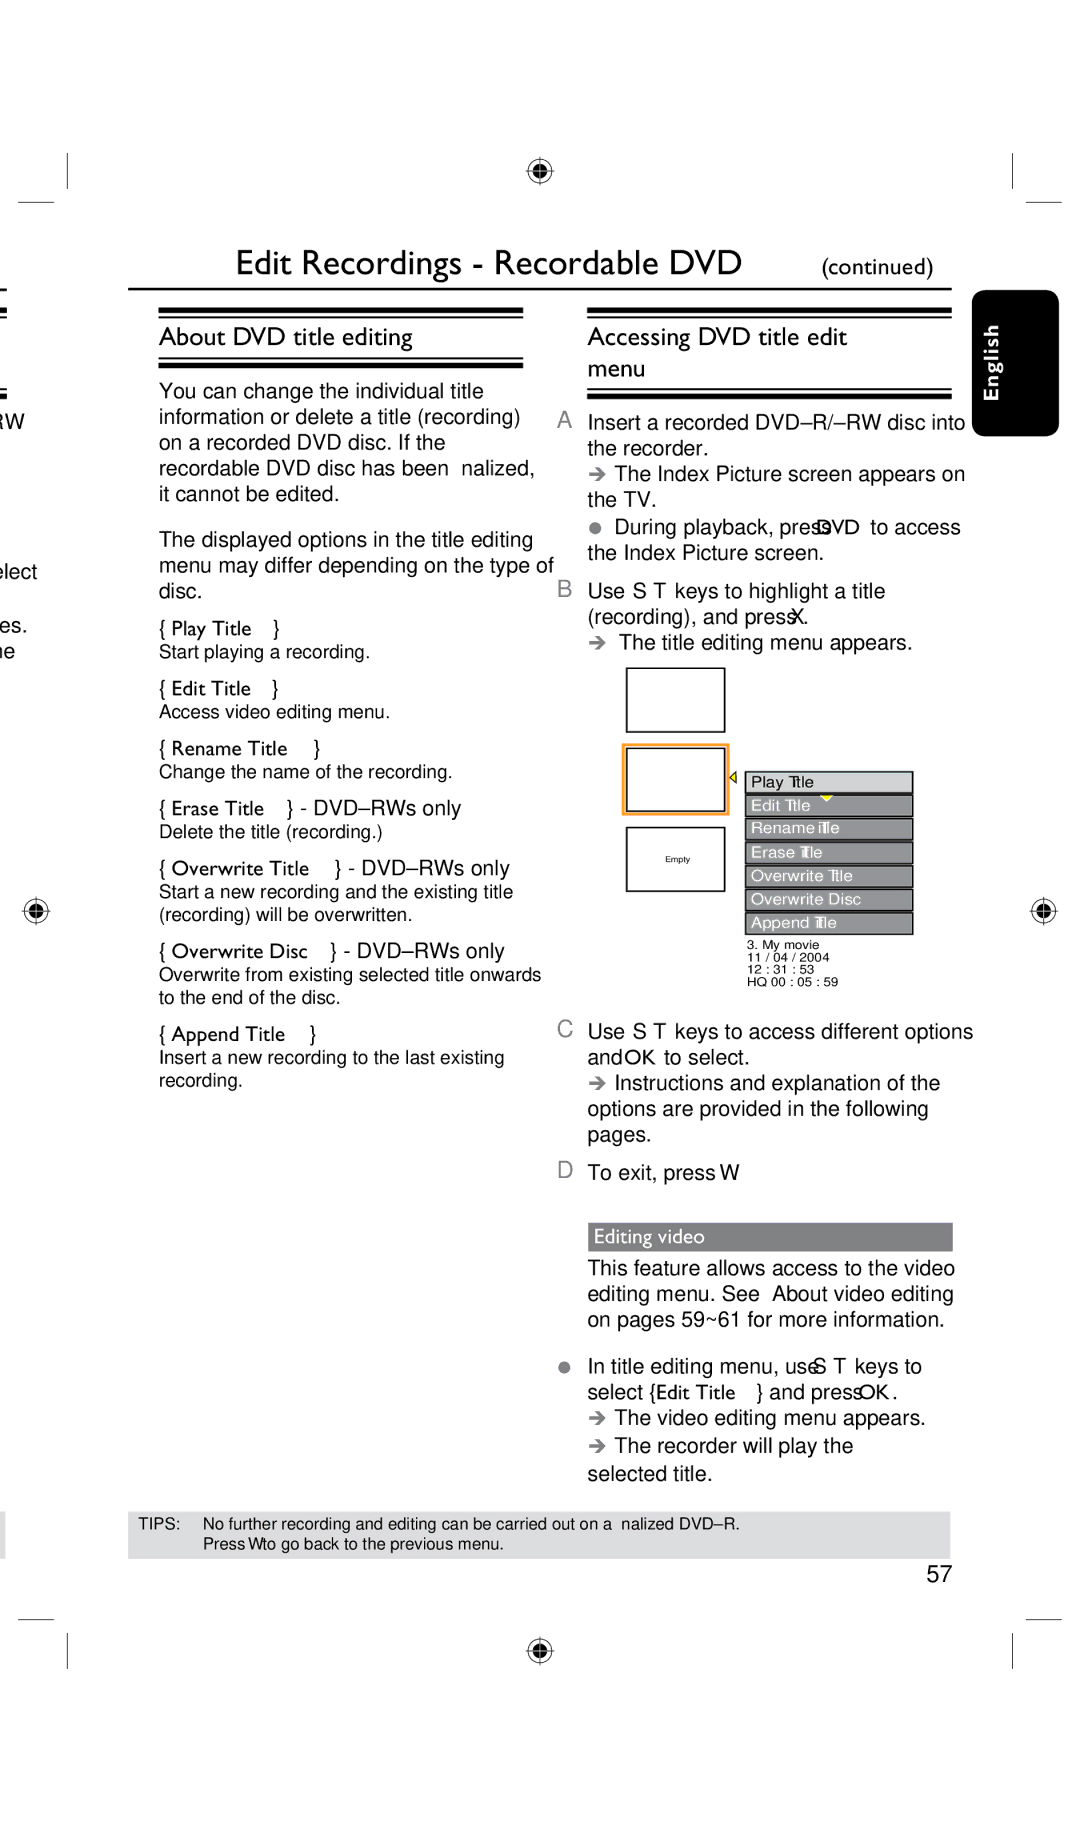
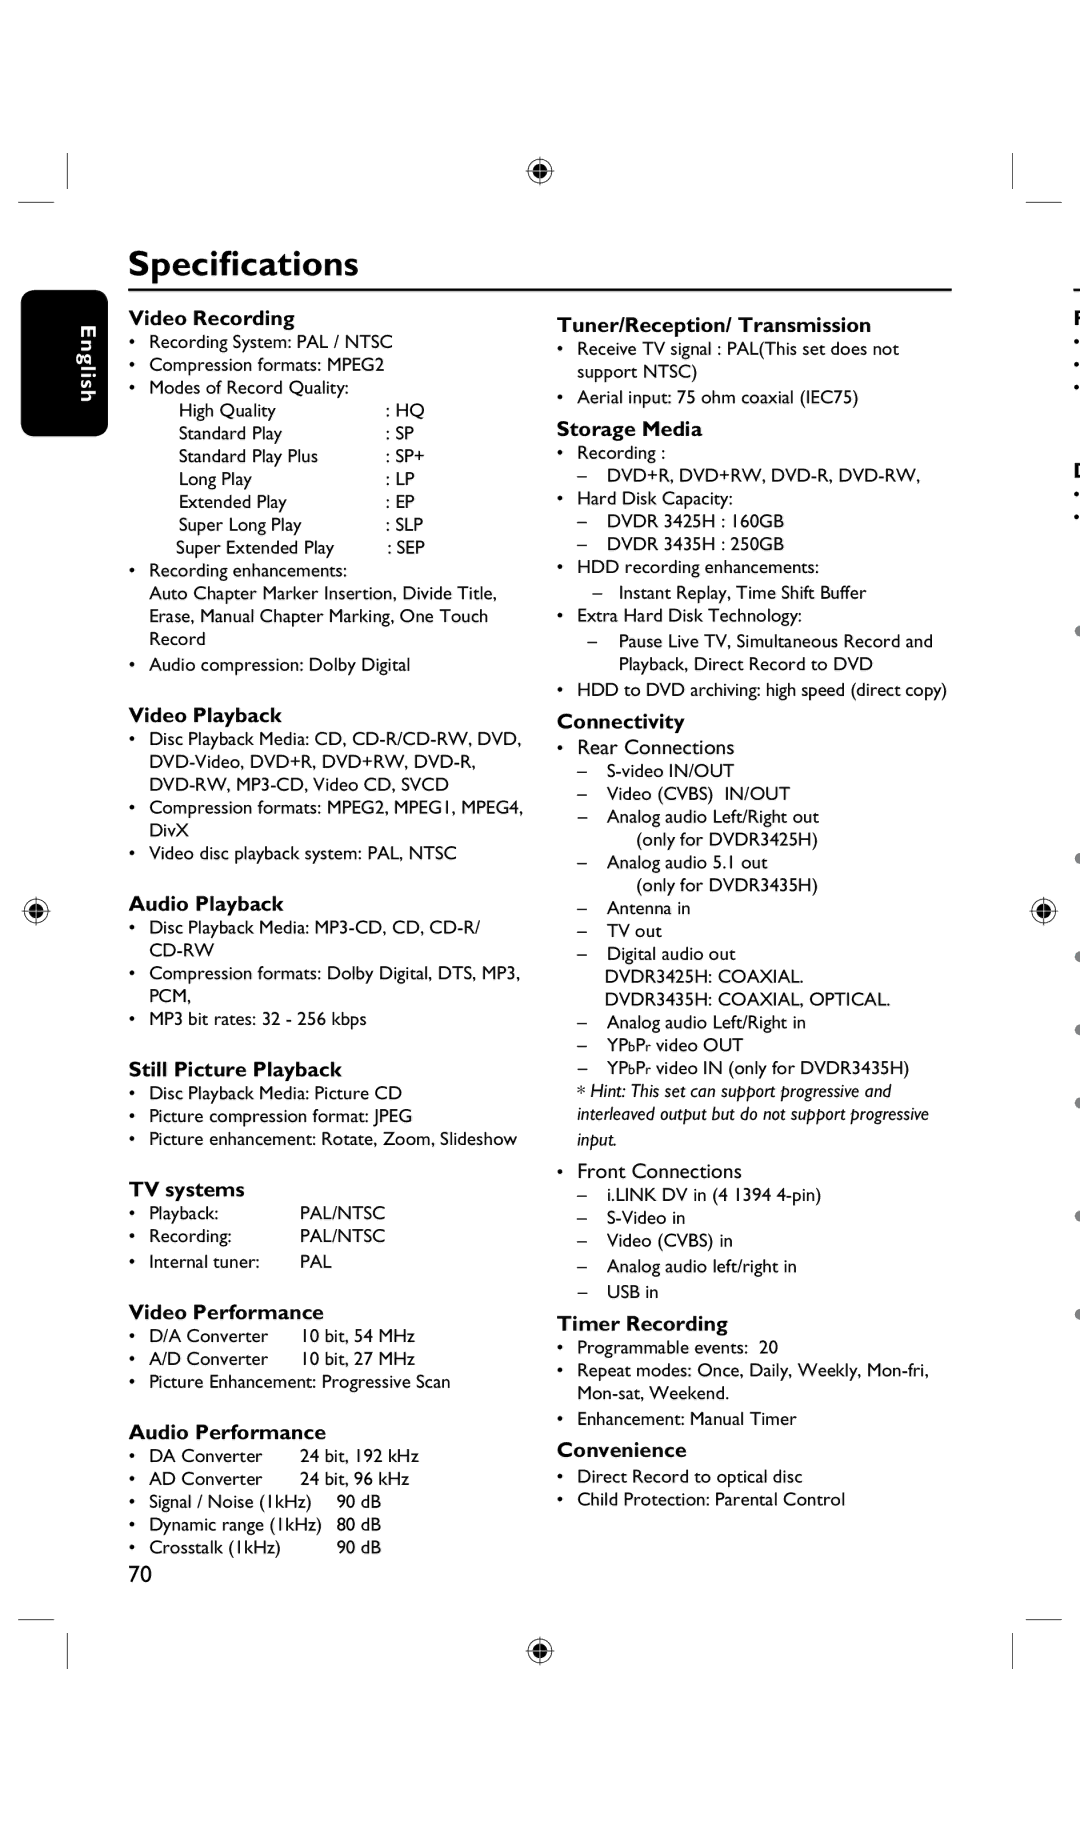
Philips DVDR3435H/93 Rename a title, Lock/Unlock a title, For details, see Parental Rating Level

Page 53
OK OK

Edit Recordings - HDD (continued)

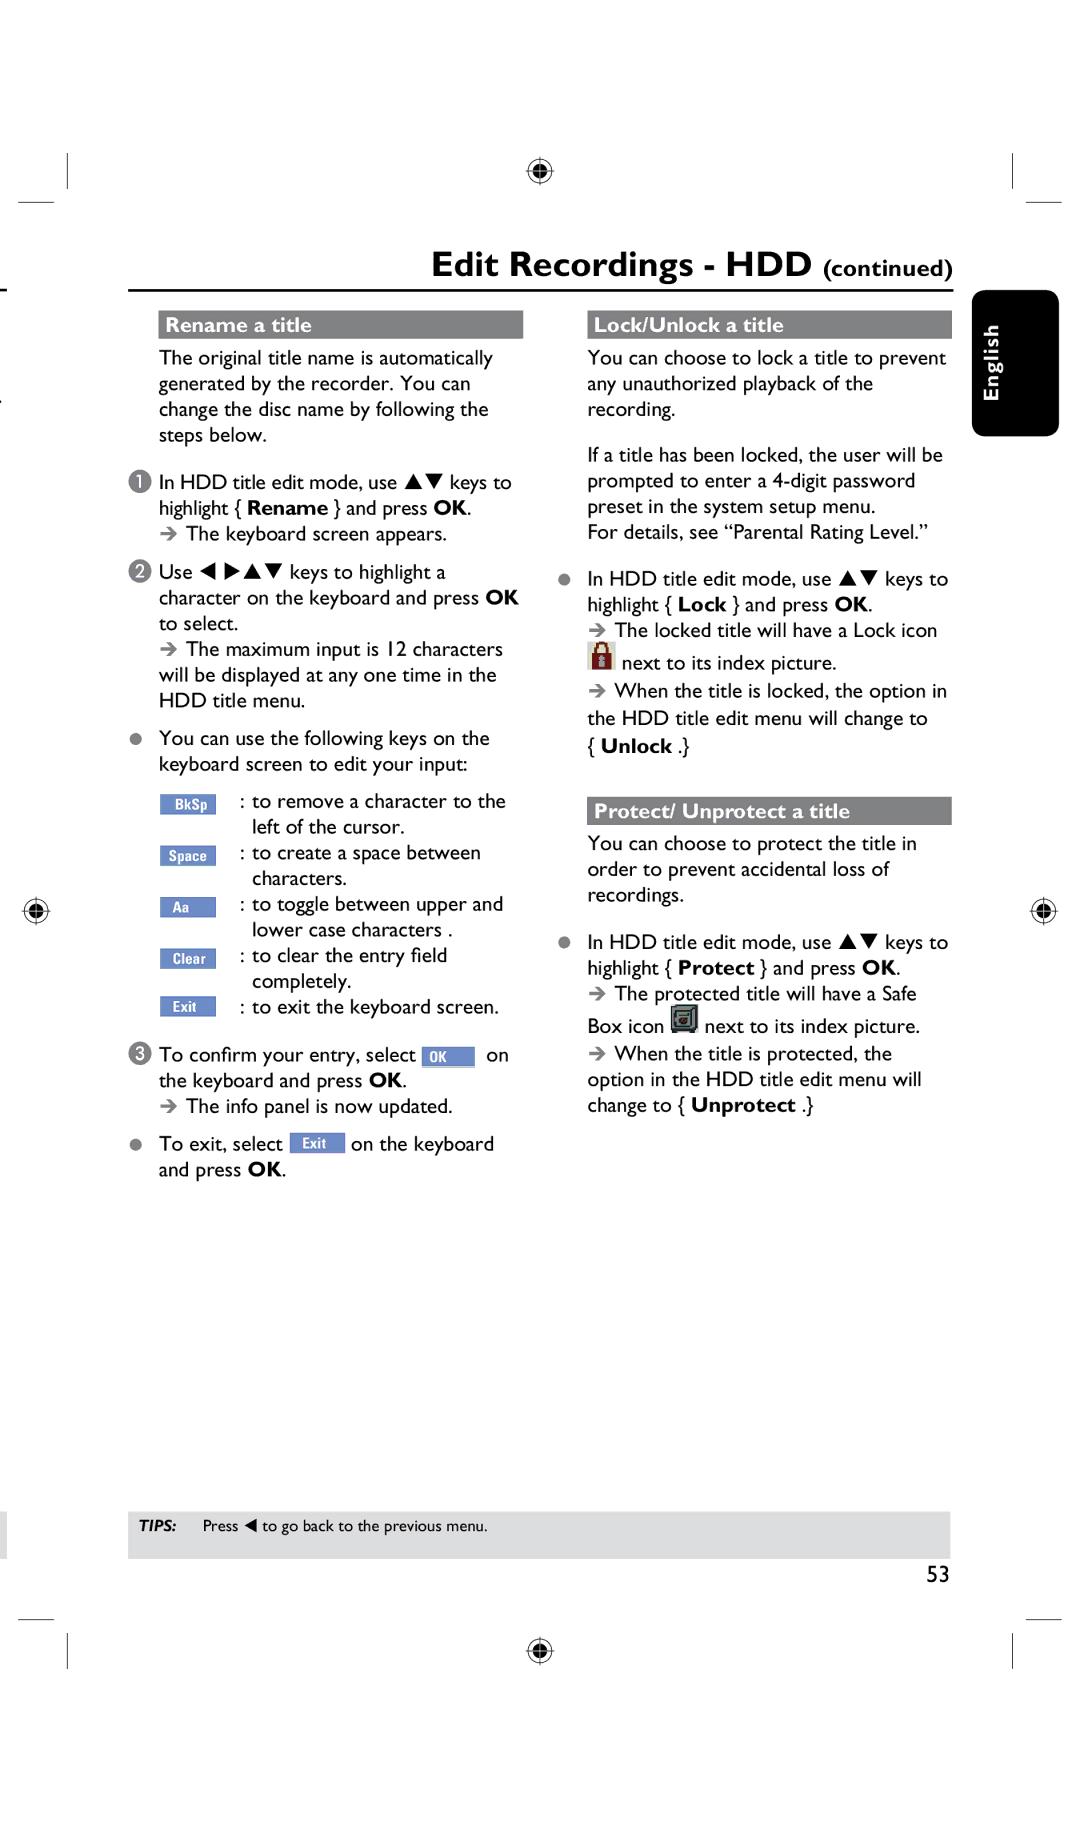
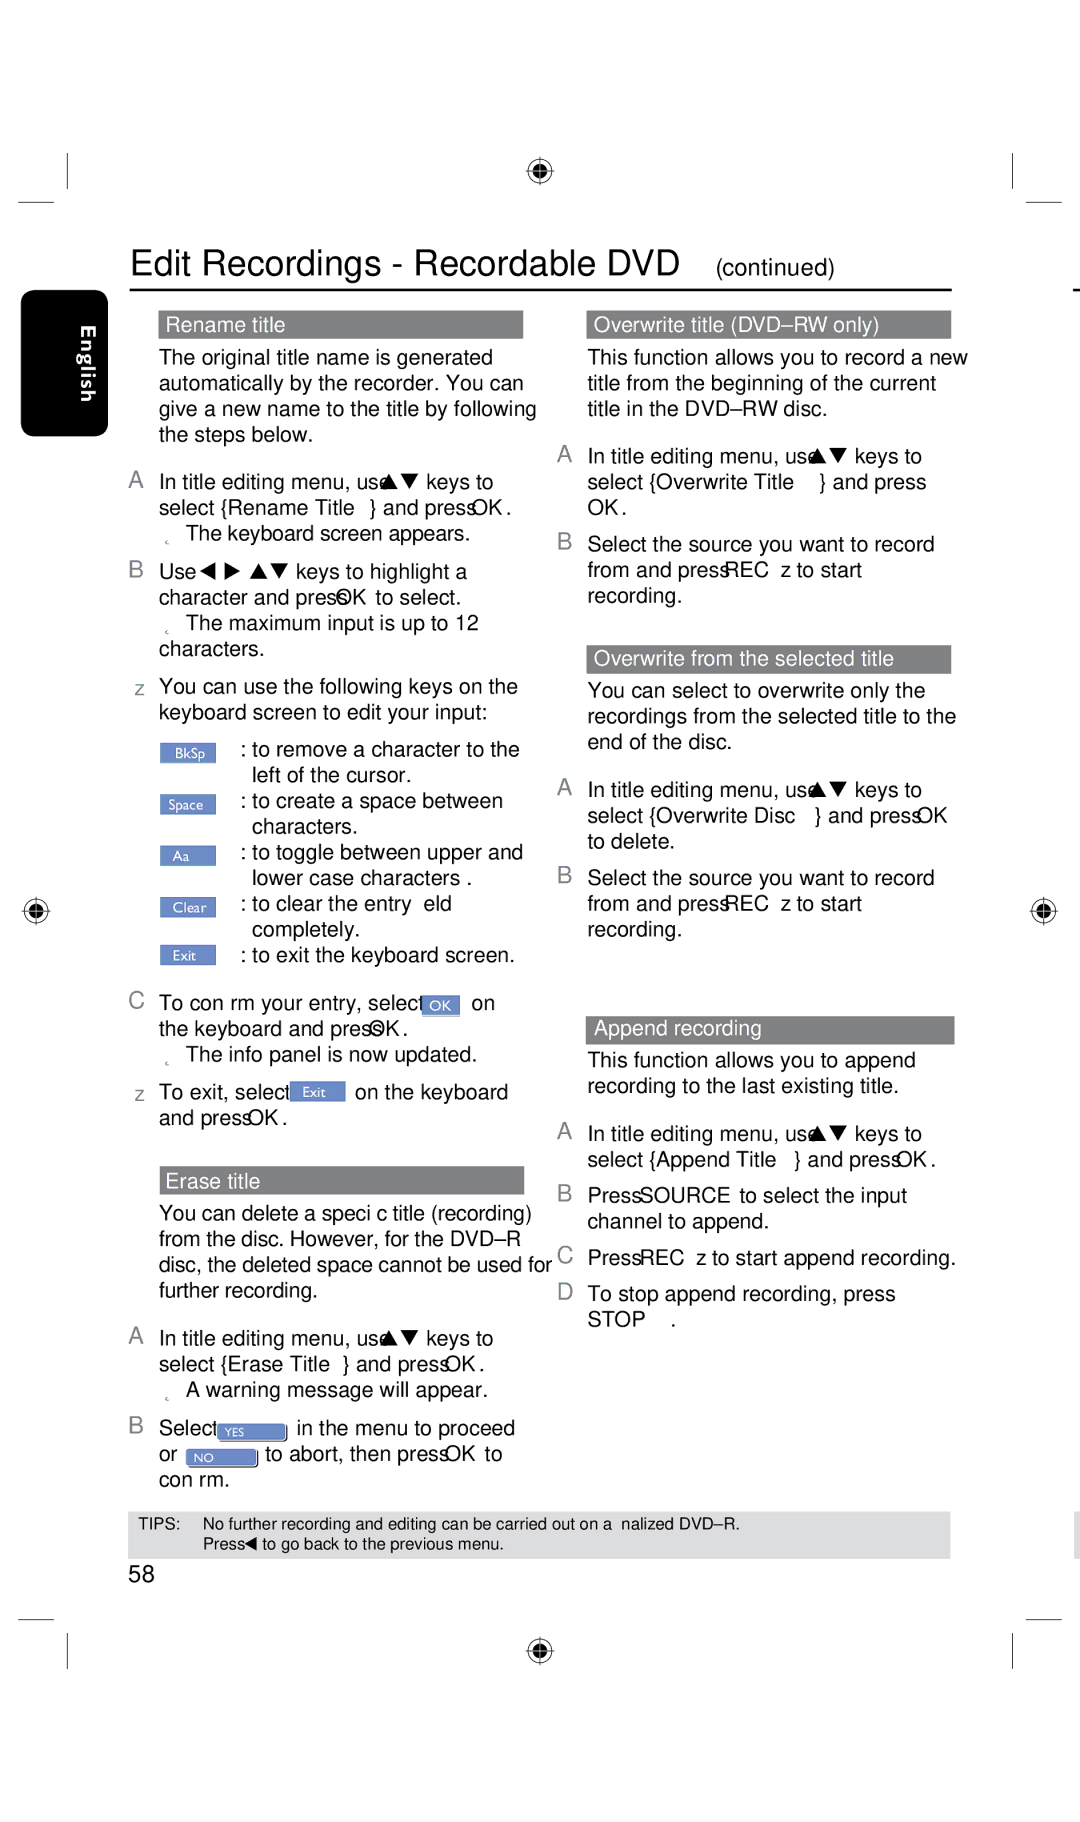
Rename a title

The original title name is automatically

.generated by the recorder. You can change the disc name by following the steps below.

A In HDD title edit mode, use  keys to highlight { Rename } and press OK.

The keyboard screen appears.

B Use   keys to highlight a character on the keyboard and press OK to select.

The maximum input is 12 characters will be displayed at any one time in the HDD title menu.

You can use the following keys on the keyboard screen to edit your input:

BkSp : to remove a character to the left of the cursor.

Space : to create a space between characters.

Aa : to toggle between upper and lower case characters .

Clear : to clear the entry field completely.

Exit : to exit the keyboard screen.

C To confirm your entry, select on the keyboard and press OK.

The info panel is now updated.

To exit, select Exit on the keyboard and press OK.

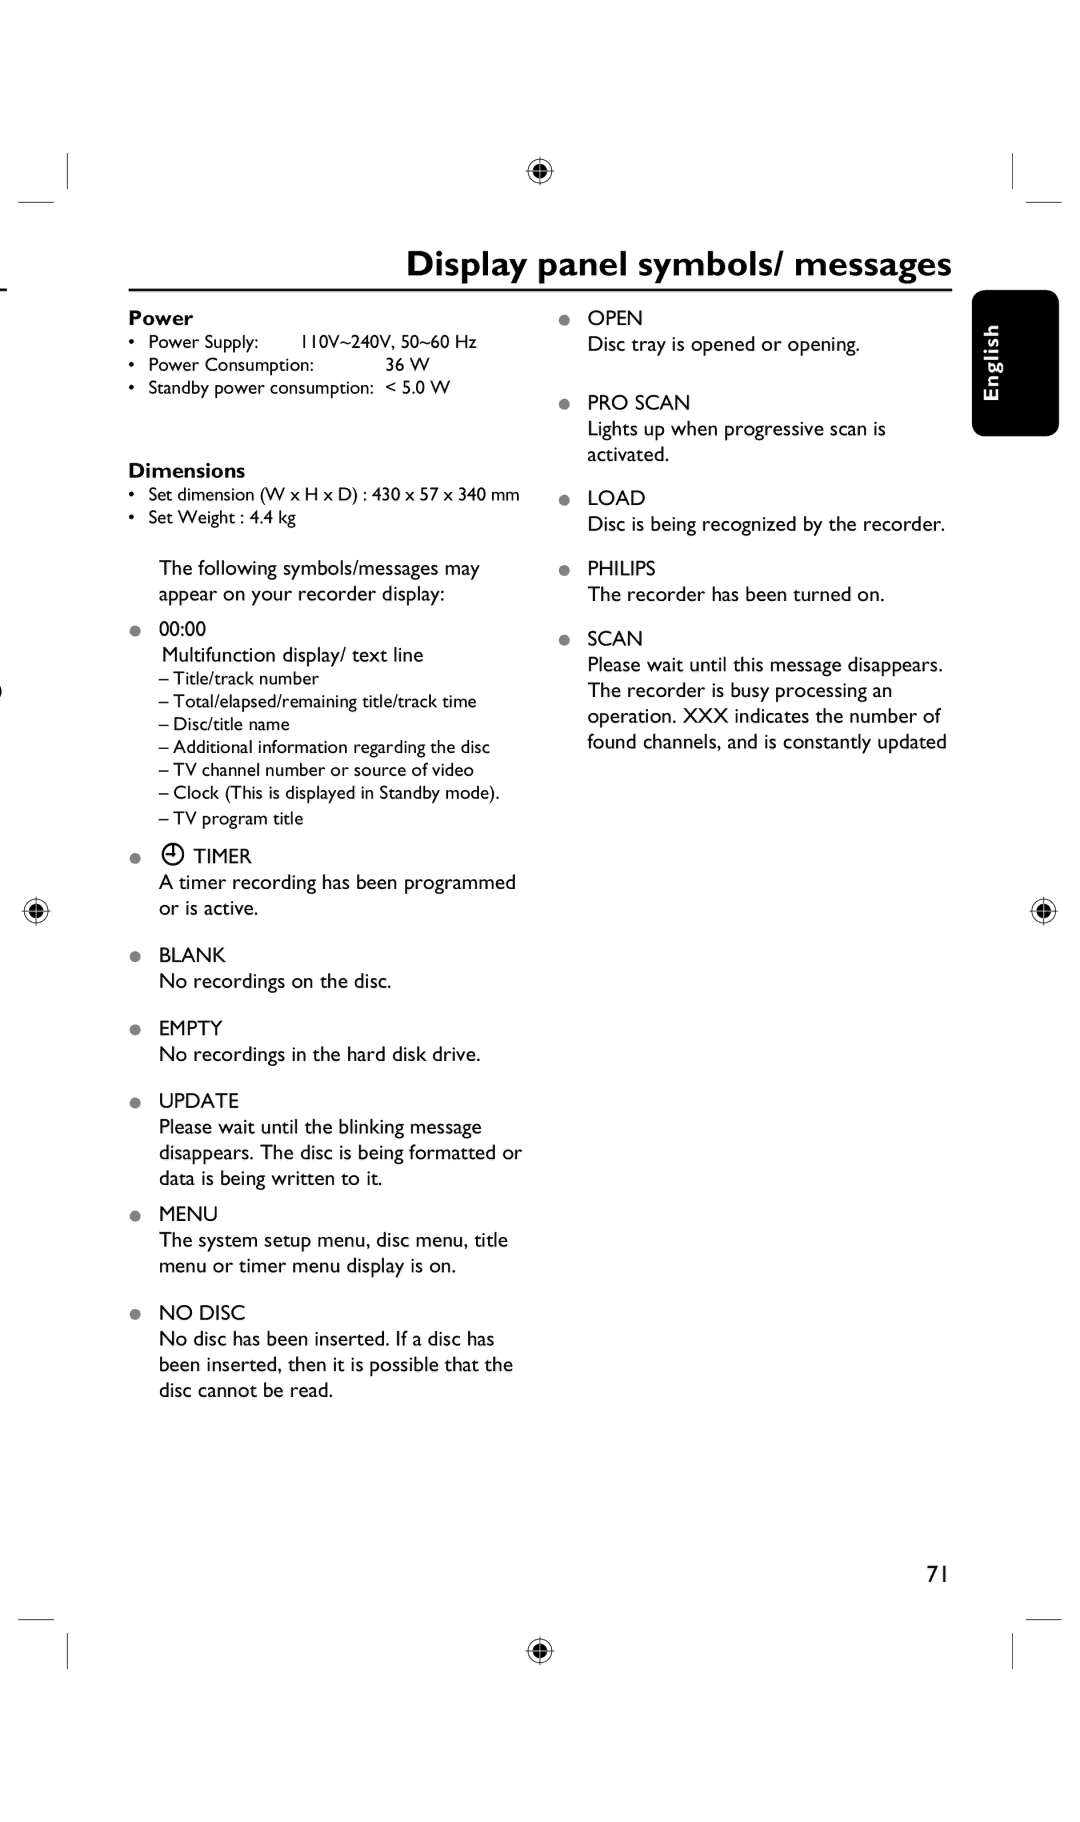
Lock/Unlock a title

You can choose to lock a title to prevent any unauthorized playback of the recording.

If a title has been locked, the user will be prompted to enter a 4-digit password preset in the system setup menu.

For details, see “Parental Rating Level.”

In HDD title edit mode, use  keys to highlight { Lock } and press OK.

The locked title will have a Lock icon

next to its index picture.

When the title is locked, the option in the HDD title edit menu will change to { Unlock .}

Protect/ Unprotect a title

You can choose to protect the title in order to prevent accidental loss of recordings.

In HDD title edit mode, use  keys to highlight { Protect } and press OK.

The protected title will have a Safe

Box icon next to its index picture.

When the title is protected, the option in the HDD title edit menu will change to { Unprotect .}

English

TIPS: Press to go back to the previous menu.

53
Image 53
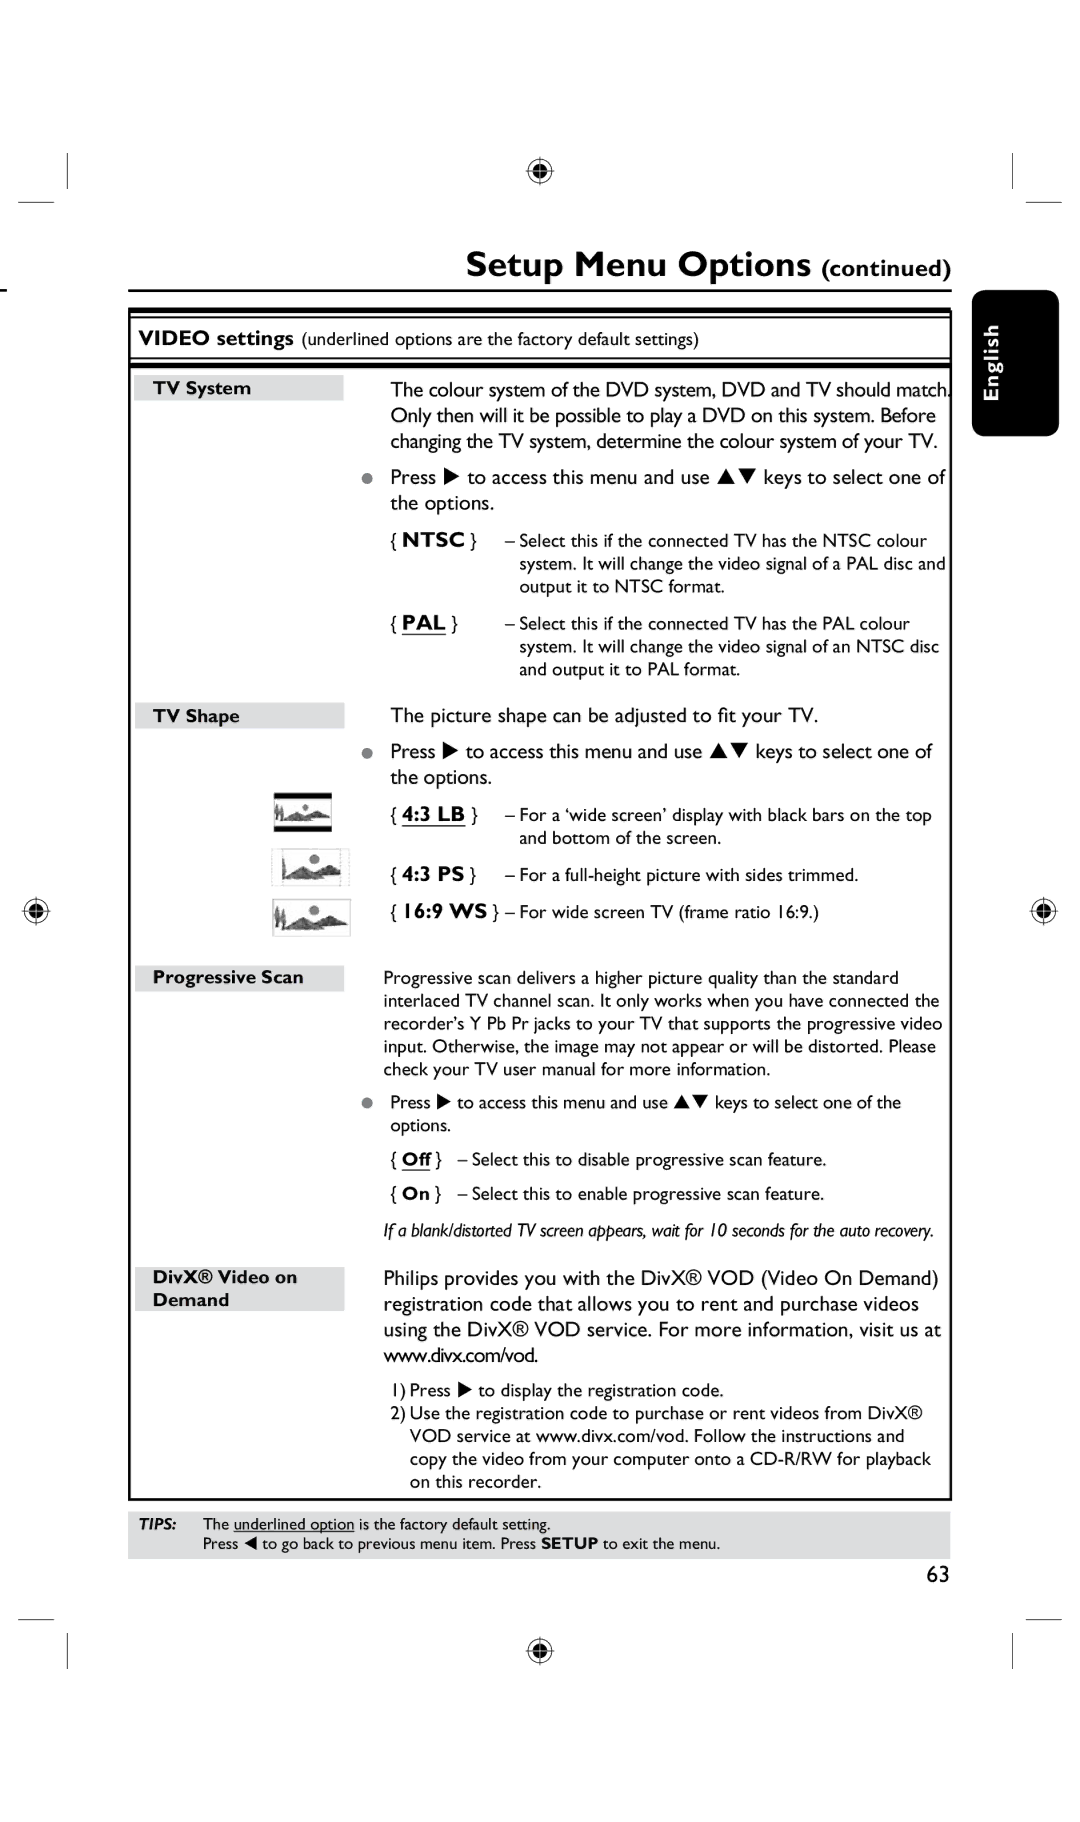
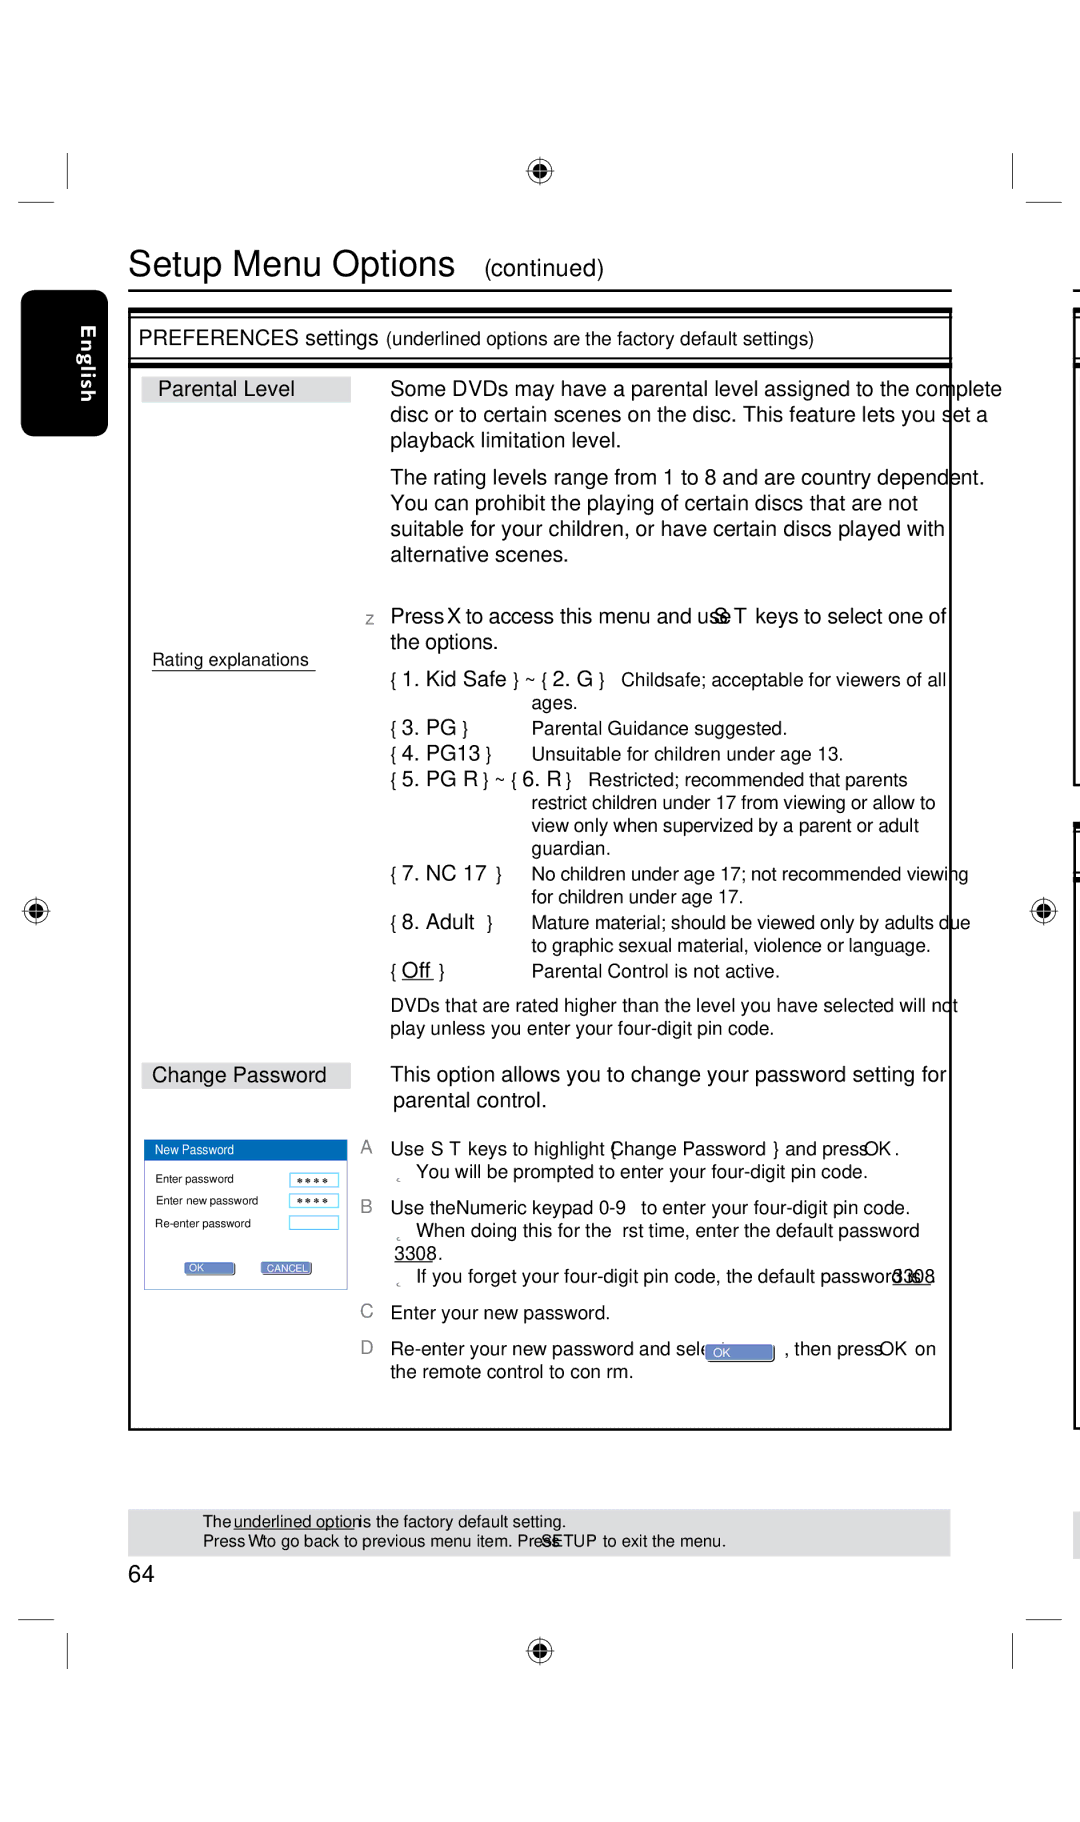
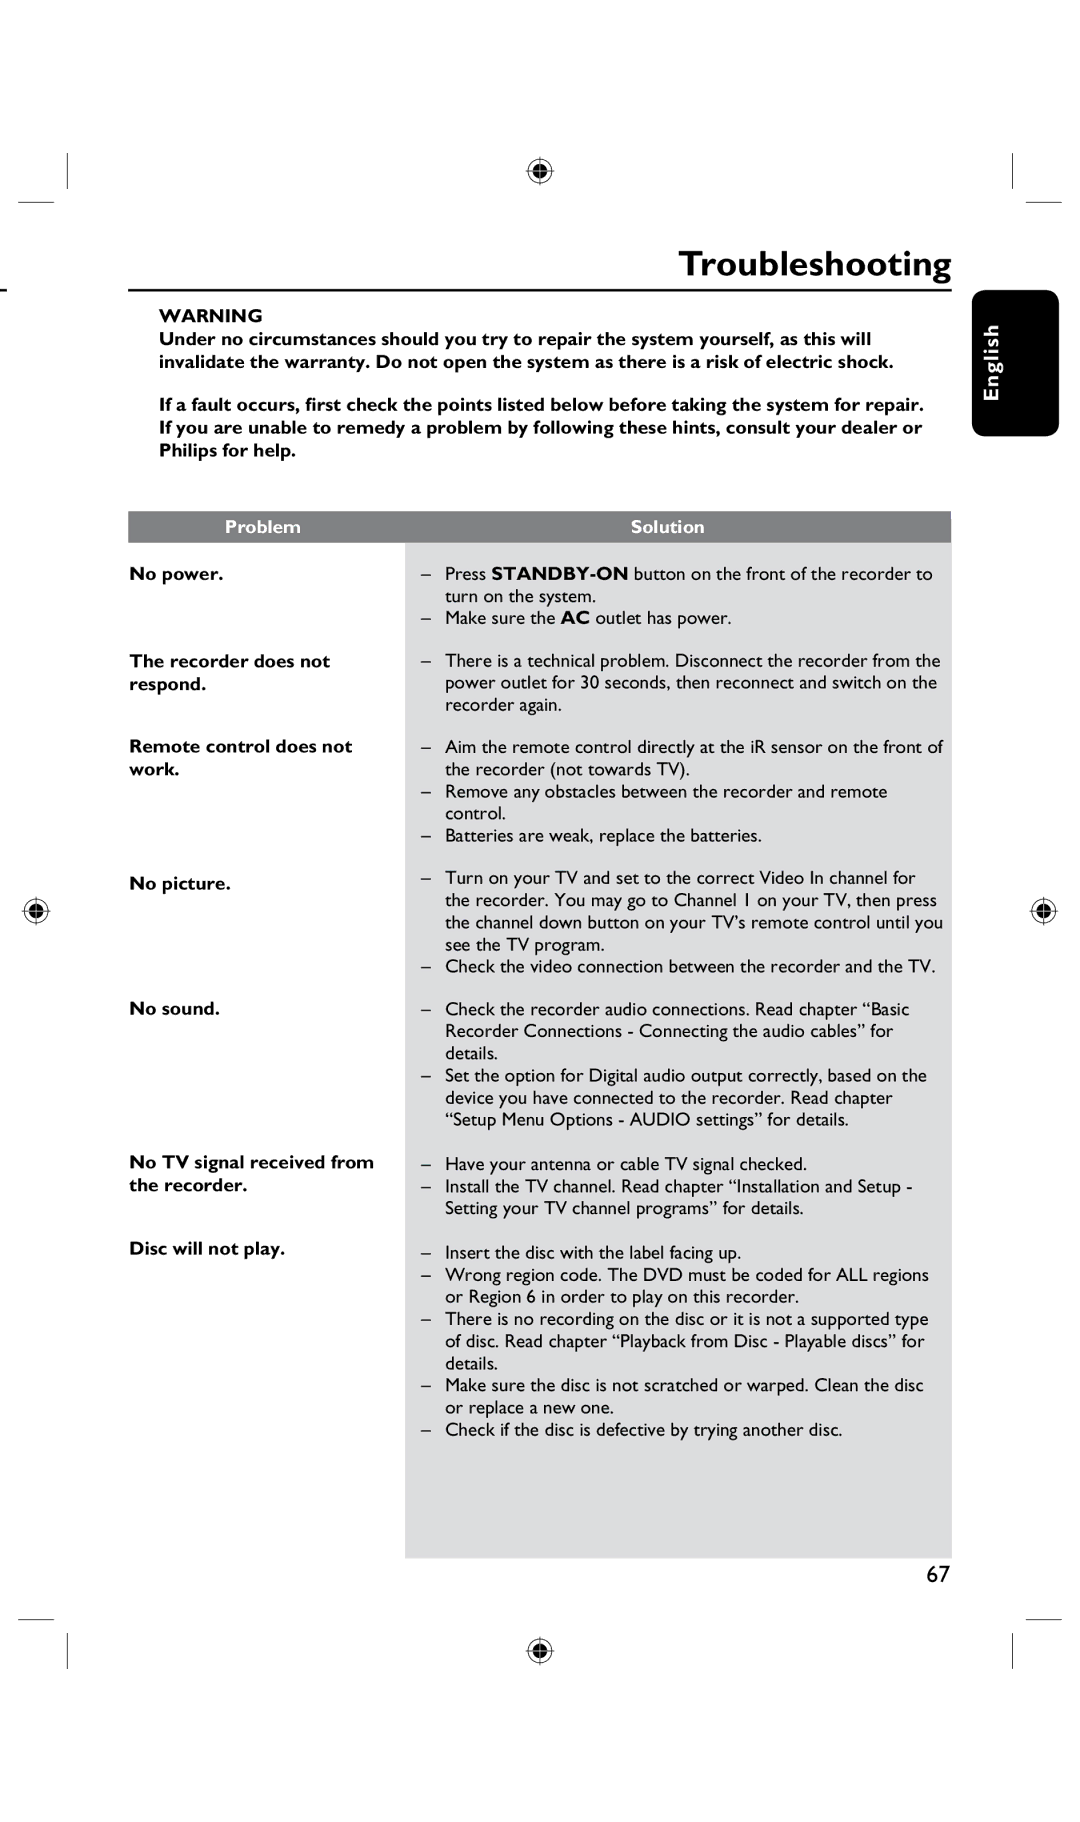
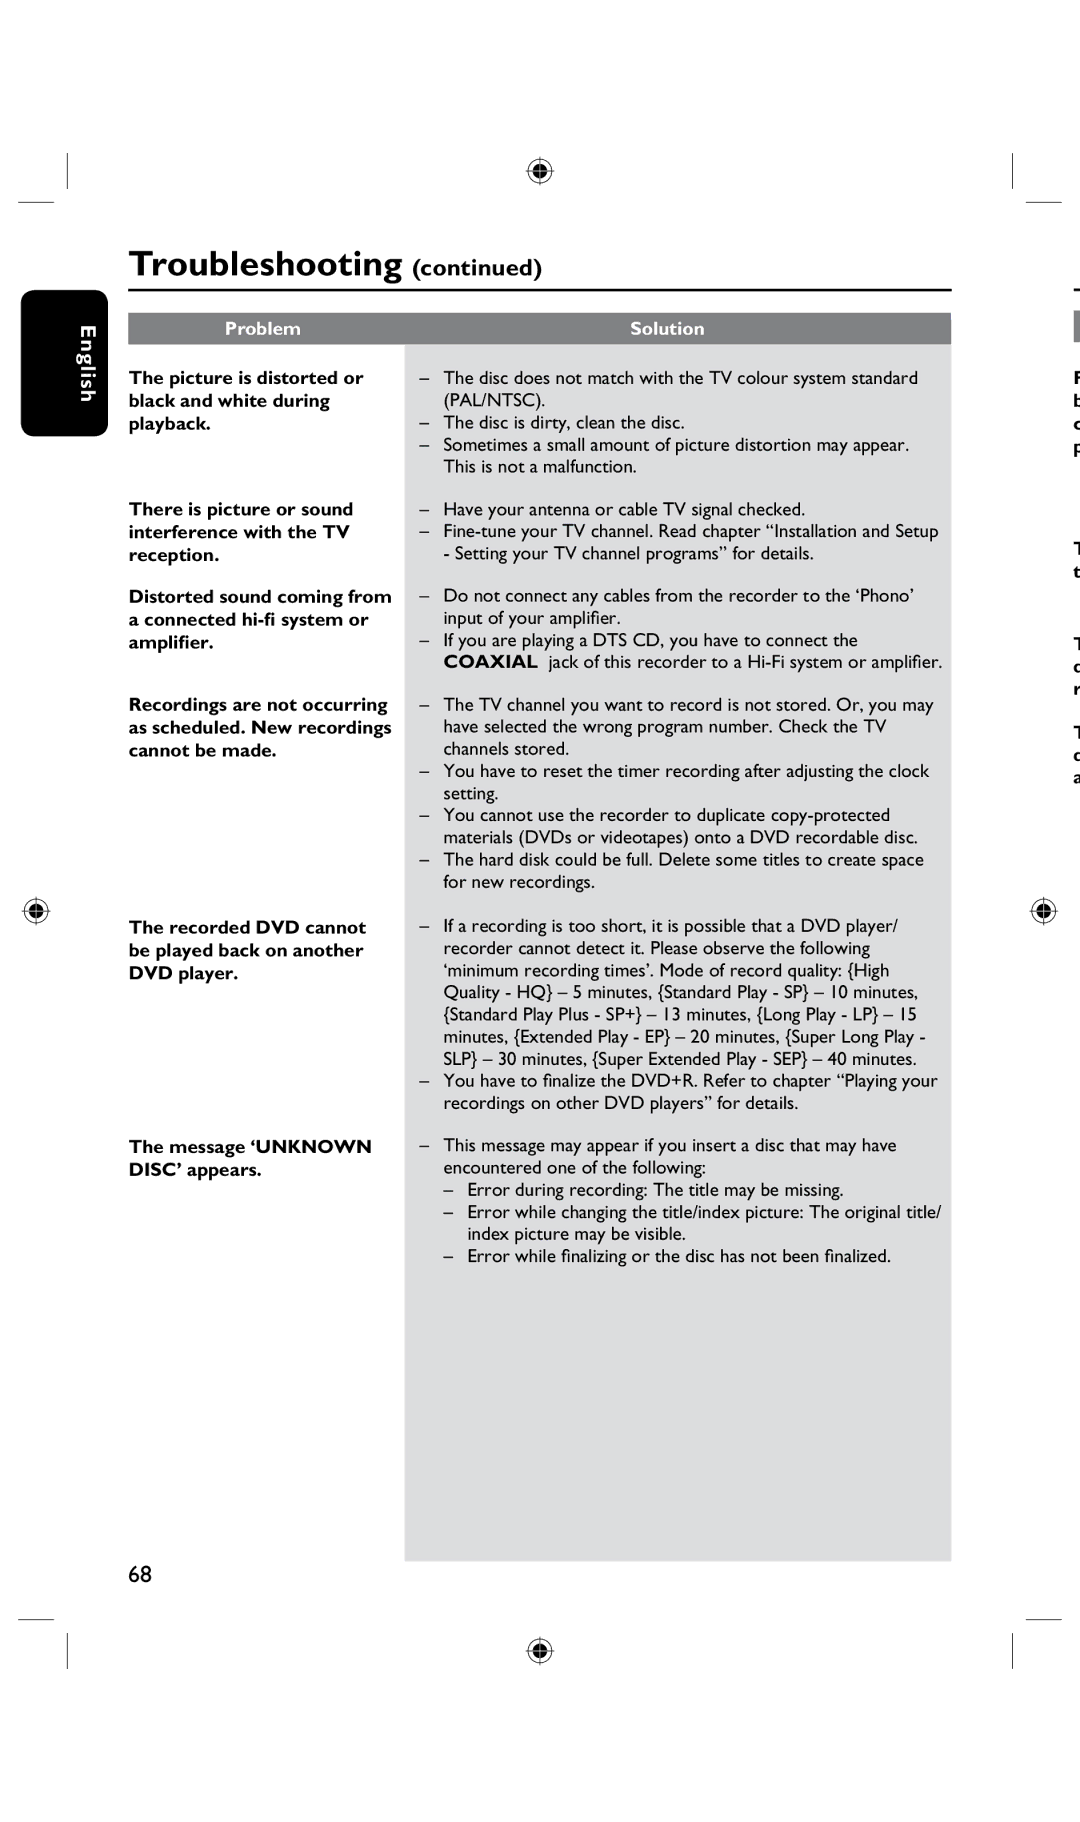
Contents 使用说明书 For Customer Use LaserIndex Engineering or disassembly is prohibited中文(简体) 中文简体 EnglishTable of Contents Table of Contents ‘Time Shift Buffer’ Special Features‘Instant Replay’ ‘Pause Live TV’Frequently Asked Questions Setup precautions Care and Safety InformationCleaning discs HDD Hard Disk Drive handling careGeneral Information Accessories suppliedIntroduction Region codesRemote Control Timer REC ModeSource DV/USBInserting Batteries Using the remote control to operate the systemGetting Started Main Unit Basic Recorder Connections Connecting the antenna cablesOption 1 Using Video Cvbs jack Connecting the video cableOption 2 Using S-Video jack excellent picture quality Option 3 Using Component Video jack best picture qualityThis connection enables you to listen to the sound Connecting the audio cablesOption 1 Using an Audio cable Option 2 Using a Coaxial cableCannect the Audio OUT for Basic Recorder Connectionsonly for DVDR3435HCenter and Subw jack to Corresponding inputs on yourOptional Connections Connecting to a Cable Box or Satellite ReceiverOther similar device Connecting to a VCR orConnect the Video IN/L-AUDIO-R VIDEO/AUDIO OUT onDV in jack Connecting a camcorder to the front jacksOption 2 Using the S-VIDEO In or Video In jack Setting your TV channel programs Installation and SetupSetup Menu General and press  Finding the viewing channelManual Program Press OK on the remote controlAuto Scan Select to sort your stored TV channels To cancel the change, highlight Cancelok Press OKSort Setting the time & date Setting the languageSetup Menu Language and press  to access the menu Setup Menu Date / Time and press  to access the menuSystem Language Language settingsAudio Language Subtitle LanguageControl TV programs Switching on to TV programPause live TV function Instant Replay functionAbout temporary HDD Before RecordingStorage Time Shift Buffer TV programs storedTo exit, press t Accessing the HDD Hard Disk Storage Setup MenuSetup Menu HDD and press  to access the menu Buffer Save Time ShiftHDD Info Space ManagementSetup Menu General and press  to confirm Default Recording settingsDefault Recording Quality Auto Chapter MarkersModify Channel Record ModeAuto Chapter Recording TV programs Record on Hard DiskRecording from a DV camcorder StopçTo record directly to a DVD recordable disc, see Recording from an external device Camcorder/VCR/ DVD playerSource Pause TV REC âTo record directly to a Recordable DVD disc, see Discs for recording Record on DVD Recordable DiscCopying from HDD to a recordable DVD DV/USB Source Recording from various sourcesADD Clear DVD REC Pause TV RECâFP-CVBS CH-XXXFP-SVIDEO RP-CVBSAbout timer recording Timer RecordingWith this recorder, you can pre-program Helpful HintSelect OK OK Timer recording manuallyPress Timer to exit the menu Changing/ Deleting a timer recordingPlayback your HDD recordings Playback from Hard DiskDispaly Pause TV Stopç ZoomPlayable discs Playback from DiscInserting a disc DVD±RWPlaying a DVD video disc Starting disc playbackPlaying a Super Video CD Playing an audio CDPlaying a DivX disc Playing a MP3 disc File format English Playing a picture disc or musical slide showPlayable Jpeg picture disc Pausing playback and step play Additional Playback FeaturesChanging to another title/ chapter/track Searching forward/backwardSelecting various repeat functions Using Display Info optionsADD Dispaly Clear Changing the audio soundtrack language Programming disc tracksSwitching camera angles Press T/C on the remote control repeatedly to displayChanging subtitle language Time search English Use  keys to select the language and press OK to confirmEdit Recordings HDD Accessing the HDD title edit menuAbout HDD title edit menu HDD Tuner ADD Clear RECEnglish Dividing a Title To abort, select CancelokTo unhide the scenes Hiding/ unhiding unwanted scenesLock/Unlock a title Rename a titleFor details, see Parental Rating Level Protect/ Unprotect a titleEdit Recordings Recordable DVD About disc edit menu Accessing disc editing menuErase disc DVD±RWs only Rename discRecord a new title English Overwrite disc DVD±RWs onlyPreparing your DVD-RW disc for more recordings Playing your recordings DVD±R, DVD-RW on other DVD playersEnglish Lock/Unlock disc DVD±RWs only Unlock DiscAbout DVD title editing Accessing DVD title edit menuRename Title Append Title The keyboard screen appears Rename title Overwrite title DVD±RW only EnglishOverwrite from the selected title Erase titleAbout video editing Accessing video editing menuSelecting a chapter English Selecting a titleCreating chapter markers To unhide a chapter Hiding an unwanted chapterUnhide Chapter and press Changing Index PictureAccessing the Setup Menu Setup Menu OptionsOptions Picture shape can be adjusted to fit your TVParental Level Change PasswordPlayback limitation level You can prohibit the playing of certain discs that are notSpdif Output ScreensaverOff Installing the latest firmware Firmware UpgradeProblem Solution TroubleshootingEnglish Troubleshooting Specifications Dimensions Display panel symbols/ messagesPower Glossary Glossary