Kenmore 796.4172# Option Buttons, Delay Start, Extra Rinse, Stain Treat, Stay Fresh, Save Energy

Page 22

HOW TO USE

OPTION BUTTONS

Your washing machine features several additional cycle options that customize cycles to meet your individual needs.

1Turn ON the washer and turn the cycle selector knob to select the desired cycle.

2Use the cycle modifier buttons to adjust the settings for that cycle.

3Press the cycle option button(s) for the option(s) you would like to add. The button will light when that option is selected. For secondary functions, press and hold the button for three seconds. The LED will blink when the secondary option is selected. Both options cannot be selected together.

4If the selected option is not allowed for the selected cycle, the chime will sound twice to alert you and the LED will not illuminate.

Press the START/PAUSE button to start the cycle. After a brief delay, the door will lock and the cycle will begin.

NOTE: To protect your garments, not every option is available with every cycle (refer to pages 14 and 15).

NOTE: If the START/PAUSE button is not pressed within four minutes, the control will shut off and the settings will be lost.
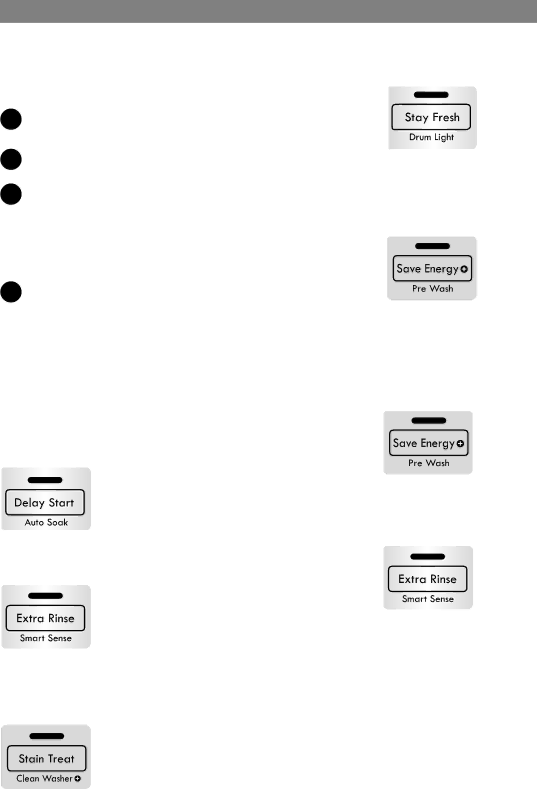
DELAY START

Once you have selected the cycle and other settings, press this button to delay the start

of the wash cycle. Each press of the button increases the delay time by one hour, for up to 19 hours. Once the desired delay time is

set, press the START/PAUSE button to start the delay time.

EXTRA RINSE

This option will add an extra rinse to the selected cycle. Use this option to help ensure the removal of detergent or bleach residue from fabrics.

NOTE: Extra Rinse and Smart Sense cannot be selected at the same time.

STAIN TREAT

Use this option for heavily soiled loads that need improved stain treatment. When

STAIN TREAT is selected, the water temperature for the selected cycle will begin as warm water to help prevent the

setting of certain types of stains. Then, as the cycle progresses, the water will heat to higher temperatures to help remove stains that require treatment at higher temperatures. NOTE: If the STAIN TREAT option is selected with the SANITIZE cycle, the cycle will begin with very hot water, because hot water is the default for the SANITIZE cycle and cannot be changed.

STAY FRESH

This feature helps keep wrinkles from setting in clothes and helps keep them fresh if they

are not removed from the washer as soon

as the cycle is complete. Press the STAY FRESH button to tumble the clothes intermit-

tently and circulate fresh air through the drum for up to eight hours. Press the POWER button or the START/PAUSE button to remove clothes at any time.

SAVE ENERGY

This option saves energy by using cooler water while increasing the wash and rinse times to maintain wash performance. This feature is only available with the NORMAL/CASUAL and HEAVY DUTY cycles as listed below.

NORMAL/CASUAL – Hot/Cold becomes Warm/Cold

NORMAL/CASUAL – Warm/Cold becomes Cold/Cold

HEAVY DUTY – Hot/Cold becomes Warm/Cold

PRE-WASH

Select this option to add a 16-minute pre- wash, rinse and spin cycle to the chosen cycle. This is especially useful for heavily soiled items. To use the Pre-Wash feature, press and hold the SAVE ENERGY button for three seconds.

SMART SENSE

This feature uses a sensor in the drum to check the hardness of the water and the detergent amount. Wash and rinse cycles

will be adjusted to optimize wash and rinse performance. To use the SMART

SENSE feature, press and hold the EXTRA RINSE button for three seconds.

Insufficient detergent amount will cause the wash time and temperature to increase.

Too much detergent will cause the rinse time to increase.

An excessive amount of detergent will result in extra rinses, to ensure that all detergent is removed from the load.

NOTE: Extra Rinse and Smart Sense cannot be selected at the same time.

22

Image 22
Contents Front-Loading No-lemon guarantee replacement of your Authorized Sears service technicians, which meansUnlimited service calls and nationwide service, as Fast help by phone we call it Rapid ResolutionSafety Messages Important Safety Instructions To Connect Electricity Detergent Dispenser EASY-ACCESS Locking DoorFilter Access Panel Glass Touch Control PanelChoose the Proper Location KEY Dimensions and SpecificationsPower Outlet ClearancesUnpacking and Removing Shipping Bolts Connecting the Water Lines On washer To tapOption 2 Laundry Drum Connecting the Drain HoseConnect to the Power Supply Option 1 StandpipeInstallation of NON-SKID Pads optional Leveling the WasherControl Panel Features Operating the Washer Using Detergent Amount Indicator Cycle Guide Cycle Guide Grouping Similar Items Sorting Wash LoadsFabric Care Labels Loading the WasherMain Wash Detergent Compartment About the Dispenser DrawerPre-Wash Detergent Compartment Liquid Bleach CompartmentDesigned to use only High-Efficiency HE detergent Detergent and Dispenser USEWord About Detergents Detergent AmountTime and Status Display Spin Speed Cycle Modifier ButtonsWASH/RINSE Soil LevelADD Steam Option Using the Steam Refresh CycleSteam Cycles and Options To ADD Steam to a cycleExtra Rinse Delay StartOption Buttons Stain TreatAuto Soak MY CycleDrum Light To save a MY CycleRegular Cleaning Regular Cleaning Storing the Washer Cleaning the DispenserMaintenance Cleaning the Water Inlet FiltersMaintenance Cleaning the Drain Pump Filter Using the Kenmore Connect System Kenmore Connect SystemProblem Possible Cause Solutions Before Calling for ServiceNormal Sounds YOU MAY Hear Before Calling for Service Problem Possible Cause Solutions Before Calling for Service Power and try again. If the error reappears, call forKenmore Elite Limited Warranty Disclaimer of implied warranties limitation of remediesPage Funciones Y Ventajas Guía DE Solución DE ProblemasInstrucciones Importantes Sobre Seguridad Irequisitos DE InstalaciónMensajes DE Seguridad Instrucciones Importantes Sobre Seguridad Advertencia Advertencia Motor DE Impulsión Directa Dispensador DE DetergentePanel DE Control Táctil DE Cristal Tina DE Acero Inoxidable DE Gran CapacidadTipo DE Piso Dimensiones Y Especificaciones ClaveEscoja EL Lugar Adecuado Espacios DE InstalaciónDesempaquetado Y Desembalaje DE Pernos DE Transporte ImportanteDel funcionamiento Conexión DE LAS Tuberías DE AguaGrifo de agua Opción 1 Tubo vertical Conexión DE LA Manguera DE DrenajeOpción 2 Tina de lavado Opción 3 Desagüe del sueloInstalación DE Almohadillas Nivelación DE LA LavadoraAntirresbalantes opcional Funciones DEL Panel DE Control Seleccionar UN Ciclo Clasificación DE LAS Prendas Y Carga DE LA LavadoraPrender LA Lavadora Seleccionar LOS Modificadores DE Ciclo Y LAS OpcionesGuía DE Ciclos = Opción disponible = Ajuste predeterminadoGuía DE Ciclos continuado Energía Vado Inteligente Lavado Enjuague Centrifugado MinAgrupación de prendas similares Etiquetas de cuidado de las prendasCarga de la lavadora Compartimiento del detergente del lavado principal Acerca DE LA Gaveta DEL DispensadorCompartimiento de detergente del prelavado Compartimiento del suavizanteDiseñado para usar sólo detergente de alta eficiencia HE USO DEL Detergente Y DEL DispensadorUnas palabras sobre los detergentes Cantidad de detergentePantalla DE Tiempo Y Estado WASH/RINSE LAVAR/ENJUAGAR Botones Modificadores DE CicloAviso Sonoro Para Añadir Vapor a un ciclo Ciclos Y Opciones DE VaporOpción Añadir Vapor Uso del ciclo Steam Refresh Renovar CON VaporStay Fresh Mantener Fresco Botones DE OpciónStain Treat Tratamiento DE Manchas PRE-WASH PrelavadoDrum Light Iluminación DE LA Tina Funciones ESP EcialesAuto Soak Remojo Automático Limpieza Regular Almacenamiento de la lavadora Limpieza Regular continuaciónLimpieza del dispensador Mantenimiento Limpieza de los filtros de entrada de aguaMantenimiento continuación Limpieza del filtro de bomba de drenajeUso del sistema Kenmore Connect NotaAntes DE Solicitar Asistencia Técnica Problema Causa posible SolucionesSonidos Normales QUE SE Pueden Escuchar Agua rociándose o circulando durante el cicloAntes DE Solicitar Asistencia Técnica continuación ManchasProblema Causa posible Soluciones El agua en la lavadora drena demasiadoGarantía limitada de Kenmore Elite Nota Nota Nota Get it fixed, at your home or ours