CONFIGURE, TEST THE ENTERPRISE REPORTER CREATE A CUSTOM REPORT FOR A SPECIFIC USER
Save a Detail Custom Report
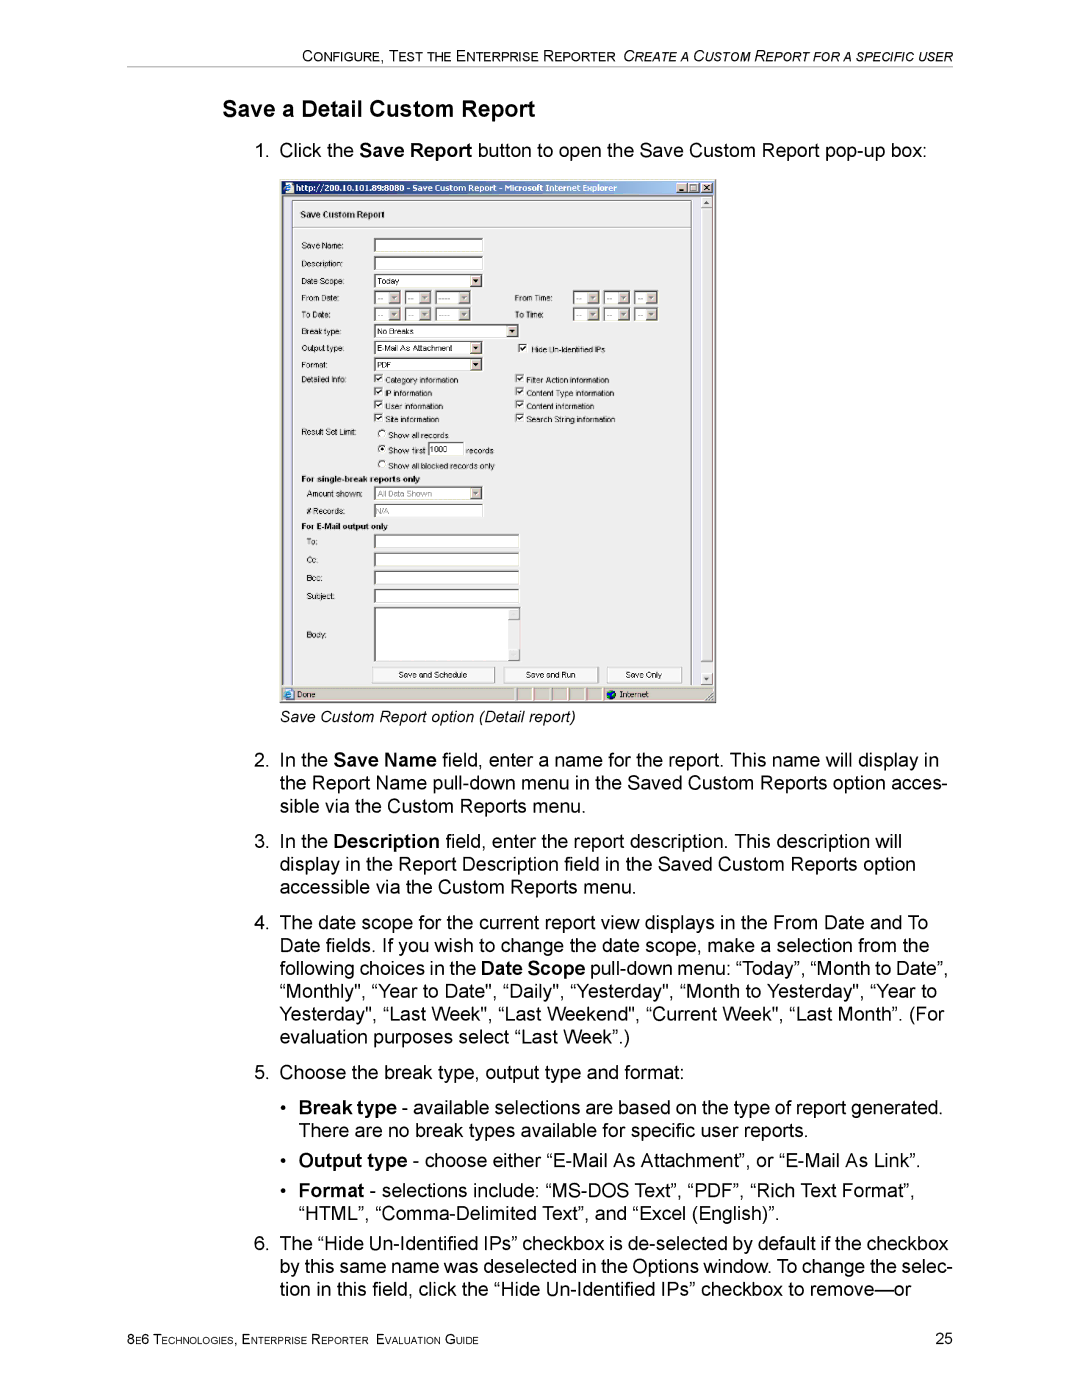
1. Click the Save Report button to open the Save Custom Report
Save Custom Report option (Detail report)
2.In the Save Name field, enter a name for the report. This name will display in the Report Name
3.In the Description field, enter the report description. This description will display in the Report Description field in the Saved Custom Reports option accessible via the Custom Reports menu.
4.The date scope for the current report view displays in the From Date and To Date fields. If you wish to change the date scope, make a selection from the following choices in the Date Scope
5.Choose the break type, output type and format:
•Break type - available selections are based on the type of report generated. There are no break types available for specific user reports.
•Output type - choose either
•Format - selections include:
6.The “Hide
8E6 TECHNOLOGIES, ENTERPRISE REPORTER EVALUATION GUIDE | 25 |
