RMC 7182
1U Rackmount System
Removing the Heatsink
Warning: We do not recommend that the CPU or the heatsink be removed. However, if you do need to remove the heatsink, please follow the instruc- tions below prevent damage to the CPU or other components.
1.Power down the system and unplug the power cord from the power supply.
2.Disconnect the heatsink fan's wires from the fan header.
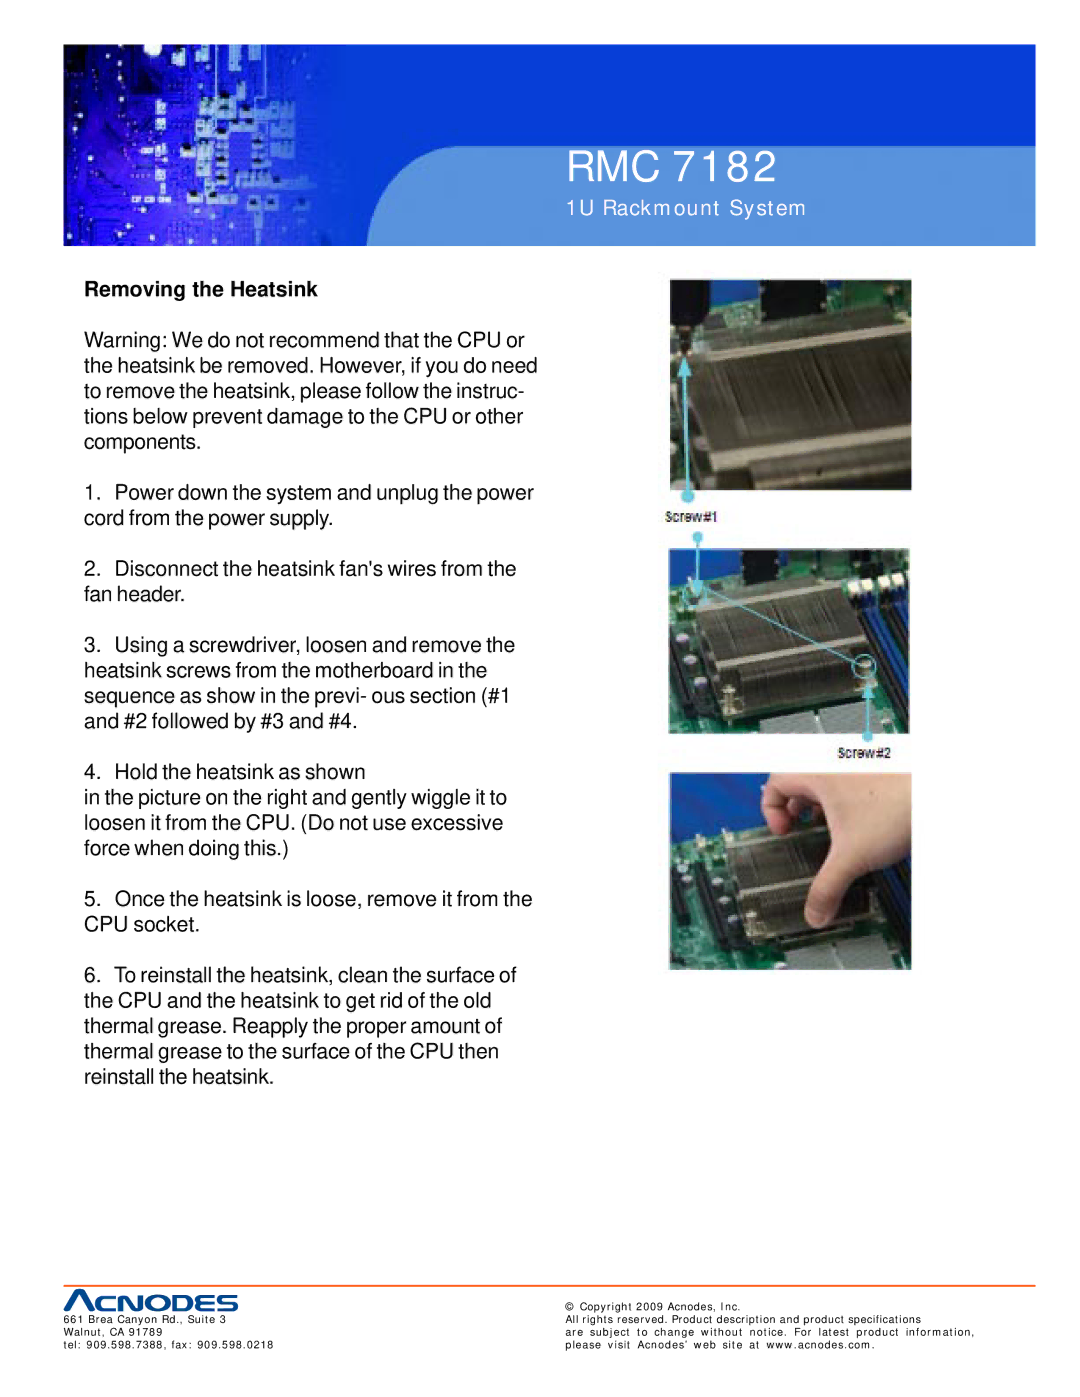
3.Using a screwdriver, loosen and remove the heatsink screws from the motherboard in the sequence as show in the previ- ous section (#1 and #2 followed by #3 and #4.
4.Hold the heatsink as shown
in the picture on the right and gently wiggle it to loosen it from the CPU. (Do not use excessive force when doing this.)
5.Once the heatsink is loose, remove it from the CPU socket.
6.To reinstall the heatsink, clean the surface of the CPU and the heatsink to get rid of the old thermal grease. Reapply the proper amount of thermal grease to the surface of the CPU then reinstall the heatsink.
| © Copyright 2009 Acnodes, Inc. |
661 Brea Canyon Rd., Suite 3 | All rights reserved. Product description and product specifications |
Walnut, CA 91789 | are subject to change without notice. For latest product information, |
tel: 909.598.7388, fax: 909.598.0218 | please visit Acnodes’ web site at www.acnodes.com. |