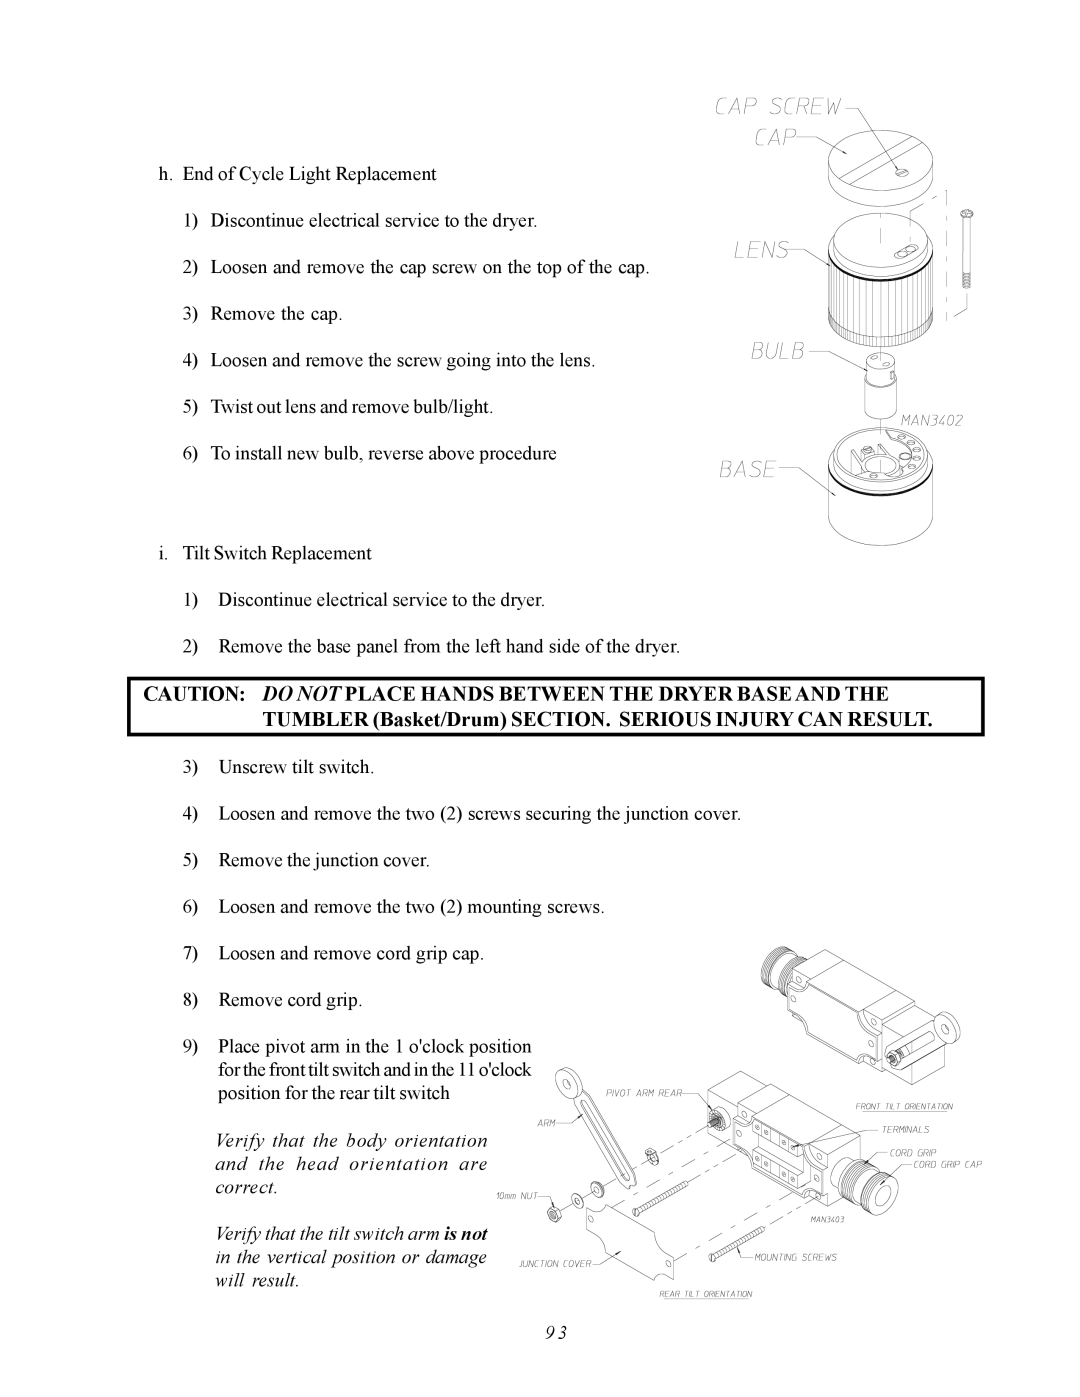
h. End of Cycle Light Replacement
1) Discontinue electrical service to the dryer.
2) Loosen and remove the cap screw on the top of the cap.
3) Remove the cap.
4)Loosen and remove the screw going into the lens.
5)Twist out lens and remove bulb/light.
6) To install new bulb, reverse above procedure
i.Tilt Switch Replacement
1)Discontinue electrical service to the dryer.
2)Remove the base panel from the left hand side of the dryer.
CAUTION: DO NOT PLACE HANDS BETWEEN THE DRYER BASE AND THE TUMBLER (Basket/Drum) SECTION. SERIOUS INJURY CAN RESULT.
3)Unscrew tilt switch.
4)Loosen and remove the two (2) screws securing the junction cover.
5)Remove the junction cover.
6)Loosen and remove the two (2) mounting screws.
7)Loosen and remove cord grip cap.
8)Remove cord grip.
9)Place pivot arm in the 1 o'clock position
for the front tilt switch and in the 11 o'clock position for the rear tilt switch
Verify that the body orientation and the head orientation are correct.
Verify that the tilt switch arm is not in the vertical position or damage will result.
9 3