Check the Enable item to enable the function of your camera, and configure the related settings in the following fields.
NOTE: When RS485 function is enabled, the system will provide the additional control buttons on the View Image screen (ActiveX mode and Java mode). See the illustrations on page 44and 47.
Port setting
Select the proper protocol setting from the two options: Popular protocol command setting or Custom protocol setting.
-Popular protocol command setting: Select the proper protocol from the
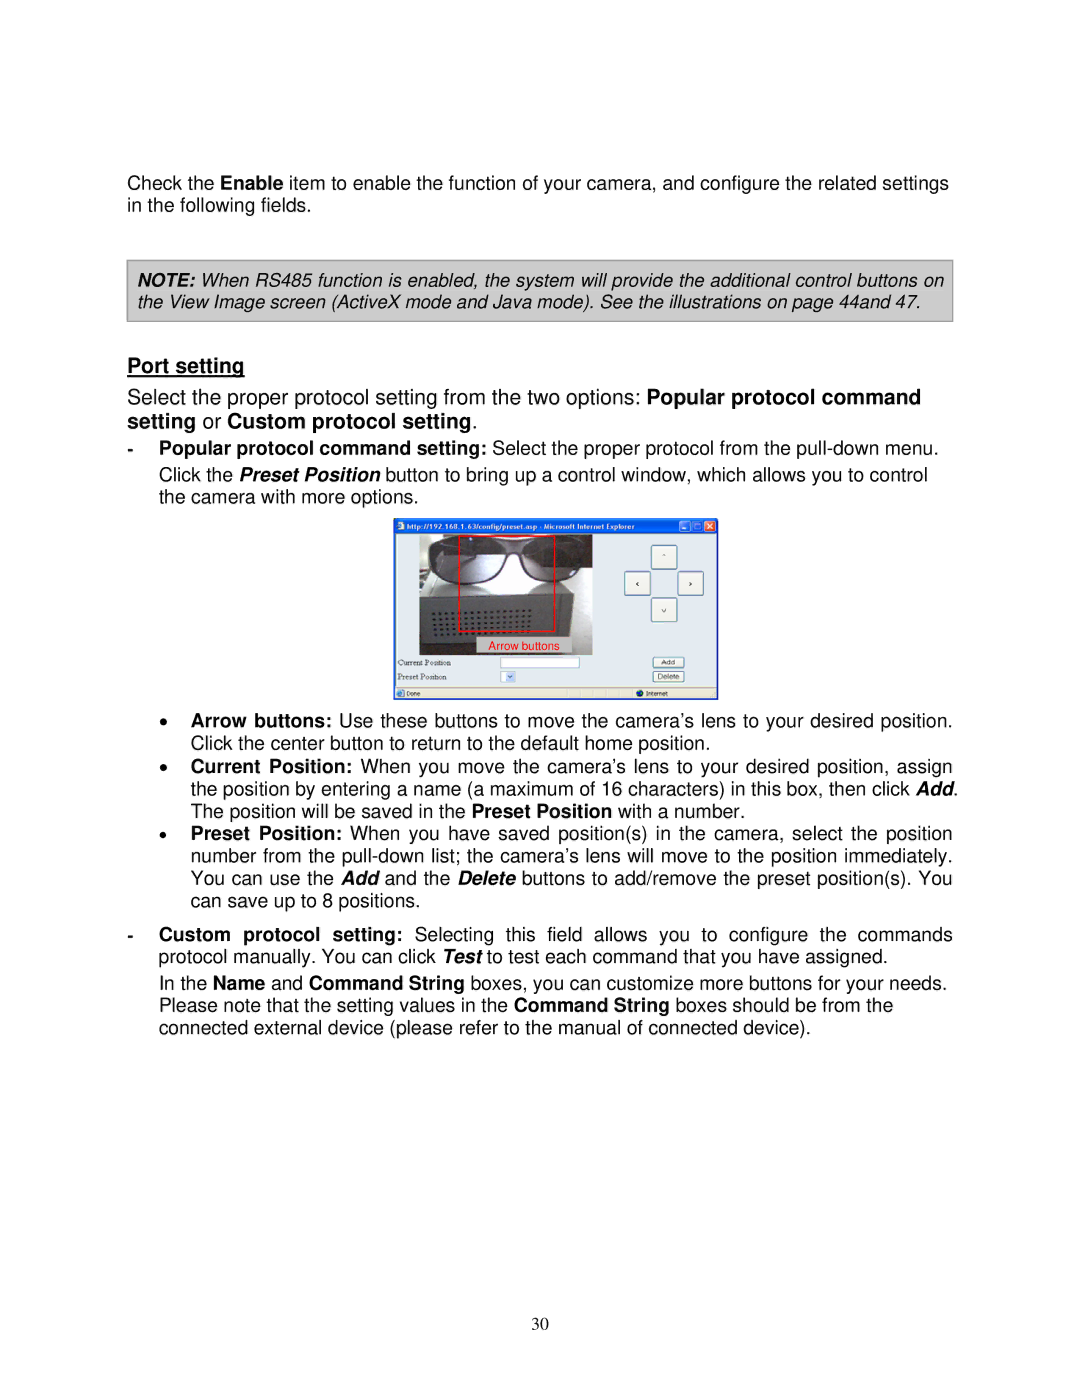
Click the Preset Position button to bring up a control window, which allows you to control the camera with more options.
Arrow buttons
•Arrow buttons: Use these buttons to move the camera’s lens to your desired position. Click the center button to return to the default home position.
•Current Position: When you move the camera’s lens to your desired position, assign the position by entering a name (a maximum of 16 characters) in this box, then click Add. The position will be saved in the Preset Position with a number.
•Preset Position: When you have saved position(s) in the camera, select the position number from the
-Custom protocol setting: Selecting this field allows you to configure the commands protocol manually. You can click Test to test each command that you have assigned.
In the Name and Command String boxes, you can customize more buttons for your needs. Please note that the setting values in the Command String boxes should be from the connected external device (please refer to the manual of connected device).
30