Section 2 – Cabinet Conversion
4.Use the old hardware to
5.Install the new monitor bezel.
6.Clean and replace the glass display shield.
7.Replace the small retainer tab that secures the display shield in place.
8.Mount the monitor remote control board in a convenient location in the service tray.
9.Connect the monitor ground wire to a ground lug on the cabinet.
10.If the old monitor was powered with an AC isolation transformer, remove the transformer from the cabinet. The new monitor will connect directly to the AC power strip, to be installed in the next section.
Install the Cabinet Exhaust Fan
An exhaust fan is required to keep the temperature inside the cabinet cool enough for the computer to operate properly.
If you experience blank screens or rebooting issues, this could be due to excessively high temperatures inside the cabinet. Drilling more air holes in the lower rear of the cabinet, as described in step 1 below, should improve airflow and reduce cabinet temperatures.
Perform the following steps to install the exhaust fan and drill air holes:
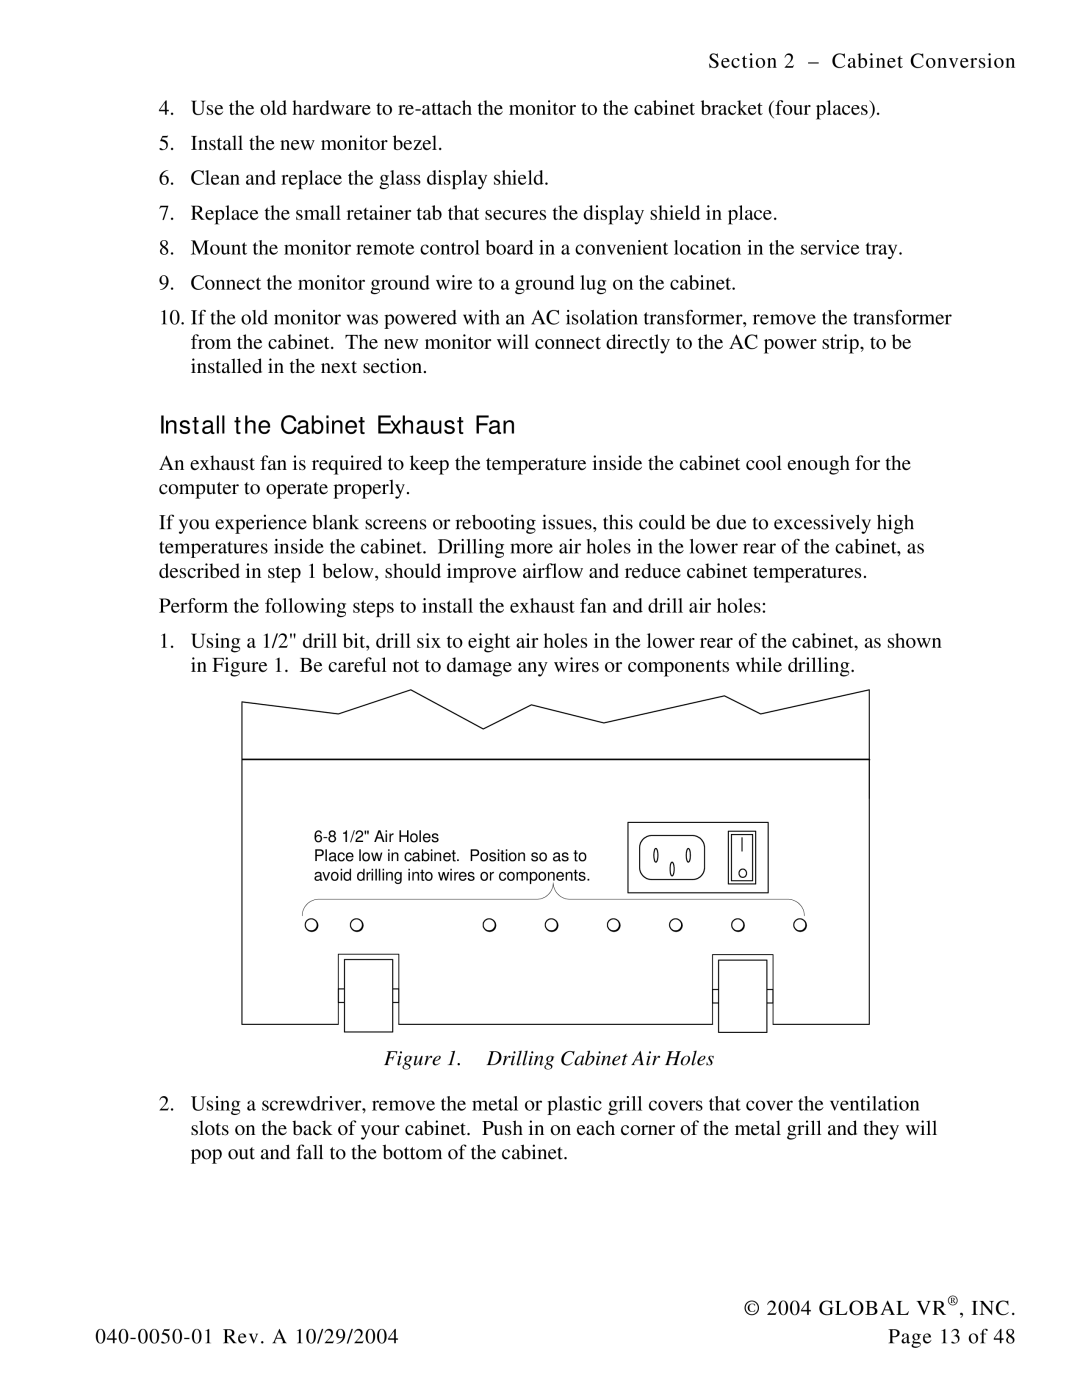
1.Using a 1/2" drill bit, drill six to eight air holes in the lower rear of the cabinet, as shown in Figure 1. Be careful not to damage any wires or components while drilling.
Place low in cabinet. Position so as to avoid drilling into wires or components.
Figure 1. Drilling Cabinet Air Holes
2.Using a screwdriver, remove the metal or plastic grill covers that cover the ventilation slots on the back of your cabinet. Push in on each corner of the metal grill and they will pop out and fall to the bottom of the cabinet.
| © 2004 GLOBAL VR®, INC. |
Page 13 of 48 |