10.1.4 Change the Record & Timer Properties Via the Network
Follow the instructions below to reconfigure the record and schedule recording settings via the network.
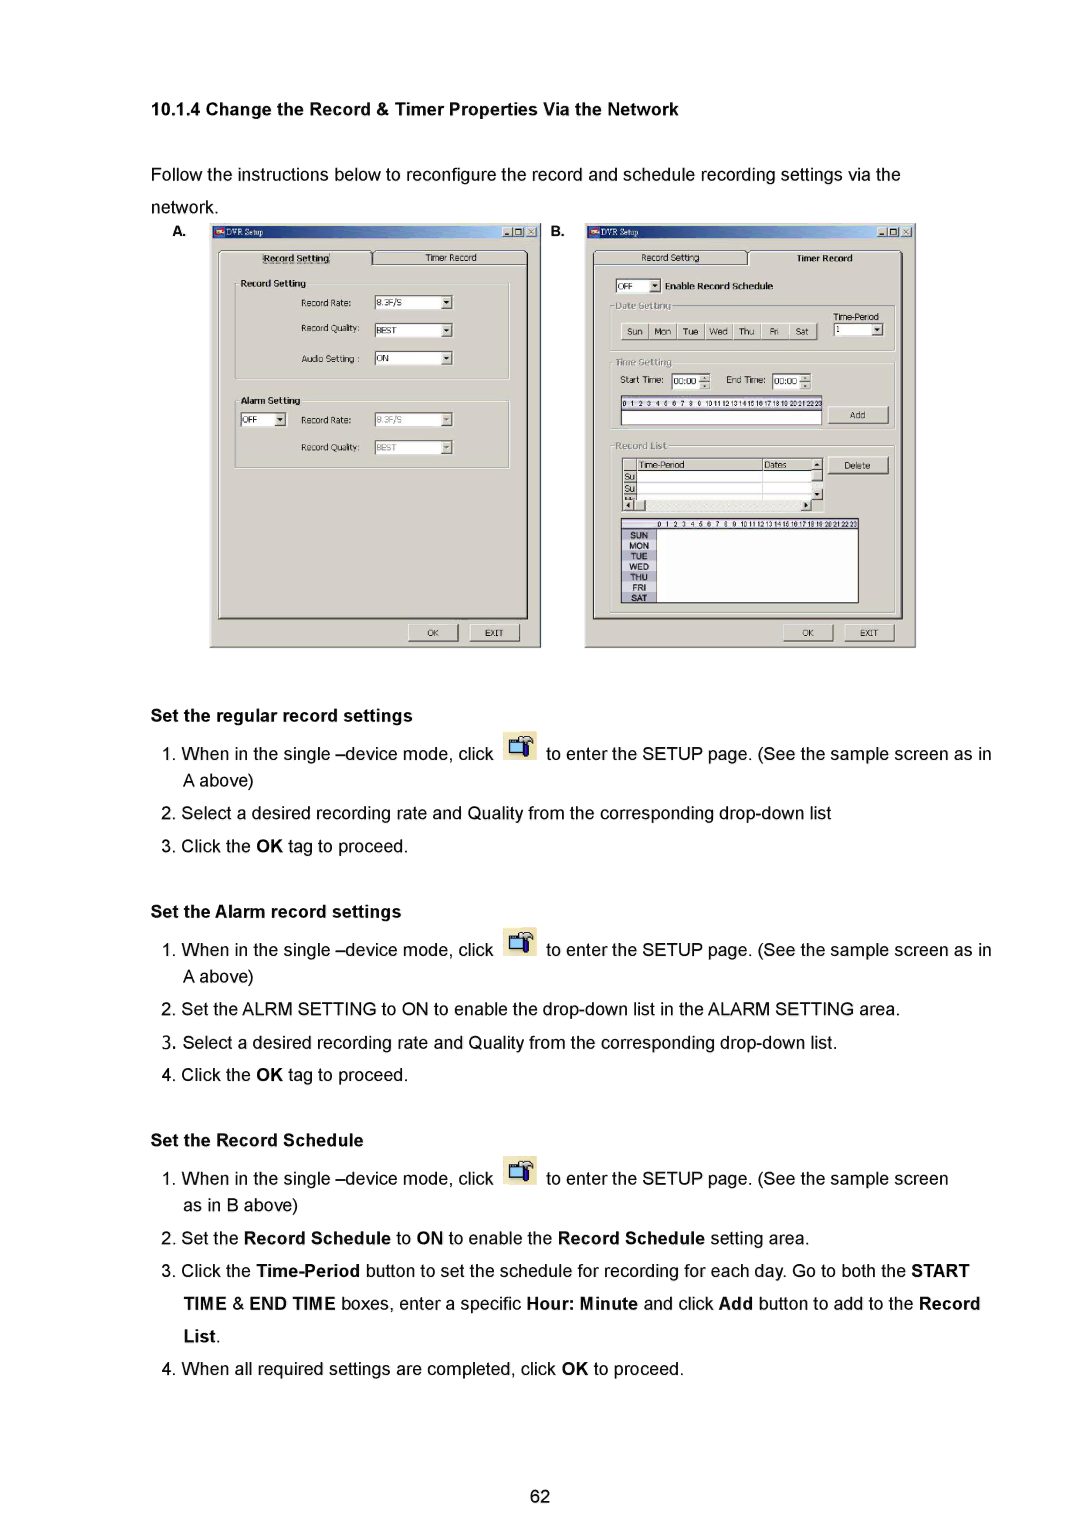
A.B.
Set the regular record settings
1.When in the single ![]() to enter the SETUP page. (See the sample screen as in A above)
to enter the SETUP page. (See the sample screen as in A above)
2.Select a desired recording rate and Quality from the corresponding
3.Click the OK tag to proceed.
Set the Alarm record settings
1.When in the single ![]() to enter the SETUP page. (See the sample screen as in A above)
to enter the SETUP page. (See the sample screen as in A above)
2.Set the ALRM SETTING to ON to enable the
3.Select a desired recording rate and Quality from the corresponding
4.Click the OK tag to proceed.
Set the Record Schedule
1.When in the single ![]() to enter the SETUP page. (See the sample screen as in B above)
to enter the SETUP page. (See the sample screen as in B above)
2.Set the Record Schedule to ON to enable the Record Schedule setting area.
3.Click the
4.When all required settings are completed, click OK to proceed.
62