Installation Guidelines
* Where to install the projector?
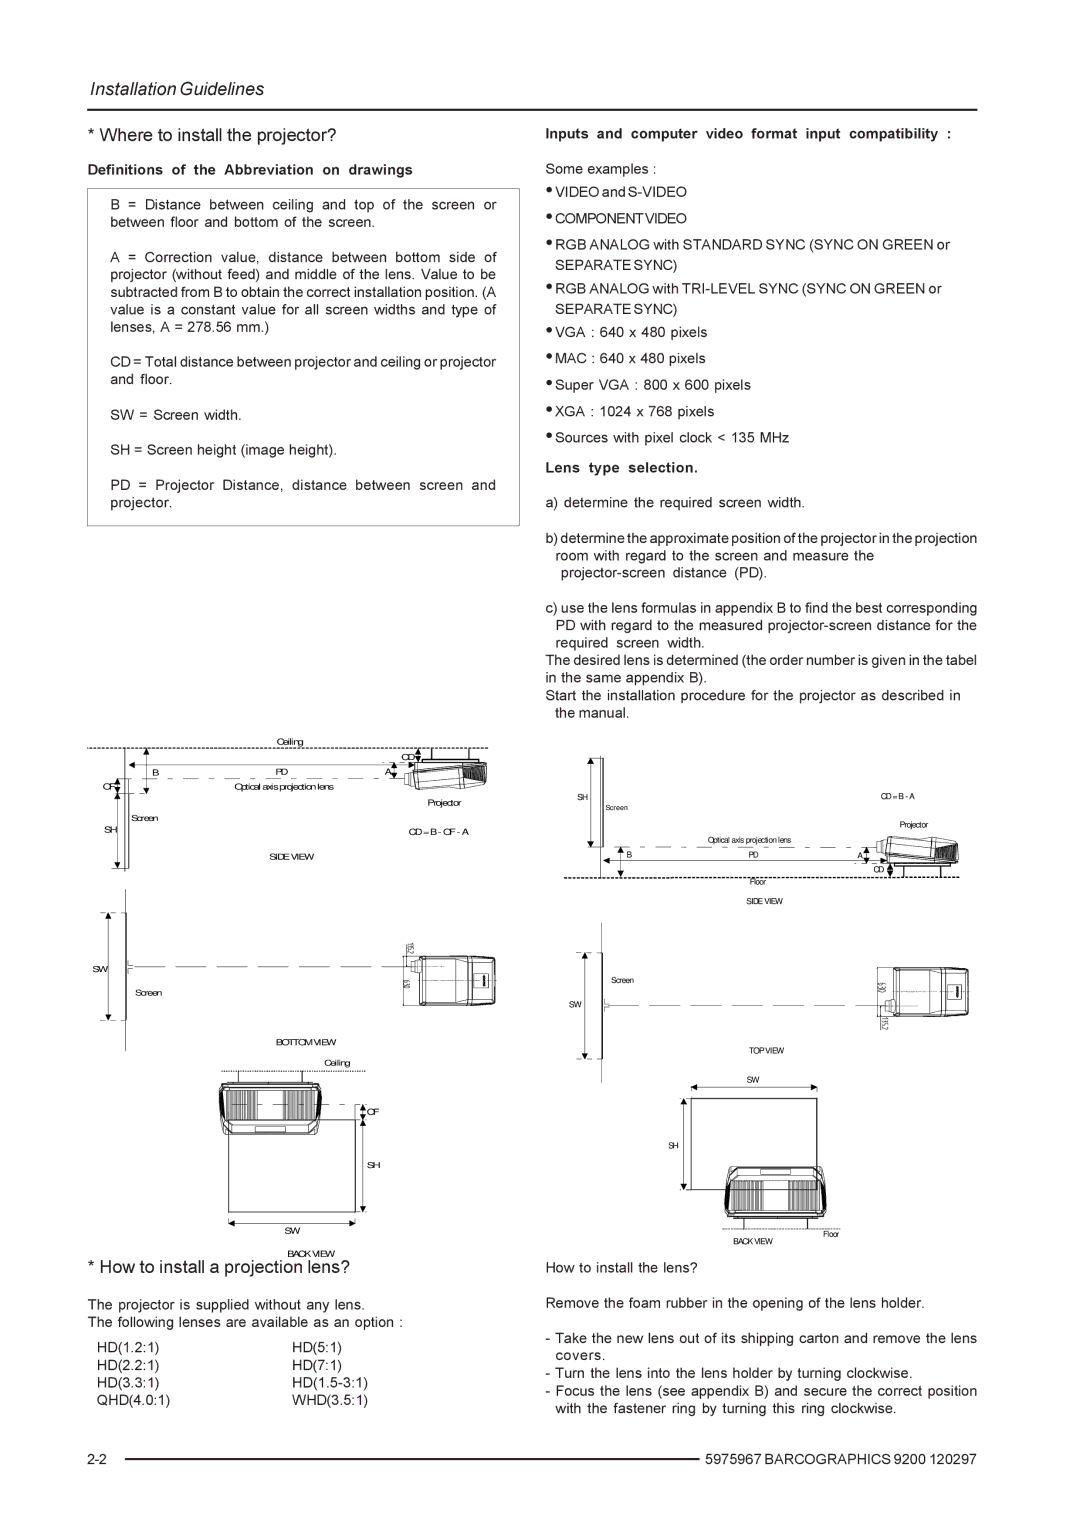
Definitions of the Abbreviation on drawings
B = Distance between ceiling and top of the screen or between floor and bottom of the screen.
A = Correction value, distance between bottom side of projector (without feed) and middle of the lens. Value to be subtracted from B to obtain the correct installation position. (A value is a constant value for all screen widths and type of lenses, A = 278.56 mm.)
CD = Total distance between projector and ceiling or projector and floor.
SW = Screen width.
SH = Screen height (image height).
PD = Projector Distance, distance between screen and projector.
Inputs and computer video format input compatibility :
Some examples :
•VIDEO and
•COMPONENTVIDEO
•RGB ANALOG with STANDARD SYNC (SYNC ON GREEN or
SEPARATE SYNC)
•RGB ANALOG with TRI-LEVEL SYNC (SYNC ON GREEN or
SEPARATE SYNC)
•VGA : 640 x 480 pixels
•MAC : 640 x 480 pixels
•Super VGA : 800 x 600 pixels
•XGA : 1024 x 768 pixels
•Sources with pixel clock < 135 MHz
Lens type selection.
a)determine the required screen width.
b)determine the approximate position of the projector in the projection room with regard to the screen and measure the
c)use the lens formulas in appendix B to find the best corresponding PD with regard to the measured
The desired lens is determined (the order number is given in the tabel in the same appendix B).
Start the installation procedure for the projector as described in the manual.
Ceiling
OF
SH
|
| CD |
|
B | PD | A |
|
| Optical axis projection lens |
|
|
|
| SH | CD = B - A |
|
| Projector | Screen |
Screen |
|
| Projector |
|
| CD =B - OF- A | |
|
| Optical axis projection lens | |
|
|
|
SIDE VIEW | B | PD | A |
CD ![]()
Floor
SW
Screen
BOTTOM VIEW
Ceiling
OF
SH
SW
BACK VIEW
* How to install a projection lens?
The projector is supplied without any lens.
The following lenses are available as an option :
HD(1.2:1)HD(5:1)
HD(2.2:1)HD(7:1)
HD(3.3:1)HD(1.5-3:1)
QHD(4.0:1)WHD(3.5:1)
SIDE VIEW
Screen
SW
TOP VIEW
SW
SH
Floor
BACK VIEW
How to install the lens?
Remove the foam rubber in the opening of the lens holder.
-Take the new lens out of its shipping carton and remove the lens covers.
-Turn the lens into the lens holder by turning clockwise.
-Focus the lens (see appendix B) and secure the correct position with the fastener ring by turning this ring clockwise.
| 5975967 BARCOGRAPHICS 9200 120297 | |
|