English
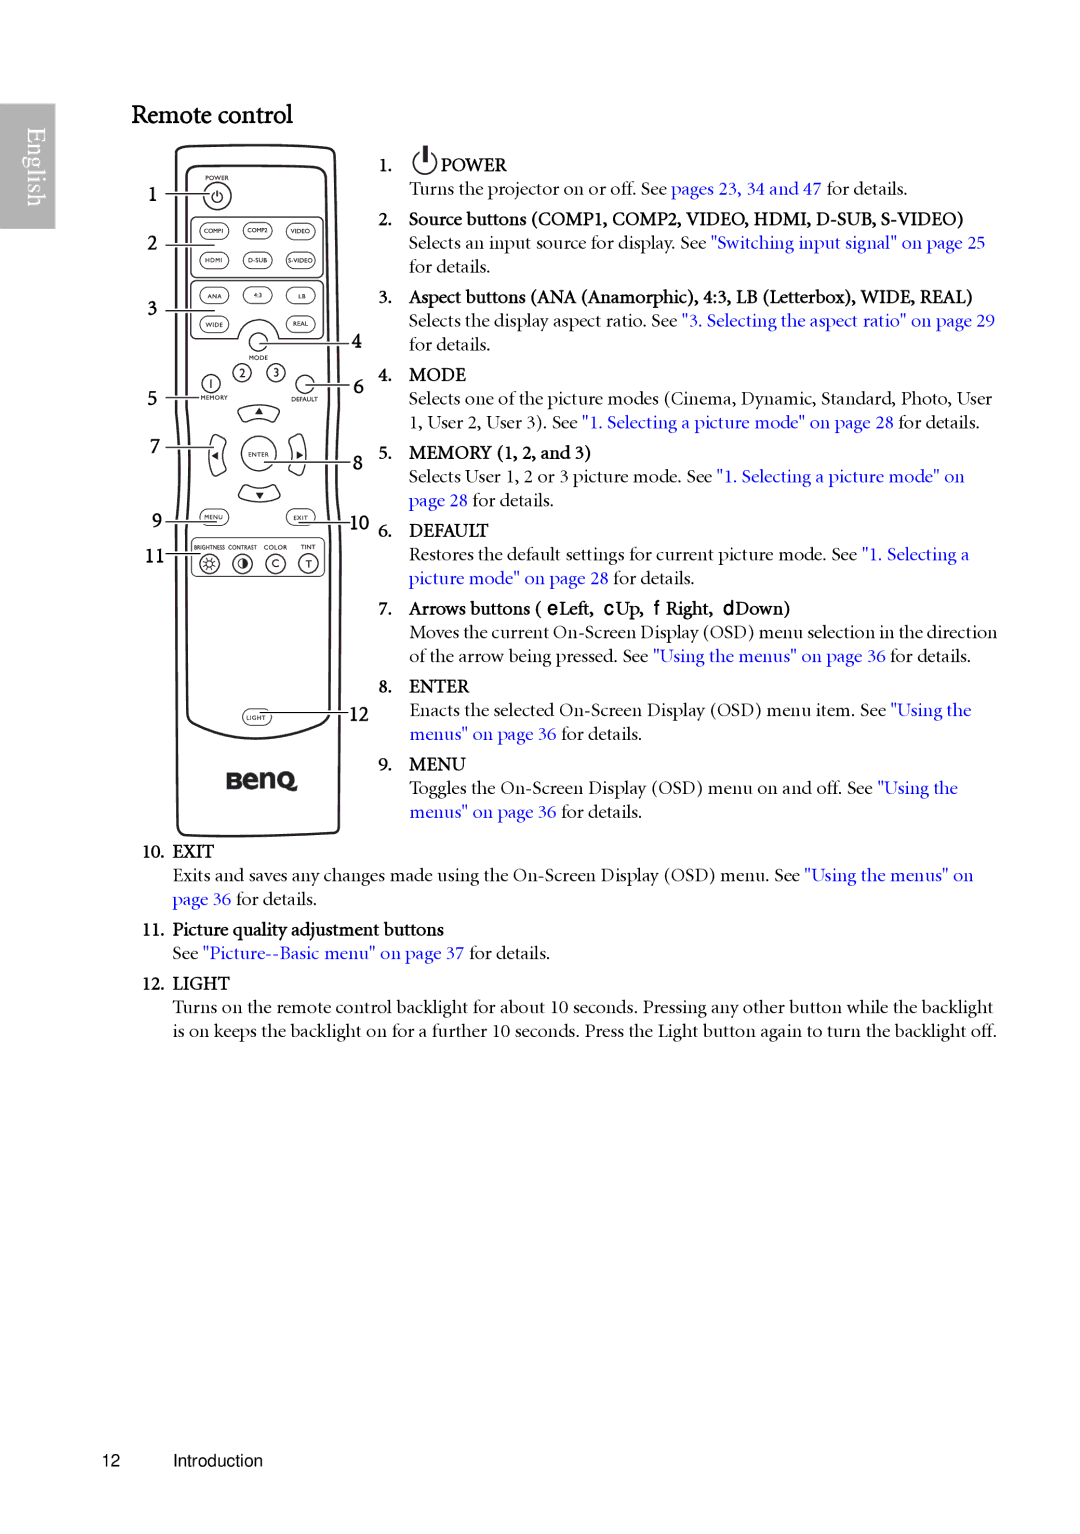
Remote control
1. POWER
POWER
1 |
|
| Turns the projector on or off. See pages 23, 34 and 47 for details. |
| |||
|
|
| 2. Source buttons (COMP1, COMP2, VIDEO, HDMI, |
2 |
|
| Selects an input source for display. See "Switching input signal" on page 25 |
|
| ||
|
|
| for details. |
3
5
4
6
3.Aspect buttons (ANA (Anamorphic), 4:3, LB (Letterbox), WIDE, REAL) Selects the display aspect ratio. See "3. Selecting the aspect ratio" on page 29 for details.
4.MODE
Selects one of the picture modes (Cinema, Dynamic, Standard, Photo, User 1, User 2, User 3). See "1. Selecting a picture mode" on page 28 for details.
7 | 8 | 5. |
| ||
9 | 10 6. | |
11 |
|
|
MEMORY (1, 2, and 3)
Selects User 1, 2 or 3 picture mode. See "1. Selecting a picture mode" on page 28 for details.
DEFAULT
Restores the default settings for current picture mode. See "1. Selecting a picture mode" on page 28 for details.
7.Arrows buttons (eLeft, cUp, fRight, dDown)
Moves the current
8.ENTER
12 | Enacts the selected |
| menus" on page 36 for details. |
9. | MENU |
| Toggles the |
| menus" on page 36 for details. |
10.EXIT
Exits and saves any changes made using the
11.Picture quality adjustment buttons
See
12.LIGHT
Turns on the remote control backlight for about 10 seconds. Pressing any other button while the backlight is on keeps the backlight on for a further 10 seconds. Press the Light button again to turn the backlight off.
12 Introduction