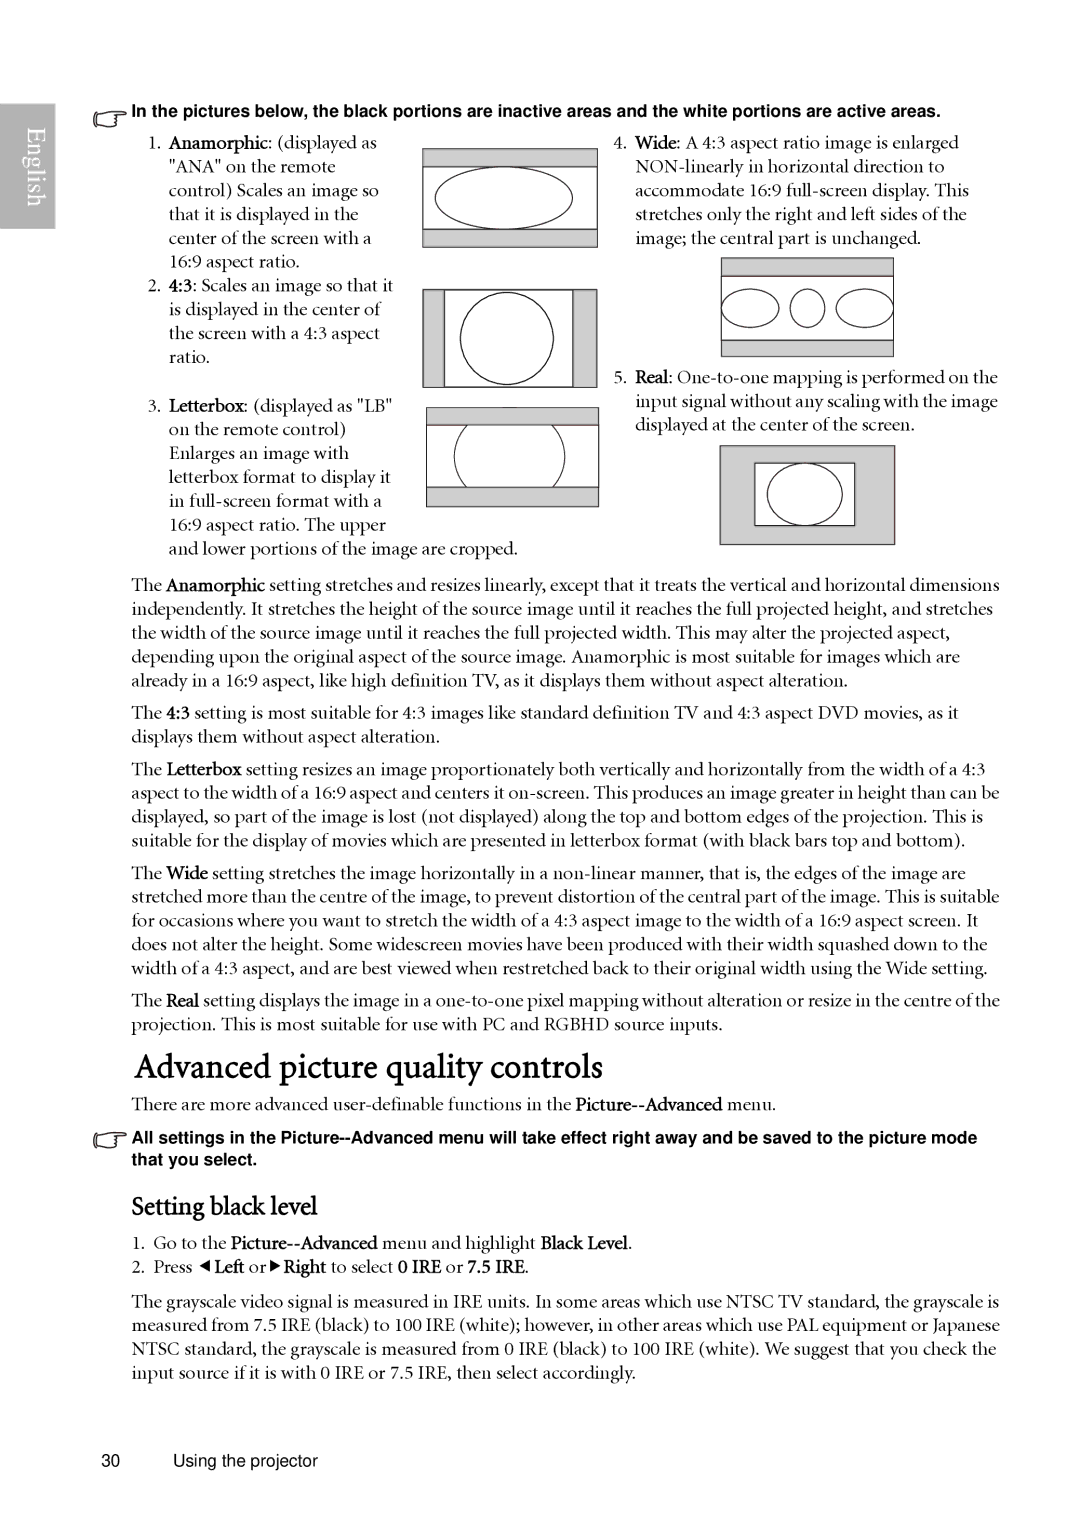
In the pictures below, the black portions are inactive areas and the white portions are active areas.
English
1.Anamorphic: (displayed as "ANA" on the remote control) Scales an image so that it is displayed in the center of the screen with a 16:9 aspect ratio.
2.4:3: Scales an image so that it is displayed in the center of the screen with a 4:3 aspect ratio.
3.Letterbox: (displayed as "LB" on the remote control) Enlarges an image with
letterbox format to display it
in
and lower portions of the image are cropped.
4.Wide: A 4:3 aspect ratio image is enlarged
5.Real:
The Anamorphic setting stretches and resizes linearly, except that it treats the vertical and horizontal dimensions independently. It stretches the height of the source image until it reaches the full projected height, and stretches the width of the source image until it reaches the full projected width. This may alter the projected aspect, depending upon the original aspect of the source image. Anamorphic is most suitable for images which are already in a 16:9 aspect, like high definition TV, as it displays them without aspect alteration.
The 4:3 setting is most suitable for 4:3 images like standard definition TV and 4:3 aspect DVD movies, as it displays them without aspect alteration.
The Letterbox setting resizes an image proportionately both vertically and horizontally from the width of a 4:3 aspect to the width of a 16:9 aspect and centers it
The Wide setting stretches the image horizontally in a
The Real setting displays the image in a
Advanced picture quality controls
There are more advanced
![]() All settings in the
All settings in the
Setting black level
1.Go to the
2.Press eLeft orfRight to select 0 IRE or 7.5 IRE.
The grayscale video signal is measured in IRE units. In some areas which use NTSC TV standard, the grayscale is measured from 7.5 IRE (black) to 100 IRE (white); however, in other areas which use PAL equipment or Japanese NTSC standard, the grayscale is measured from 0 IRE (black) to 100 IRE (white). We suggest that you check the input source if it is with 0 IRE or 7.5 IRE, then select accordingly.
30 Using the projector