H | 41 |
Base Components – Front Accessible
12
Fig.
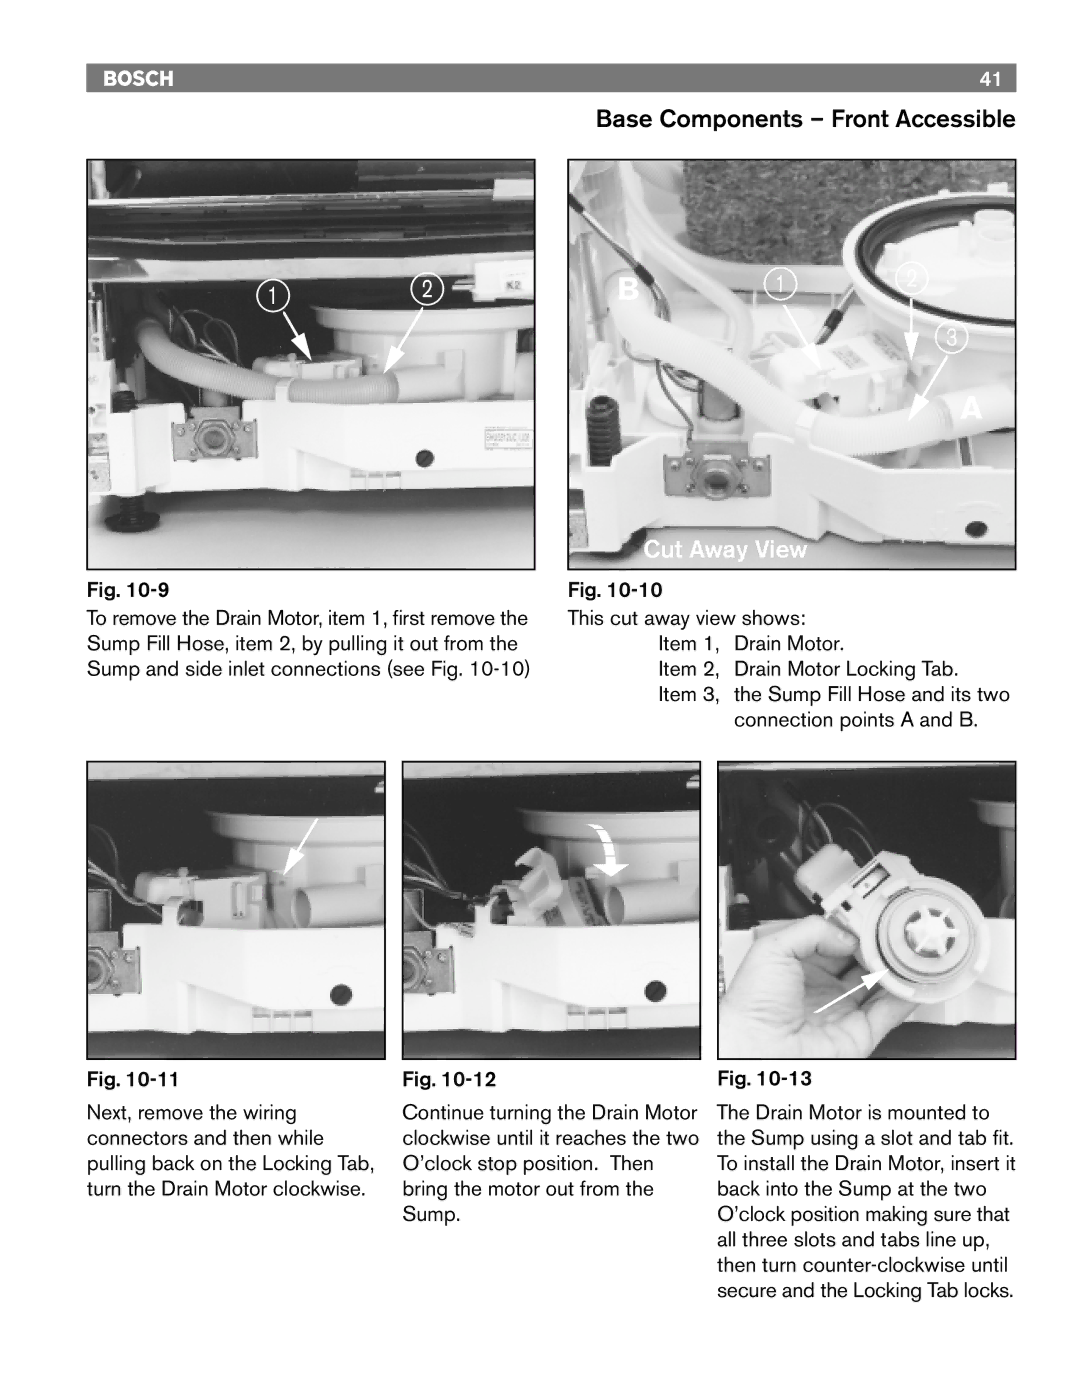
To remove the Drain Motor, item 1, first remove the Sump Fill Hose, item 2, by pulling it out from the Sump and side inlet connections (see Fig.
B 1 2
![]() 3
3
A
Cut Away View
Fig.
This cut away view shows: Item 1, Drain Motor.
Item 2, Drain Motor Locking Tab.
Item 3, the Sump Fill Hose and its two connection points A and B.
Fig.
Next, remove the wiring connectors and then while pulling back on the Locking Tab, turn the Drain Motor clockwise.
Fig.
Continue turning the Drain Motor clockwise until it reaches the two O’clock stop position. Then bring the motor out from the Sump.
Fig.
The Drain Motor is mounted to the Sump using a slot and tab fit. To install the Drain Motor, insert it back into the Sump at the two O’clock position making sure that all three slots and tabs line up, then turn
