English
Using System Menus
Making system adjustments
Adjustments to system properties are ones you typically make only once or not at all. If your system operates as you want it to, there may be no need for any changes. In some cases, however, changes are required to make the system fully compatible with the installation options you have chosen. Making your remote control other components is one example.
Español
Français
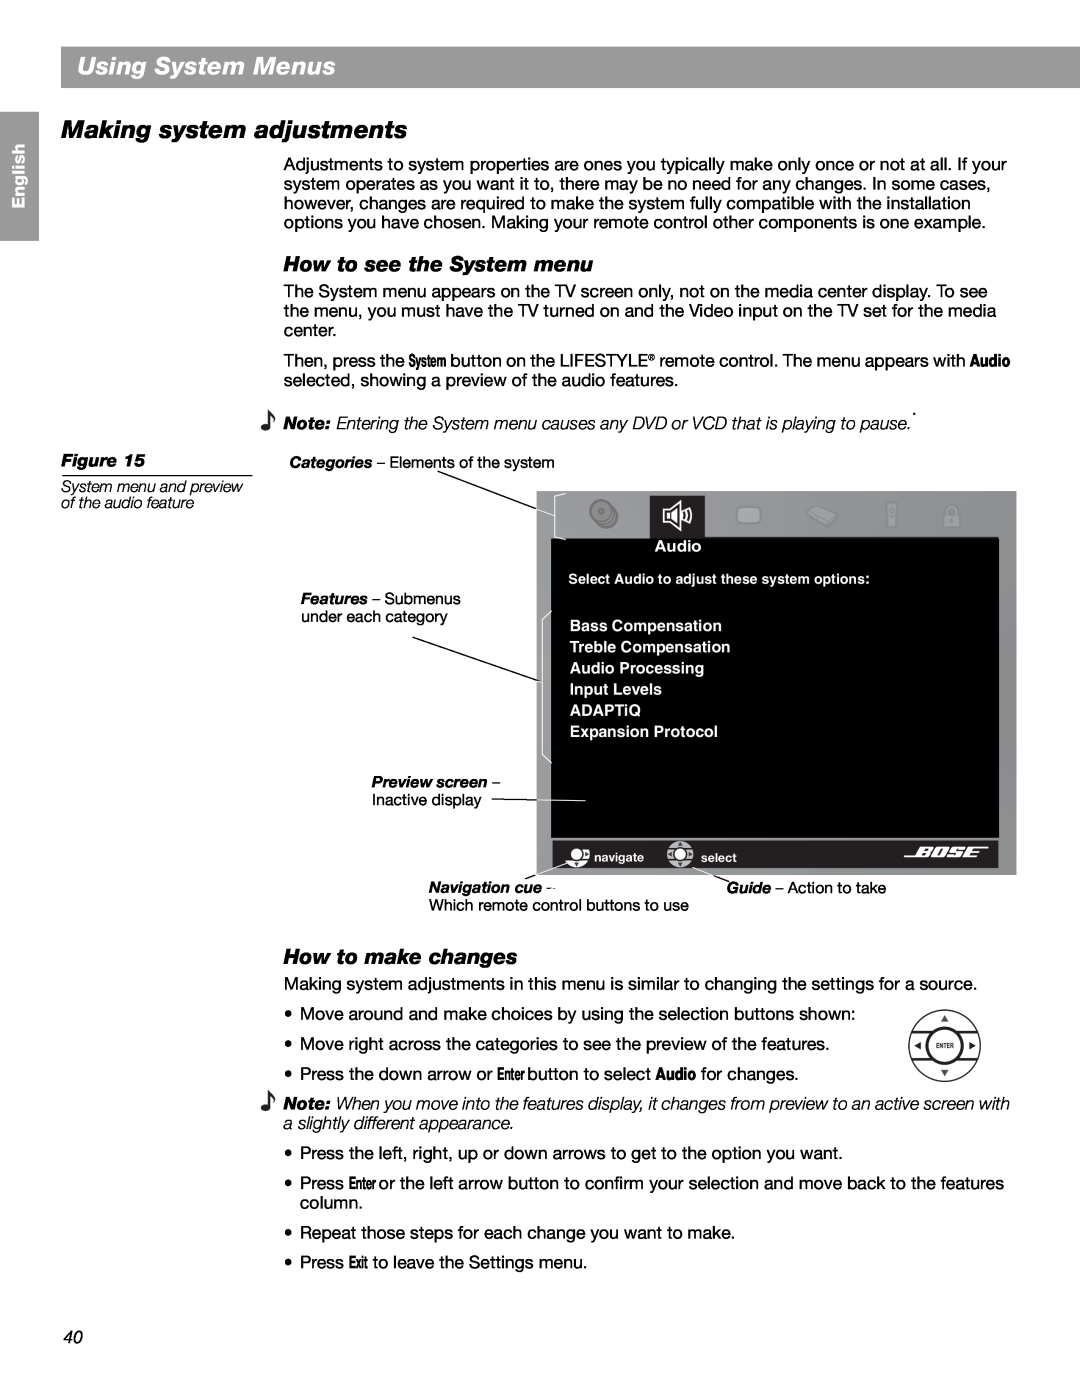
Figure 15
System menu and preview of the audio feature
How to see the System menu
The System menu appears on the TV screen only, not on the media center display. To see the menu, you must have the TV turned on and the Video input on the TV set for the media center.
Then, press the System button on the LIFESTYLE® remote control. The menu appears with Audio selected, showing a preview of the audio features.
.
Note: Entering the System menu causes any DVD or VCD that is playing to pause.
Categories – Elements of the system
Audio
Select Audio to adjust these system options:
Features – Submenus under each category
Bass Compensation
Treble Compensation
Audio Processing
Input Levels
ADAPTiQ
Expansion Protocol
Preview screen –
Inactive display
| navigate | select |
Navigation cue | Guide – Action to take | |
Which remote control buttons to use |
| |
How to make changes
Making system adjustments in this menu is similar to changing the settings for a source.
• Move around and make choices by using the selection buttons shown:
• Move right across the categories to see the preview of the features.
• Press the down arrow or Enter button to select Audio for changes.
Note: When you move into the features display, it changes from preview to an active screen with a slightly different appearance.
•Press the left, right, up or down arrows to get to the option you want.
•Press Enter or the left arrow button to confirm your selection and move back to the features column.
•Repeat those steps for each change you want to make.
•Press Exit to leave the Settings menu.
40
