Chapter 2 Creating You Own Favorite Tones (Patches)
Ring Modulator
|
| 4 |
|
| 3 |
| 1 | 5 |
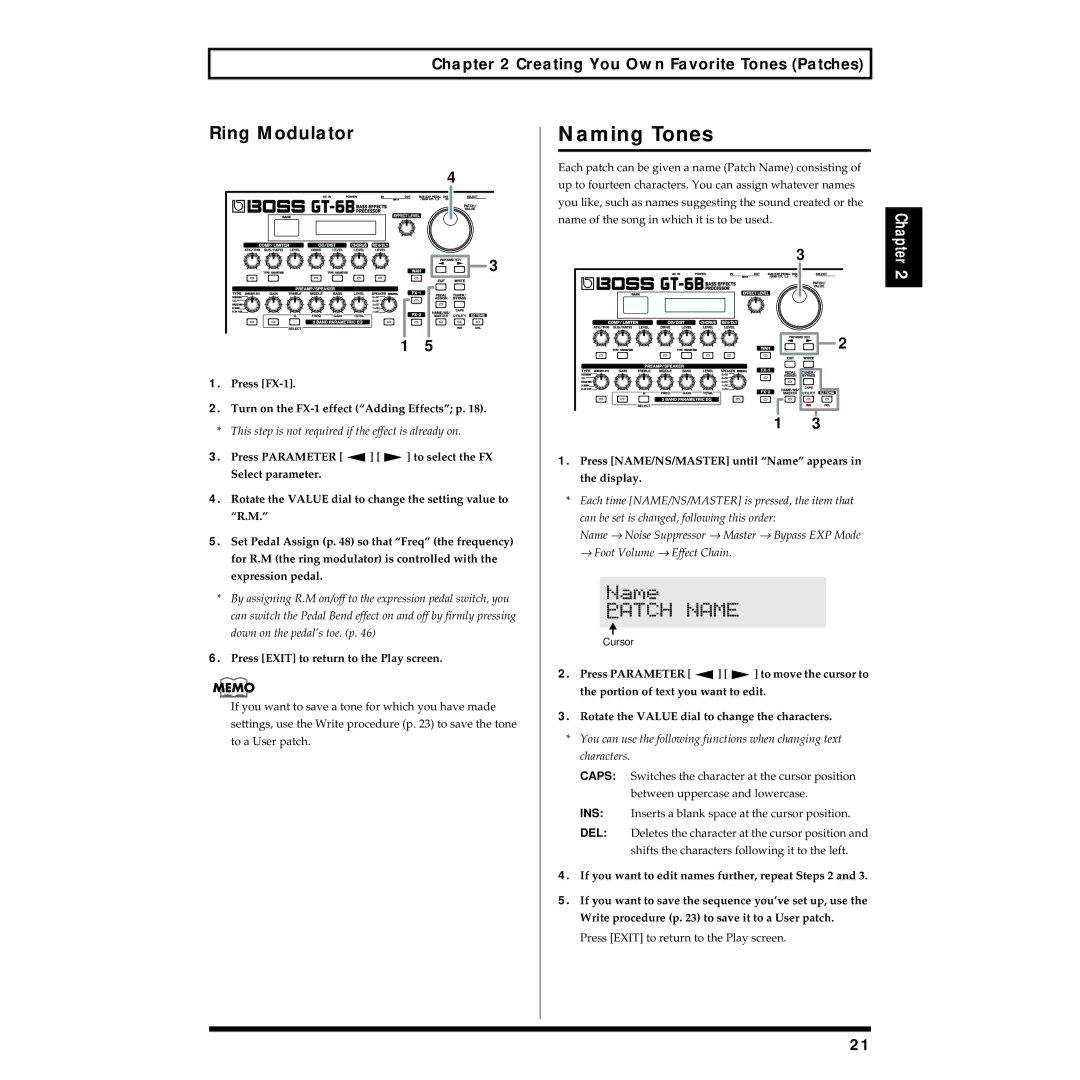
1. | Press |
|
2. | Turn on the | |
* This step is not required if the effect is already on.
3.Press PARAMETER [ ![]() ] [
] [ ![]() ] to select the FX Select parameter.
] to select the FX Select parameter.
4.Rotate the VALUE dial to change the setting value to “R.M.”
5.Set Pedal Assign (p. 48) so that “Freq” (the frequency) for R.M (the ring modulator) is controlled with the expression pedal.
*By assigning R.M on/off to the expression pedal switch, you can switch the Pedal Bend effect on and off by firmly pressing down on the pedal’s toe. (p. 46)
6.Press [EXIT] to return to the Play screen.
If you want to save a tone for which you have made settings, use the Write procedure (p. 23) to save the tone to a User patch.
Naming Tones
Each patch can be given a name (Patch Name) consisting of | |
up to fourteen characters. You can assign whatever names | |
you like, such as names suggesting the sound created or the | |
name of the song in which it is to be used. | Chapter |
3 | |
| 2 |
| 2 |
1 | 3 |
1.Press [NAME/NS/MASTER] until “Name” appears in the display.
*Each time [NAME/NS/MASTER] is pressed, the item that can be set is changed, following this order:
Name → Noise Suppressor → Master → Bypass EXP Mode → Foot Volume → Effect Chain.
Cursor
2.Press PARAMETER [ ![]() ] [
] [ ![]() ] to move the cursor to the portion of text you want to edit.
] to move the cursor to the portion of text you want to edit.
3.Rotate the VALUE dial to change the characters.
*You can use the following functions when changing text characters.
CAPS: Switches the character at the cursor position between uppercase and lowercase.
INS: Inserts a blank space at the cursor position.
DEL: Deletes the character at the cursor position and shifts the characters following it to the left.
4.If you want to edit names further, repeat Steps 2 and 3.
5.If you want to save the sequence you’ve set up, use the Write procedure (p. 23) to save it to a User patch.
Press [EXIT] to return to the Play screen.
21
