Chapter 10 Using MIDI
Setting the Program Change Map | Procedure | |
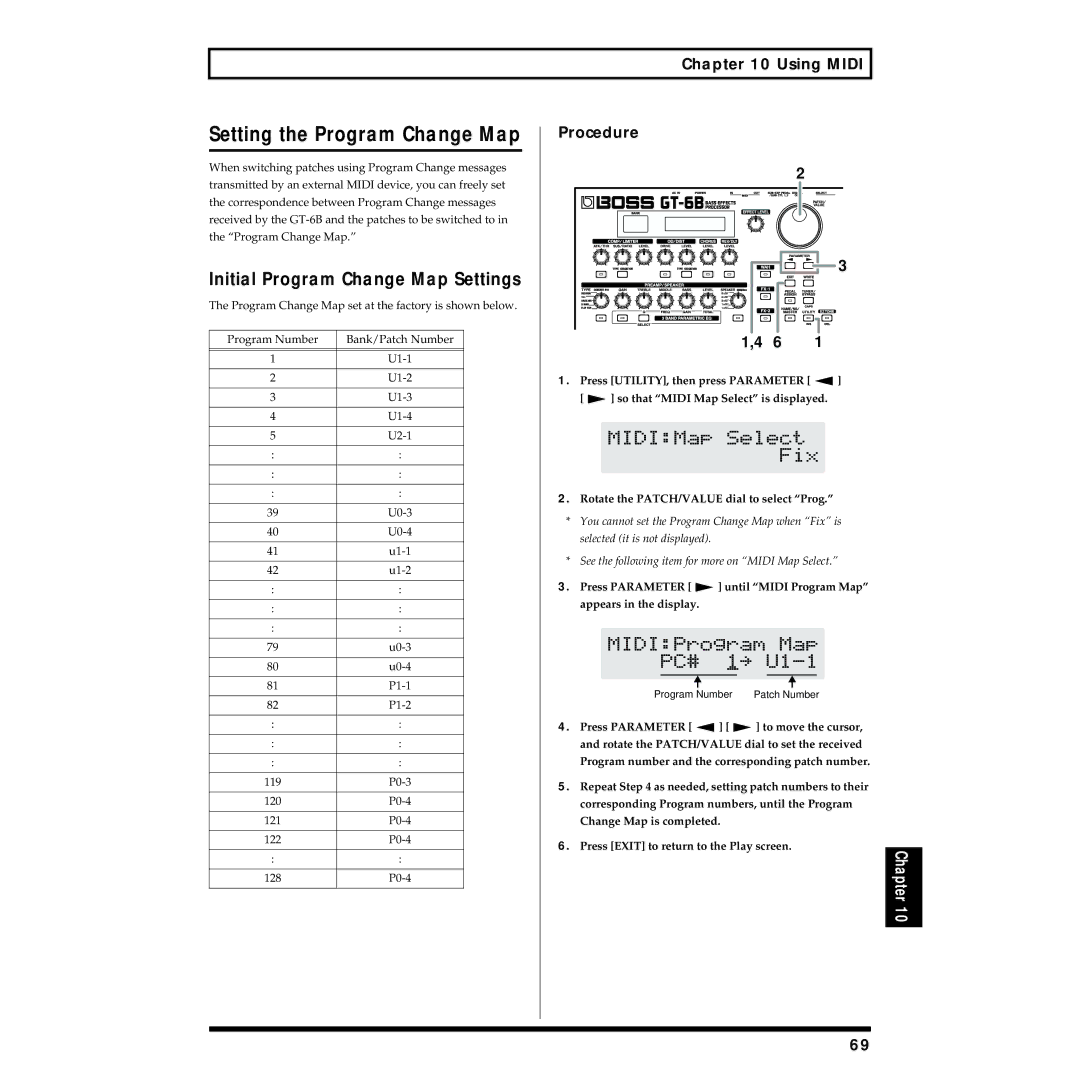
When switching patches using Program Change messages | 2 | |
transmitted by an external MIDI device, you can freely set | ||
| ||
the correspondence between Program Change messages |
| |
received by the |
| |
the “Program Change Map.” |
|
Initial Program Change Map Settings |
|
|
|
|
| 3 | ||
|
|
|
|
|
| |||
The Program Change Map set at the factory is shown below. |
|
|
|
|
|
| ||
Program Number | Bank/Patch Number |
|
|
|
| 1,4 6 | 1 | |
1 |
|
|
|
|
|
| ||
2 | 1. | Press [UTILITY], then press PARAMETER [ | ] | |||||
3 |
| [ | ] so that “MIDI Map Select” is displayed. | |||||
4 |
|
|
|
|
|
| ||
5 |
|
|
|
|
|
| ||
: | : |
|
|
|
|
|
| |
: | : |
|
|
|
|
|
| |
: | : | 2. | Rotate the PATCH/VALUE dial to select “Prog.” | |||||
|
| |||||||
39 | * | You cannot set the Program Change Map when “Fix” is | ||||||
40 | ||||||||
| selected (it is not displayed). |
|
|
| ||||
41 |
|
|
|
| ||||
* | See the following item for more on “MIDI Map Select.” | |||||||
42 | ||||||||
|
|
|
|
|
| |||
: | : | 3. | Press PARAMETER [ | ] until “MIDI Program Map” | ||||
: | : |
| appears in the display. |
|
|
| ||
|
|
|
|
|
| |||
: | : |
|
|
|
|
|
| |
79 |
|
|
|
|
|
| ||
80 |
|
|
|
|
|
| ||
81 |
|
| Program Number | Patch Number | ||||
82 |
|
| ||||||
|
|
|
|
|
| |||
: | : | 4. | Press PARAMETER [ | ] [ | ] to move the cursor, | |||
: | : |
| and rotate the PATCH/VALUE dial to set the received | |||||
: | : |
| Program number and the corresponding patch number. | |||||
119 | 5. | Repeat Step 4 as needed, setting patch numbers to their | ||||||
120 |
| corresponding Program numbers, until the Program | ||||||
121 |
| Change Map is completed. |
|
| ||||
122 | 6. | Press [EXIT] to return to the Play screen. | Chapter10 | |||||
: | : | |||||||
|
|
|
|
| ||||
|
|
|
|
|
| |||
128 |
|
|
|
|
|
| ||
69