BOXLIGHT XD-10m manual Image Menu for Computer Sources, Resize, Auto Image

Models: XD-10m

1 58
Download 58 pages 21.66 Kb
Page 27
Image 27

Image Menu for Computer Sources

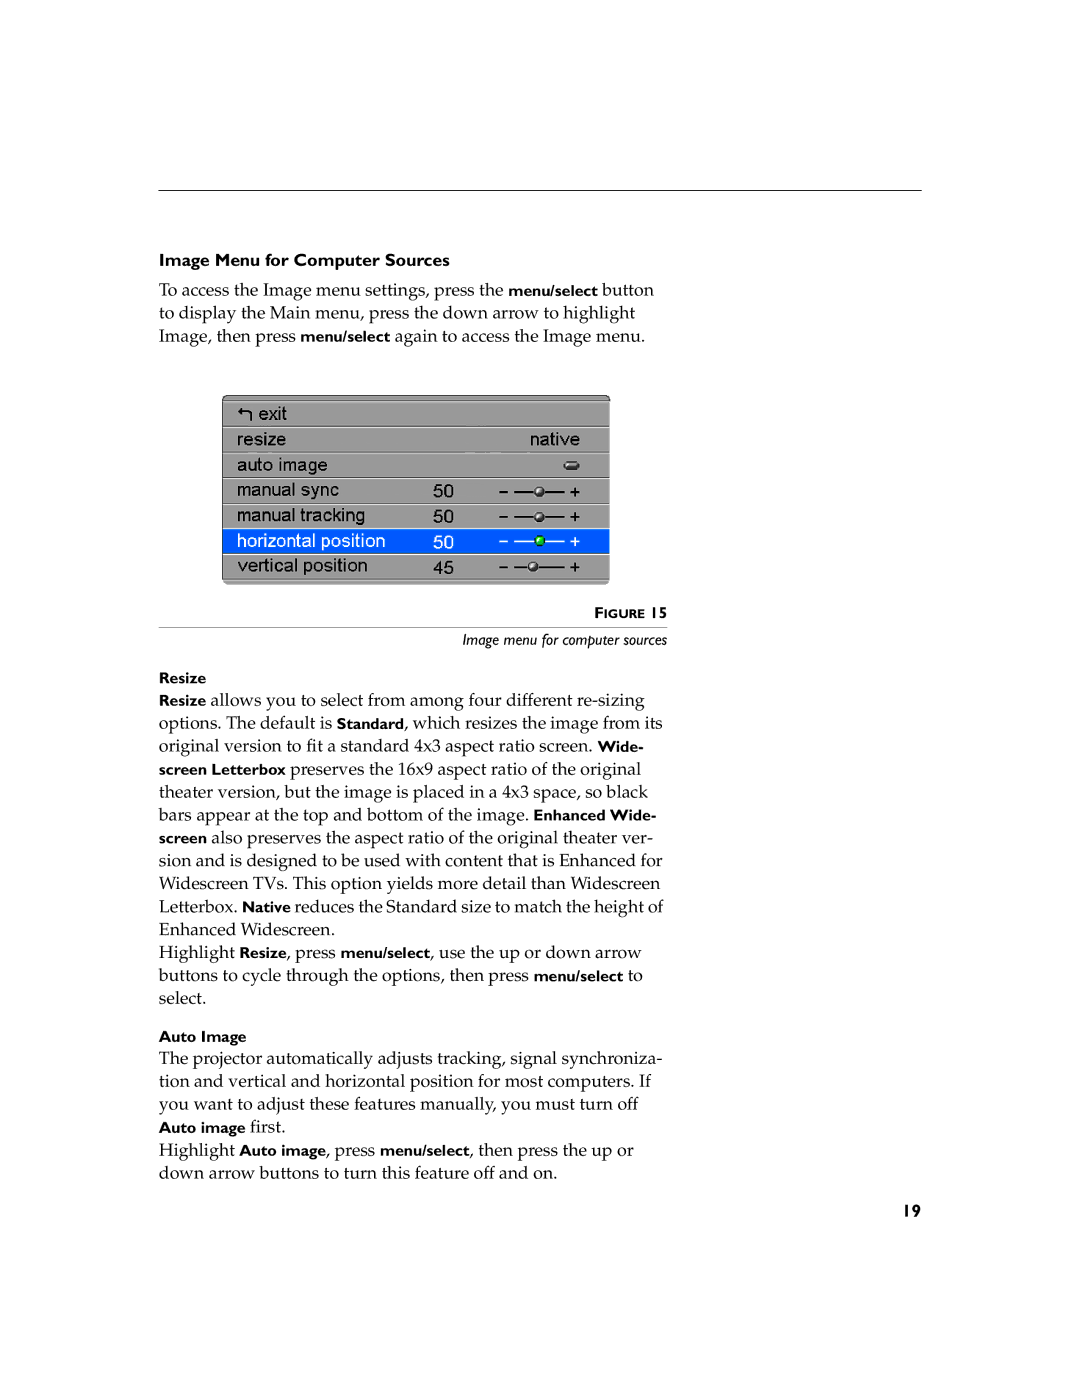
To access the Image menu settings, press the menu/select button to display the Main menu, press the down arrow to highlight Image, then press menu/select again to access the Image menu.

FIGURE 15

Image menu for computer sources

Resize

Resize allows you to select from among four different re-sizing options. The default is Standard, which resizes the image from its original version to fit a standard 4x3 aspect ratio screen. Wide- screen Letterbox preserves the 16x9 aspect ratio of the original theater version, but the image is placed in a 4x3 space, so black bars appear at the top and bottom of the image. Enhanced Wide- screen also preserves the aspect ratio of the original theater ver- sion and is designed to be used with content that is Enhanced for Widescreen TVs. This option yields more detail than Widescreen Letterbox. Native reduces the Standard size to match the height of Enhanced Widescreen.

Highlight Resize, press menu/select, use the up or down arrow buttons to cycle through the options, then press menu/select to select.

Auto Image

The projector automatically adjusts tracking, signal synchroniza- tion and vertical and horizontal position for most computers. If you want to adjust these features manually, you must turn off Auto image first.

Highlight Auto image, press menu/select, then press the up or down arrow buttons to turn this feature off and on.

19

Page 27
Image 27
BOXLIGHT XD-10m manual Image Menu for Computer Sources, Resize, Auto Image