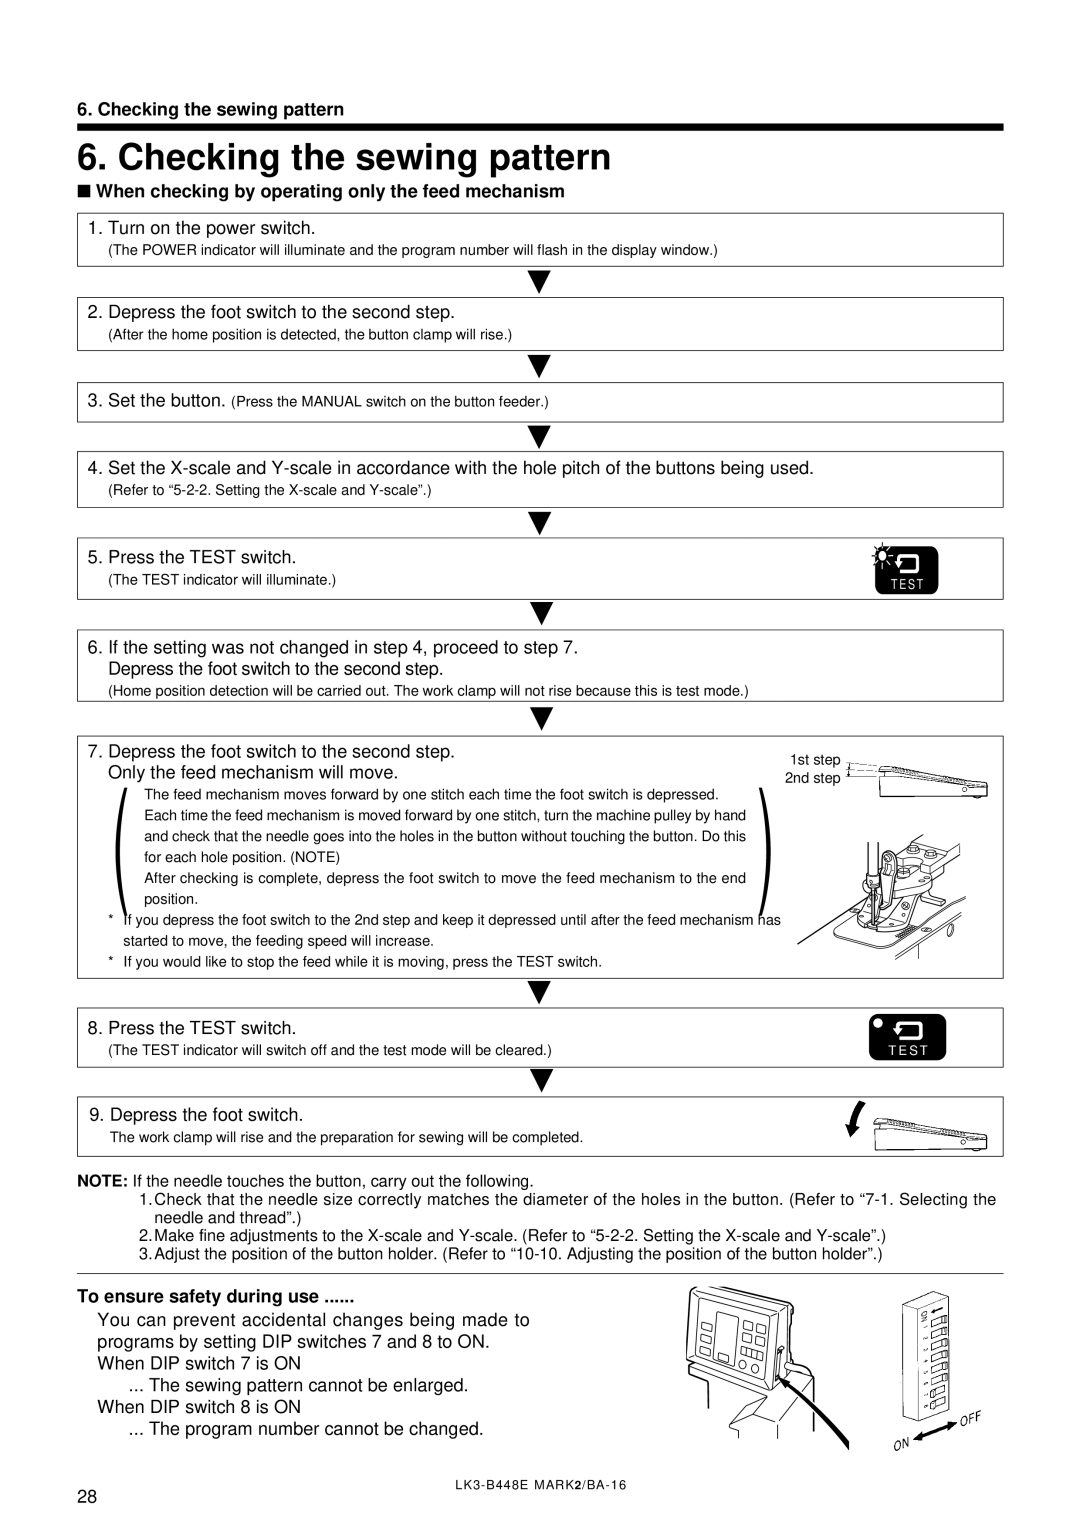
6. Checking the sewing pattern

6. Checking the sewing pattern

When checking by operating only the feed mechanism

1.Turn on the power switch.

(The POWER indicator will illuminate and the program number will flash in the display window.)

2. Depress the foot switch to the second step.

(After the home position is detected, the button clamp will rise.)

3.Set the button. (Press the MANUAL switch on the button feeder.)

4.Set the X-scale and Y-scale in accordance with the hole pitch of the buttons being used.

(Refer to “5-2-2. Setting the X-scale and Y-scale”.)

5. Press the TEST switch.

(The TEST indicator will illuminate.)

T E S T


6. If the setting was not changed in step 4, proceed to step 7. Depress the foot switch to the second step.

(Home position detection will be carried out. The work clamp will not rise because this is test mode.)

7. Depress the foot switch to the second step. Only the feed mechanism will move.

The feed mechanism moves forward by one stitch each time the foot switch is depressed.

( Each time the feed mechanism is moved forward by one stitch, turn the machine pulley by hand ) and check that the needle goes into the holes in the button without touching the button. Do this for each hole position. (NOTE)

After checking is complete, depress the foot switch to move the feed mechanism to the end position.

*If you depress the foot switch to the 2nd step and keep it depressed until after the feed mechanism has started to move, the feeding speed will increase.

*If you would like to stop the feed while it is moving, press the TEST switch.

1st step 2nd step

8. Press the TEST switch.

(The TEST indicator will switch off and the test mode will be cleared.)

T E S T

9. Depress the foot switch.

The work clamp will rise and the preparation for sewing will be completed.

NOTE: If the needle touches the button, carry out the following.

1.Check that the needle size correctly matches the diameter of the holes in the button. (Refer to “7-1. Selecting the needle and thread”.)

2.Make fine adjustments to the X-scale and Y-scale. (Refer to “5-2-2. Setting the X-scale and Y-scale”.)

3.Adjust the position of the button holder. (Refer to “10-10. Adjusting the position of the button holder”.)

To ensure safety during use ......

You can prevent accidental changes being made to programs by setting DIP switches 7 and 8 to ON. When DIP switch 7 is ON

... The sewing pattern cannot be enlarged. When DIP switch 8 is ON

... The program number cannot be changed.

LK3-B448E MARK2/BA-16

28

Page 35
Image 35
Brother LK3-B448E instruction manual Checking the sewing pattern, When checking by operating only the feed mechanism

LK3-B448E specifications

The Brother LK3-B448E is a versatile and innovative sewing machine designed to meet the needs of both home sewers and professionals alike. This comprehensive machine is especially advantageous for users who want to experiment with intricate designs and achieve high-quality results with ease.

At the core of the LK3-B448E lies its advanced computerized technology, which facilitates a seamless sewing experience. The machine features a user-friendly interface, making it accessible for not just experienced sewists but also beginners. The LCD display provides clear visibility of settings, stitch patterns, and design options, ensuring that users have full control over their projects.

One of the standout features of the LK3-B448E is its extensive library of built-in stitch patterns. With over 100 different stitches to choose from, including decorative, utility, and quilting stitches, users can easily customize their sewing to suit any project. In addition to the built-in stitches, this machine supports the use of embroidery patterns and designs, expanding creative possibilities significantly.

The LK3-B448E also incorporates advanced sewing technologies, such as automatic needle threading and a drop-in bobbin system. These features simplify the setup process, allowing users to spend more time sewing and less time managing technicalities. Furthermore, the machine offers adjustable stitch length and width, enabling personalized settings that cater to various fabric types and sewing tasks.

Another remarkable characteristic of the LK3-B448E is its adjustable presser foot pressure. This allows for better control, whether working with delicate fabrics or thicker materials. The machine’s speed controls help manage sewing speed, providing additional comfort for users as they tackle intricate patterns or detailed designs.

The LK3-B448E also supports USB connectivity, enabling users to transfer new designs and updates effortlessly. This feature ensures that the machine remains relevant with cutting-edge patterns and functionalities, extending its lifespan and usability.

In conclusion, the Brother LK3-B448E combines user-friendly design with advanced technology, offering a comprehensive sewing experience. Its extensive features, coupled with customizable settings, make it an ideal choice for both novice and experienced users looking to enhance their sewing projects. With the LK3-B448E, creating beautiful garments and intricate designs is a straightforward and enjoyable process.