Elastic Stitching


Point élastique

Pattern

14 (Elastic Stitch)

The Elastic Stitch can be used in 3 ways: mending, sewing elastic or joining fabric. Each is explained below.

Set the pattern selection dial to 14.

MENDING

1.Place the reinforcement fabric under the tear to be mended.

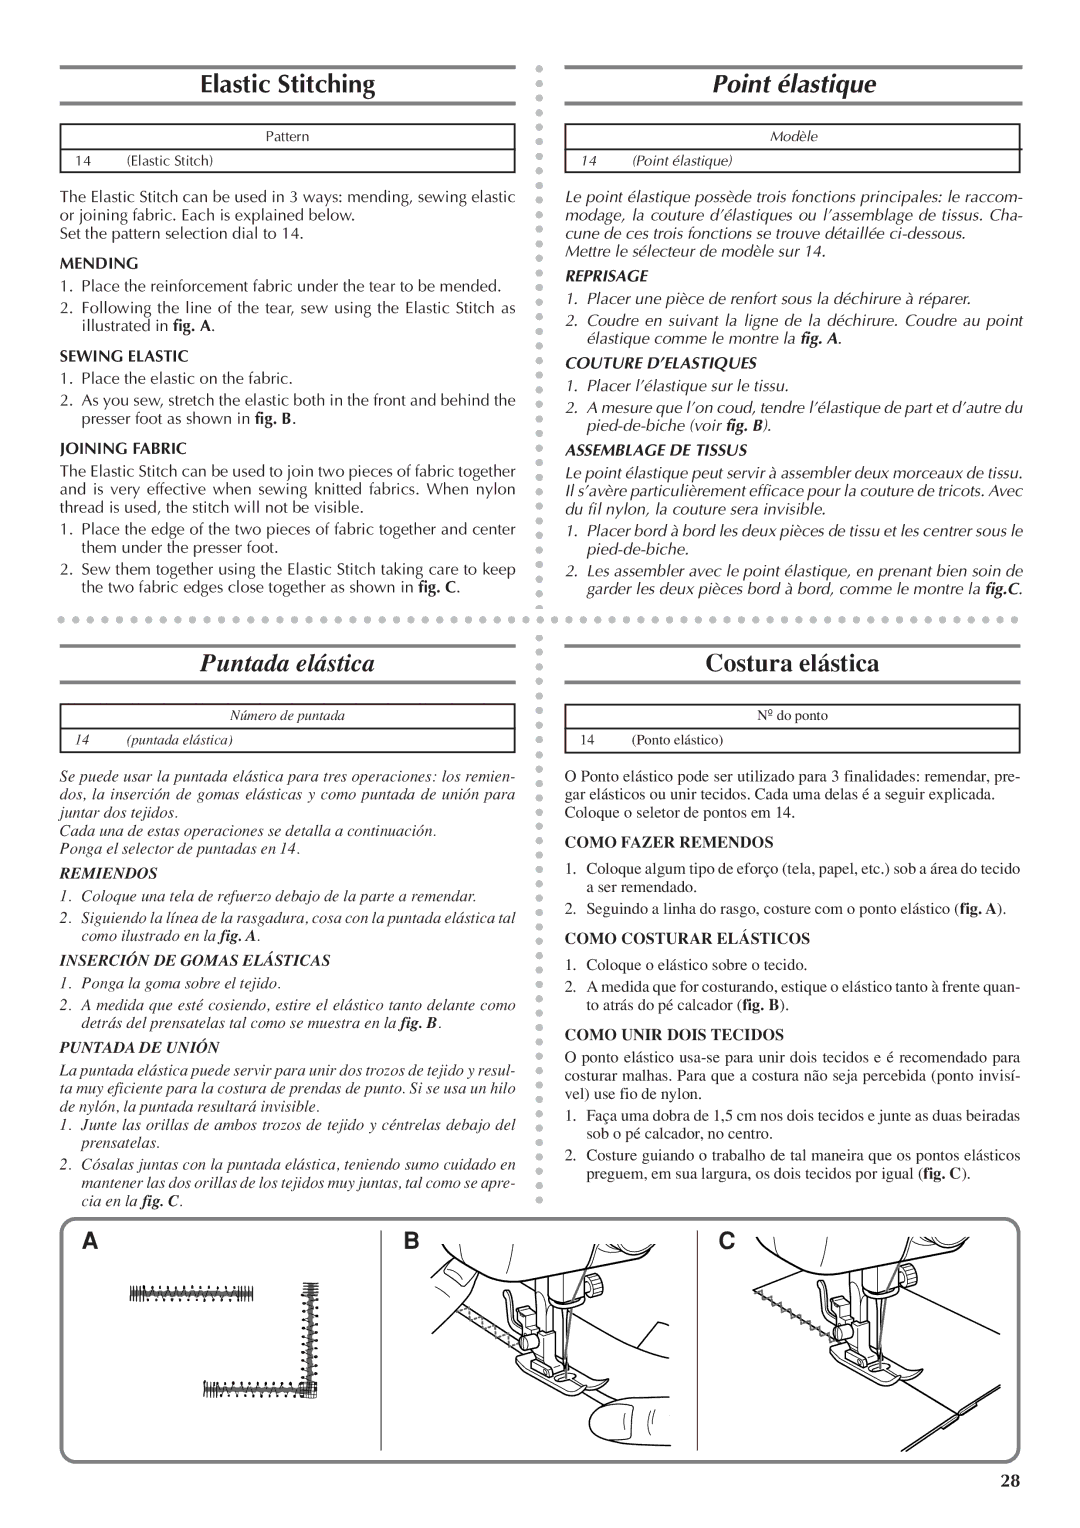
2.Following the line of the tear, sew using the Elastic Stitch as illustrated in fig. A.

SEWING ELASTIC

1.Place the elastic on the fabric.

2.As you sew, stretch the elastic both in the front and behind the presser foot as shown in fig. B.

JOINING FABRIC

The Elastic Stitch can be used to join two pieces of fabric together and is very effective when sewing knitted fabrics. When nylon thread is used, the stitch will not be visible.

1.Place the edge of the two pieces of fabric together and center them under the presser foot.

2.Sew them together using the Elastic Stitch taking care to keep the two fabric edges close together as shown in fig. C.

Modèle

14 (Point élastique)

Le point élastique possède trois fonctions principales: le raccom- modage, la couture d’élastiques ou l’assemblage de tissus. Cha- cune de ces trois fonctions se trouve détaillée ci-dessous.

Mettre le sélecteur de modèle sur 14.

REPRISAGE

1.Placer une pièce de renfort sous la déchirure à réparer.

2.Coudre en suivant la ligne de la déchirure. Coudre au point élastique comme le montre la fig. A.

COUTURE D’ELASTIQUES

1.Placer l’élastique sur le tissu.

2.A mesure que l’on coud, tendre l’élastique de part et d’autre du pied-de-biche (voir fig. B).

ASSEMBLAGE DE TISSUS

Le point élastique peut servir à assembler deux morceaux de tissu. Il s’avère particulièrement efficace pour la couture de tricots. Avec du fil nylon, la couture sera invisible.

1.Placer bord à bord les deux pièces de tissu et les centrer sous le pied-de-biche.

2.Les assembler avec le point élastique, en prenant bien soin de garder les deux pièces bord à bord, comme le montre la fig.C.

Puntada elástica


Costura elástica

Número de puntada

14 (puntada elástica)

Se puede usar la puntada elástica para tres operaciones: los remien- dos, la inserción de gomas elásticas y como puntada de unión para juntar dos tejidos.

Cada una de estas operaciones se detalla a continuación. Ponga el selector de puntadas en 14.

REMIENDOS

1.Coloque una tela de refuerzo debajo de la parte a remendar.

2.Siguiendo la línea de la rasgadura, cosa con la puntada elástica tal como ilustrado en la fig. A.

INSERCIÓN DE GOMAS ELÁSTICAS

1.Ponga la goma sobre el tejido.

2.A medida que esté cosiendo, estire el elástico tanto delante como detrás del prensatelas tal como se muestra en la fig. B.

PUNTADA DE UNIÓN

La puntada elástica puede servir para unir dos trozos de tejido y resul- ta muy eficiente para la costura de prendas de punto. Si se usa un hilo de nylón, la puntada resultará invisible.

1.Junte las orillas de ambos trozos de tejido y céntrelas debajo del prensatelas.

2.Cósalas juntas con la puntada elástica, teniendo sumo cuidado en mantener las dos orillas de los tejidos muy juntas, tal como se apre- cia en la fig. C.

Nº do ponto

14 (Ponto elástico)

O Ponto elástico pode ser utilizado para 3 finalidades: remendar, pre- gar elásticos ou unir tecidos. Cada uma delas é a seguir explicada. Coloque o seletor de pontos em 14.

COMO FAZER REMENDOS

1.Coloque algum tipo de eforço (tela, papel, etc.) sob a área do tecido a ser remendado.

2.Seguindo a linha do rasgo, costure com o ponto elástico (fig. A).

COMO COSTURAR ELÁSTICOS

1.Coloque o elástico sobre o tecido.

2.A medida que for costurando, estique o elástico tanto à frente quan- to atrás do pé calcador (fig. B).

COMO UNIR DOIS TECIDOS

O ponto elástico usa-se para unir dois tecidos e é recomendado para costurar malhas. Para que a costura não seja percebida (ponto invisí- vel) use fio de nylon.

1.Faça uma dobra de 1,5 cm nos dois tecidos e junte as duas beiradas sob o pé calcador, no centro.

2.Costure guiando o trabalho de tal maneira que os pontos elásticos preguem, em sua largura, os dois tecidos por igual (fig. C).

A

B

C

28

Page 36
Image 36
Brother LS 1520 instruction manual Elastic Stitching, Point élastique, Puntada elástica Costura elástica

LS 1520 specifications

The Brother LS 1520 is a versatile sewing machine designed to cater to both beginners and more experienced sewers alike. Lightweight and portable, the LS 1520 is an ideal choice for hobbyists who might want to travel with their sewing projects. With its user-friendly design, this machine offers a range of features that make sewing an enjoyable and efficient experience.

One of the key characteristics of the Brother LS 1520 is its straight stitch capability, which is perfect for various sewing tasks, from hemming to quilting. The machine boasts 14 built-in stitch patterns, including decorative stitches and a one-step buttonhole, allowing for creative sewing applications. The easy stitch selection dial allows users to quickly choose the desired stitch pattern, ensuring a smooth transition between projects.

The LS 1520 incorporates a top-loading bobbin system, which simplifies the process of loading and threading the bobbin. This design not only enhances convenience but also allows for smooth and consistent sewing. Additionally, the machine features an automatic needle threader, eliminating the frustration of manual threading, especially for those with visual impairments.

Another noteworthy aspect of the Brother LS 1520 is its adjustable stitch length and sewing speed, providing flexibility to customize each project according to specific requirements. The machine offers a free arm, perfect for sewing cylindrical items like sleeves and pant hems, allowing for greater versatility in project design.

The Brother LS 1520 also emphasizes safety, featuring a finger guard that helps prevent accidental injuries during operation. The machine operates quietly, making it suitable for home use, without disturbing the household.

Durability is a key characteristic of the LS 1520; it is built to last with high-quality components that withstand regular use. Brother's reputation for precision engineering is evident in this model, ensuring reliable performance in every stitch.

In conclusion, the Brother LS 1520 is an excellent sewing machine that balances user-friendliness with advanced features. Its combination of multiple stitch patterns, ease of use, safety features, and portability make it a popular choice among sewers of all levels. Whether tackling simple repairs or intricate projects, the LS 1520 promises a satisfying sewing experience.