SEASONAL CLEANING
ACCESSING THE INDOOR AND OUTDOOR
COILS Ð The minimum cleaning recommendation for indoor and outdoor coils is once per season. To access the coils for a thorough cleaning, it is necessary to remove the Air System. To accomplish this task, per- form the following steps:
1.DISCONNECT ALL POWER TO UNIT!
2.Remove the unit chassis from the sleeve as described in the General Disassembly section of this manual. See Figure 6.
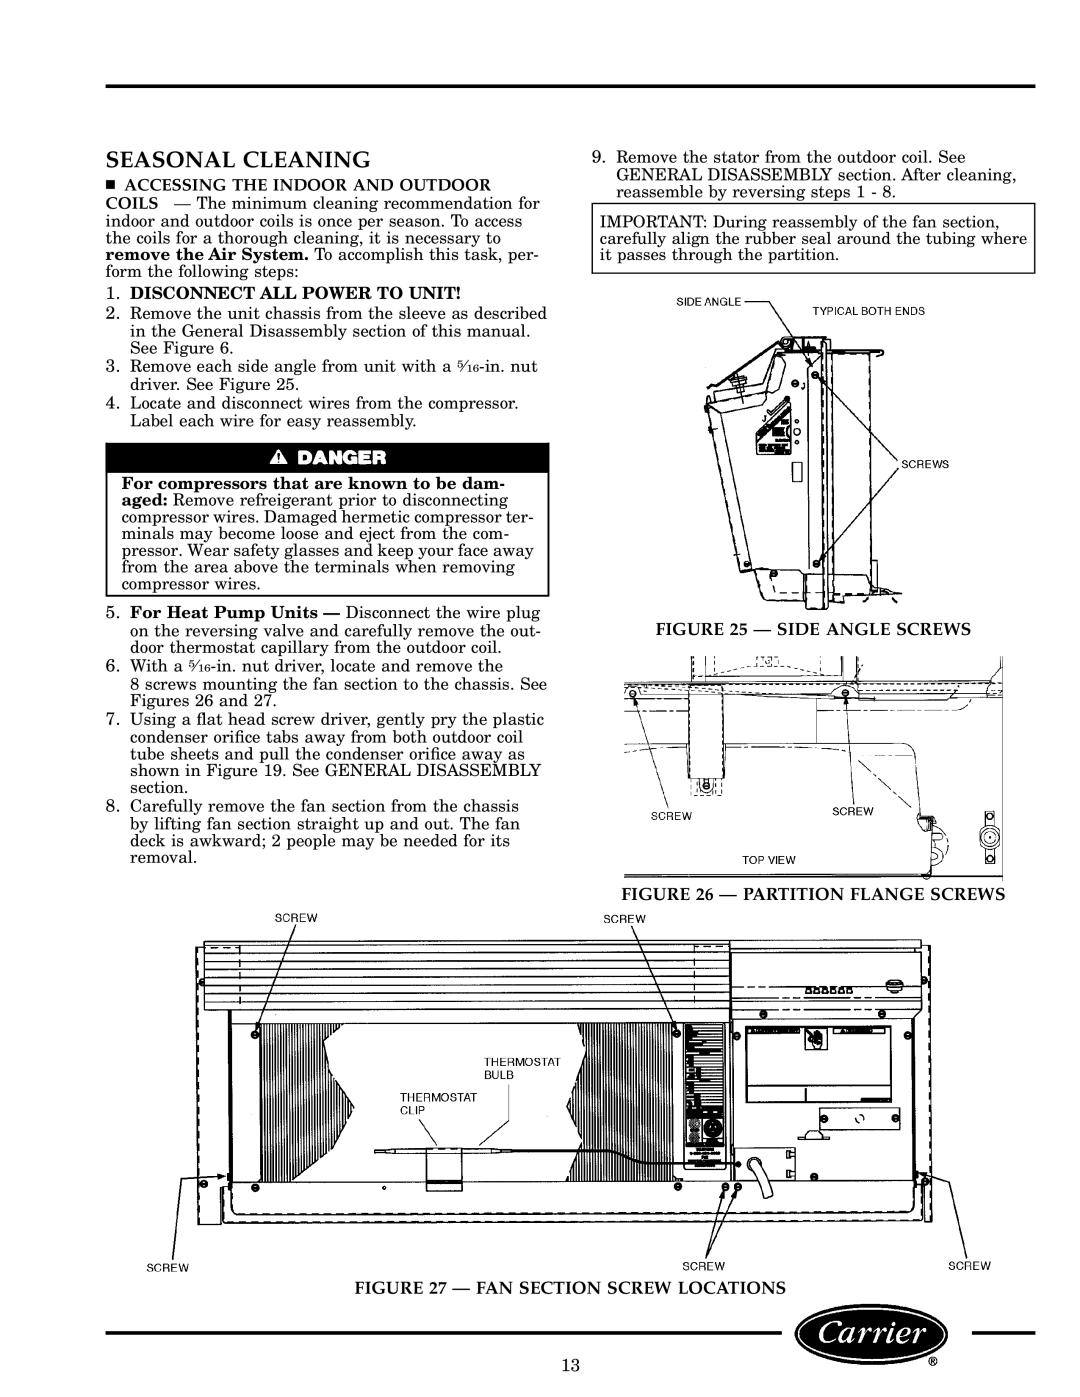
3.Remove each side angle from unit with a
4.Locate and disconnect wires from the compressor. Label each wire for easy reassembly.
For compressors that are known to be dam- aged: Remove refreigerant prior to disconnecting compressor wires. Damaged hermetic compressor ter- minals may become loose and eject from the com- pressor. Wear safety glasses and keep your face away from the area above the terminals when removing compressor wires.
5.For Heat Pump Units Ð Disconnect the wire plug on the reversing valve and carefully remove the out- door thermostat capillary from the outdoor coil.
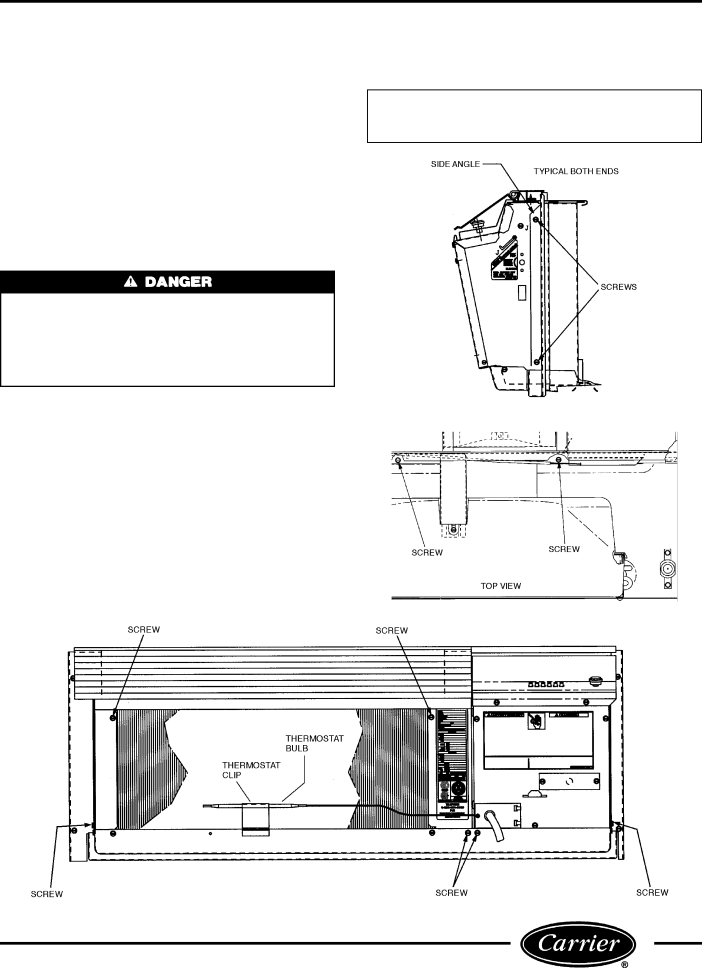
6.With a
8 screws mounting the fan section to the chassis. See Figures 26 and 27.
7.Using a ¯at head screw driver, gently pry the plastic condenser ori®ce tabs away from both outdoor coil tube sheets and pull the condenser ori®ce away as shown in Figure 19. See GENERAL DISASSEMBLY section.
8.Carefully remove the fan section from the chassis by lifting fan section straight up and out. The fan deck is awkward; 2 people may be needed for its removal.
9.Remove the stator from the outdoor coil. See GENERAL DISASSEMBLY section. After cleaning, reassemble by reversing steps 1 - 8.
IMPORTANT: During reassembly of the fan section, carefully align the rubber seal around the tubing where it passes through the partition.
FIGURE 25 Ð SIDE ANGLE SCREWS
FIGURE 26 Ð PARTITION FLANGE SCREWS
FIGURE 27 Ð FAN SECTION SCREW LOCATIONS
13