52S
SERIES
GENERAL DISASSEMBLY
This section includes common procedures for disassem- bly and reassembly of 52S units. These instructions are general in nature and include procedures the tech- nician may be called upon to perform when accessing certain components of the 52S unit.
It is important to carefully follow manufacturer's instruc- tions when disassembling or reassembling a unit for cleaning, maintenance, or part replacement. When dis- assembling wiring, it is strongly recommended that numbered stickers be attached to identify leads and ter- minals to aid in the reassembly process. Always review safety procedures prior to the start of a job.
Prior to servicing electrical equipment, disconnect all power to avoid electric shock! Never alter cord or plug and do not use extension cords.
TO DISCONNECT POWER FOR CORD- CONNECTED UNIT
1.Push OFF button.
2.Open the disconnect switch at main power supply. Use proper Lockout and Tag procedures.
3.Unplug the unit service cord.
TO DISCONNECT POWER FOR PERMANENTLY CONNECTED (HARDWIRED) UNITS
1.Push OFF button.
2.Open the disconnect switch at main power supply. Use proper Lockout and Tag procedures.
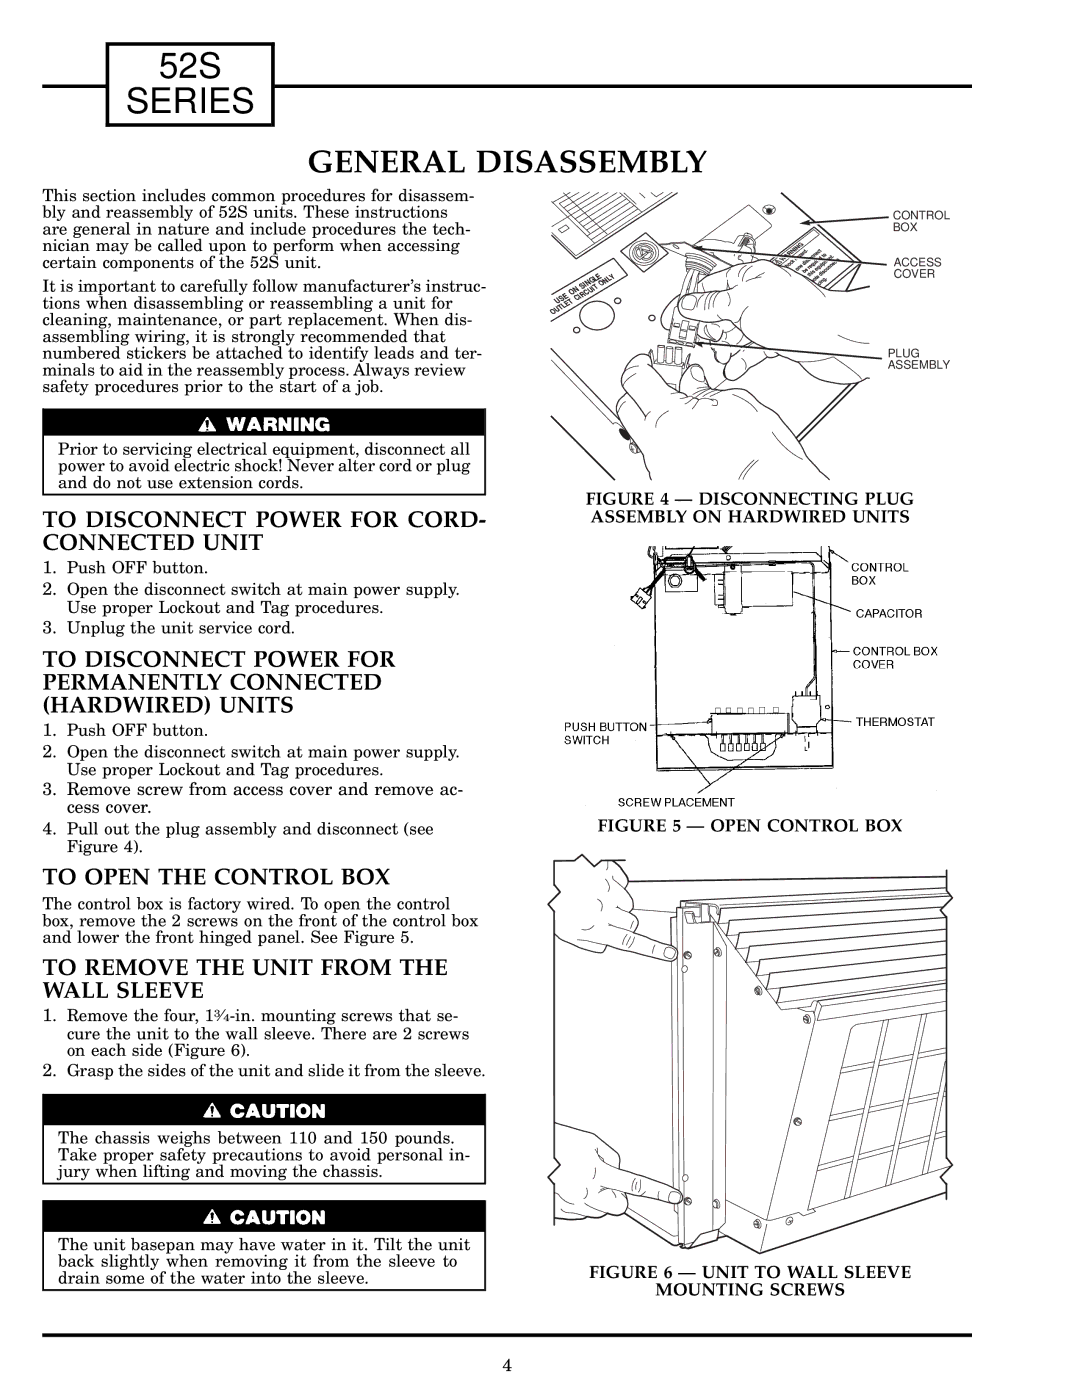
3.Remove screw from access cover and remove ac- cess cover.
4.Pull out the plug assembly and disconnect (see Figure 4).
TO OPEN THE CONTROL BOX
The control box is factory wired. To open the control box, remove the 2 screws on the front of the control box and lower the front hinged panel. See Figure 5.
TO REMOVE THE UNIT FROM THE WALL SLEEVE
1.Remove the four,
2.Grasp the sides of the unit and slide it from the sleeve.
The chassis weighs between 110 and 150 pounds. Take proper safety precautions to avoid personal in- jury when lifting and moving the chassis.
The unit basepan may have water in it. Tilt the unit back slightly when removing it from the sleeve to drain some of the water into the sleeve.
CONTROL
BOX
.
.
ACCESS
COVER
![]() PLUG
PLUG
ASSEMBLY
FIGURE 4 Ð DISCONNECTING PLUG ASSEMBLY ON HARDWIRED UNITS
FIGURE 5 Ð OPEN CONTROL BOX
FIGURE 6 Ð UNIT TO WALL SLEEVE
MOUNTING SCREWS
4