5.Next, test the resistance individually of each wire to the shell of the compressor. The paint on the com- pressor can prevent good contact between the probe and the metal. The paint should be removed from
a small section of the shell of the compressor to ensure good contact by the meter probe. The
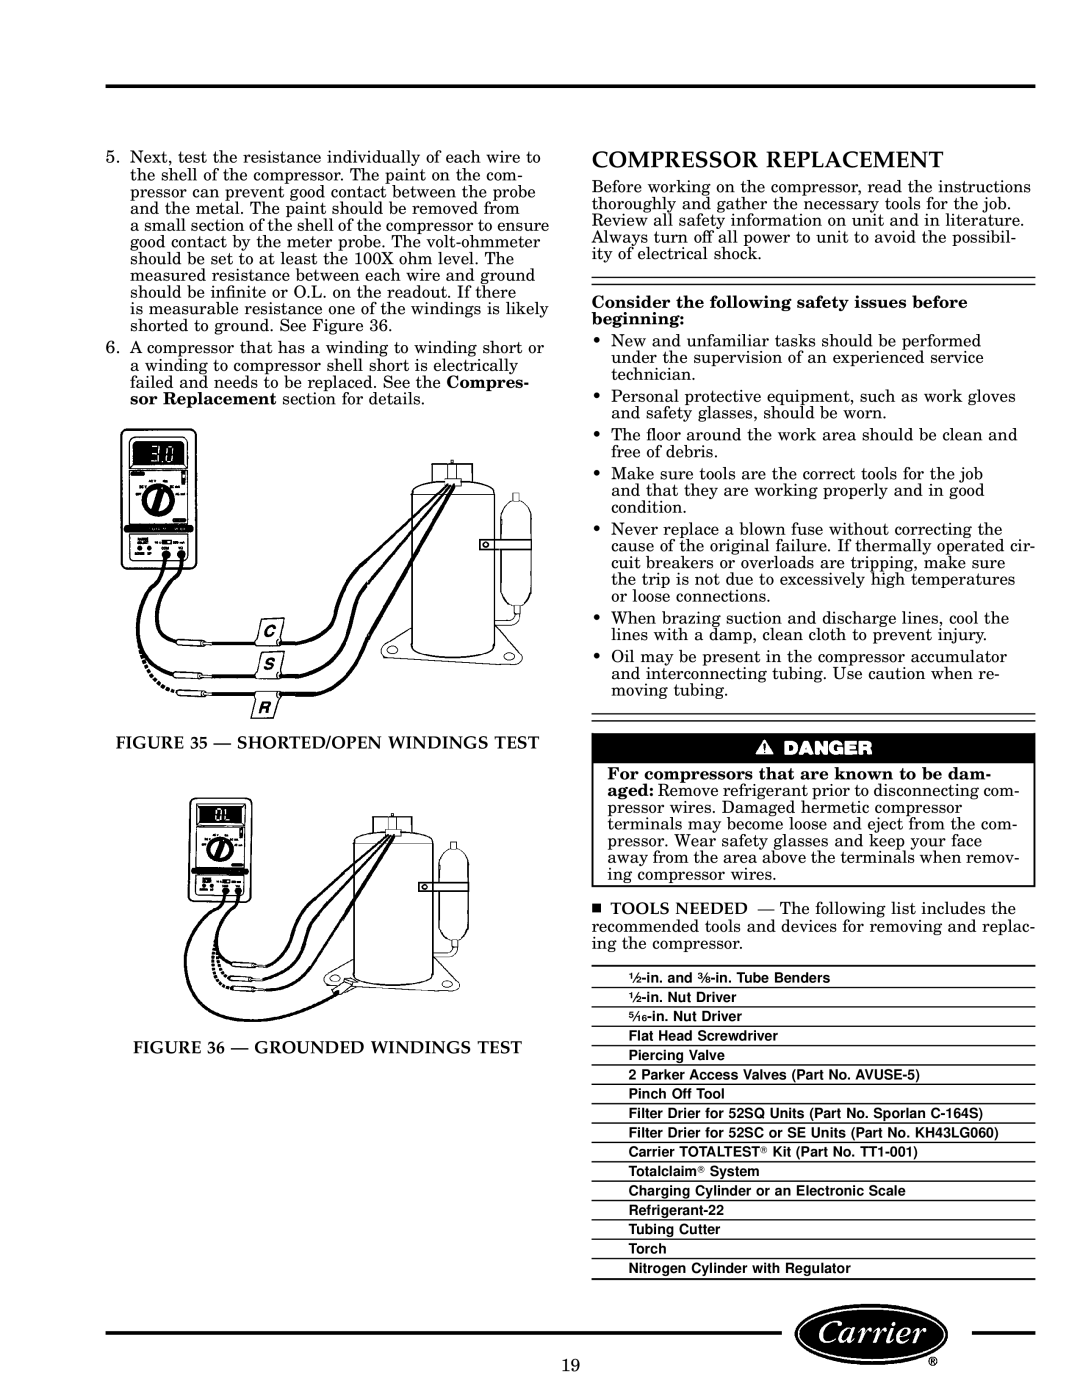
is measurable resistance one of the windings is likely shorted to ground. See Figure 36.
6.A compressor that has a winding to winding short or a winding to compressor shell short is electrically failed and needs to be replaced. See the Compres- sor Replacement section for details.
FIGURE 35 Ð SHORTED/OPEN WINDINGS TEST
FIGURE 36 Ð GROUNDED WINDINGS TEST
COMPRESSOR REPLACEMENT
Before working on the compressor, read the instructions thoroughly and gather the necessary tools for the job. Review all safety information on unit and in literature. Always turn off all power to unit to avoid the possibil- ity of electrical shock.
Consider the following safety issues before beginning:
·New and unfamiliar tasks should be performed under the supervision of an experienced service technician.
·Personal protective equipment, such as work gloves and safety glasses, should be worn.
·The ¯oor around the work area should be clean and free of debris.
·Make sure tools are the correct tools for the job and that they are working properly and in good condition.
·Never replace a blown fuse without correcting the cause of the original failure. If thermally operated cir- cuit breakers or overloads are tripping, make sure the trip is not due to excessively high temperatures or loose connections.
·When brazing suction and discharge lines, cool the lines with a damp, clean cloth to prevent injury.
·Oil may be present in the compressor accumulator and interconnecting tubing. Use caution when re- moving tubing.
For compressors that are known to be dam- aged: Remove refrigerant prior to disconnecting com- pressor wires. Damaged hermetic compressor terminals may become loose and eject from the com- pressor. Wear safety glasses and keep your face away from the area above the terminals when remov- ing compressor wires.
TOOLS NEEDED Ð The following list includes the
recommended tools and devices for removing and replac- ing the compressor.
Flat Head Screwdriver
Piercing Valve
2 Parker Access Valves (Part No.
Pinch Off Tool
Filter Drier for 52SQ Units (Part No. Sporlan
Filter Drier for 52SC or SE Units (Part No. KH43LG060)
Carrier TOTALTEST Kit (Part No.
Totalclaim System
Charging Cylinder or an Electronic Scale
Tubing Cutter
Torch
Nitrogen Cylinder with Regulator
19