52S
SERIES
FAN MOTOR REPLACEMENT
Perform the following steps to remove and reinstall the fan motor:
1.DISCONNECT ALL POWER TO UNIT.
2.Remove the unit from the sleeve as detailed in the GENERAL DISASSEMBLY section and place the unit on a large ¯at surface.
3.Remove the discharge air grille, the aluminum top panel, the top cover, and the discharge air deck as detailed in the GENERAL DISASSEMBLY sec- tion under To Access
4.Remove
5.Remove the gusset, and detach the condenser ori®ce from the outdoor coil as detailed in the GENERAL DISASSEMBLY section under To Access
6.Loosen the mechanical fastener that holds the in- door fan to the fan motor shaft. The indoor fan may be secured to the fan motor shaft by either an Allen screw or a square head bolt. This may require removing the electric heat assembly. If so, refer to the HEATERS section of this manual under Heater
Removal.
7.Open the control box as detailed in the GENERAL DISASSEMBLY section. Label and disconnect the fan motor wires from the push button switch and capacitor.
8.Using the
9.Gently lift the outdoor coil up and just outside of the unit basepan. This allows access to the spring clip that secures the outdoor fan to the fan motor.
Do not kink or break the tubes that connect to the coil. The system still has refrigerant in it. Wear gloves, the coil ®ns are sharp and can cut your hands.
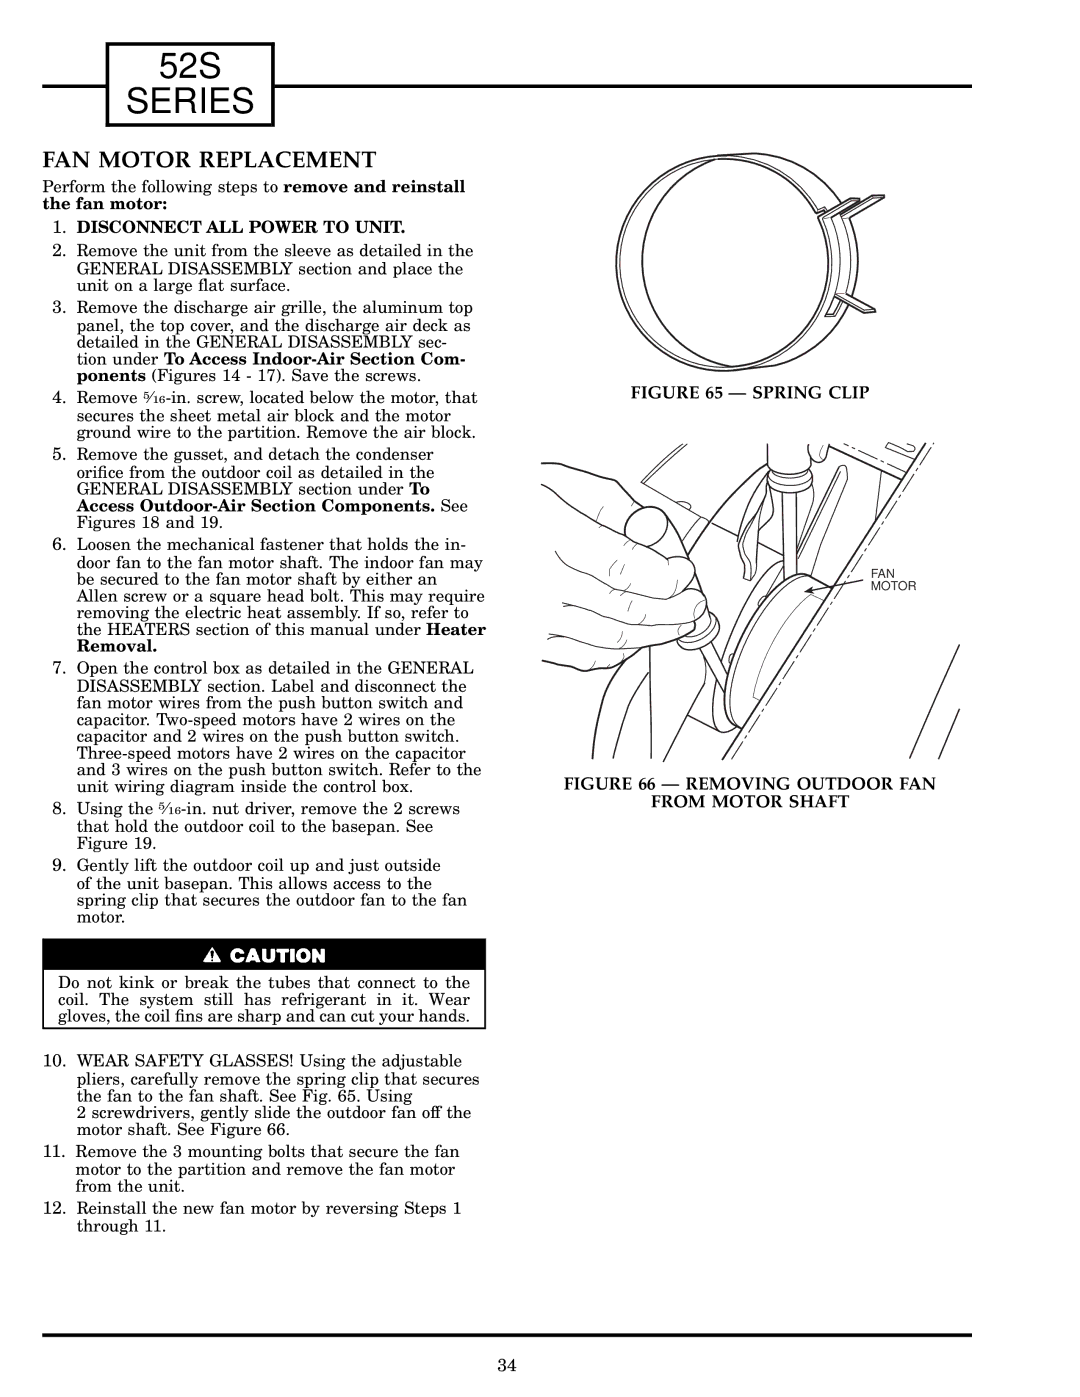
10.WEAR SAFETY GLASSES! Using the adjustable pliers, carefully remove the spring clip that secures the fan to the fan shaft. See Fig. 65. Using
2 screwdrivers, gently slide the outdoor fan off the motor shaft. See Figure 66.
11.Remove the 3 mounting bolts that secure the fan motor to the partition and remove the fan motor from the unit.
12.Reinstall the new fan motor by reversing Steps 1 through 11.
FIGURE 65 Ð SPRING CLIP
FAN
MOTOR
FIGURE 66 Ð REMOVING OUTDOOR FAN
FROM MOTOR SHAFT
34