52S
SERIES
CLEANING THE VENT AIR FILTER
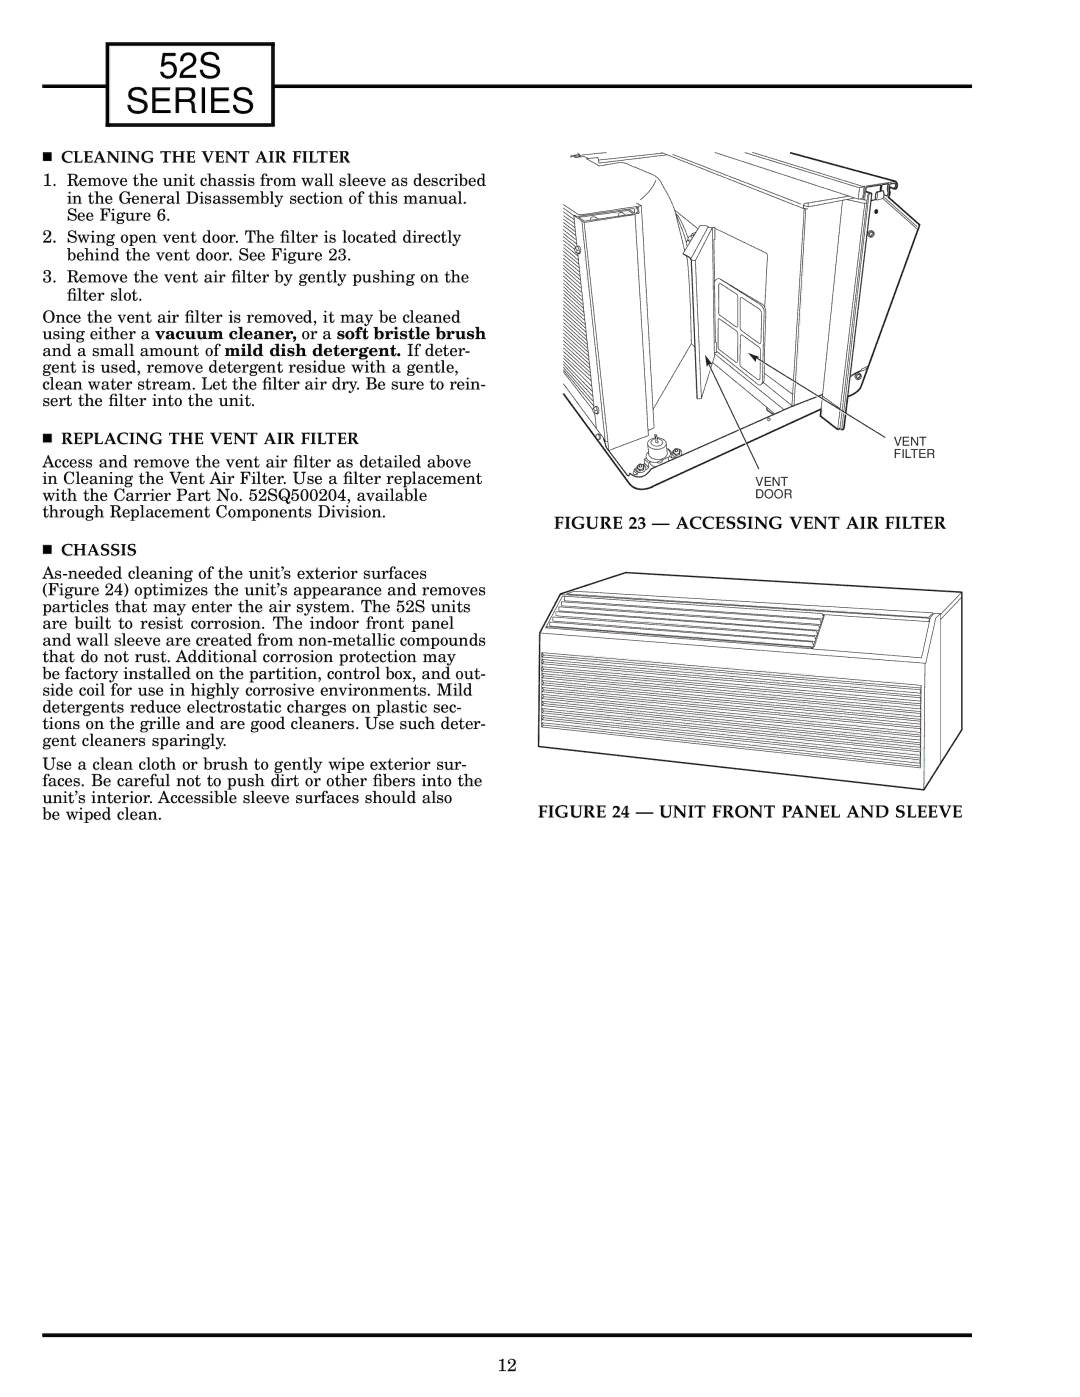
1.Remove the unit chassis from wall sleeve as described in the General Disassembly section of this manual. See Figure 6.
2.Swing open vent door. The ®lter is located directly behind the vent door. See Figure 23.
3.Remove the vent air ®lter by gently pushing on the ®lter slot.
Once the vent air ®lter is removed, it may be cleaned using either a vacuum cleaner, or a soft bristle brush and a small amount of mild dish detergent. If deter- gent is used, remove detergent residue with a gentle, clean water stream. Let the ®lter air dry. Be sure to rein- sert the ®lter into the unit.
REPLACING THE VENT AIR FILTER
Access and remove the vent air ®lter as detailed above in Cleaning the Vent Air Filter. Use a ®lter replacement with the Carrier Part No. 52SQ500204, available through Replacement Components Division.
CHASSIS
Use a clean cloth or brush to gently wipe exterior sur- faces. Be careful not to push dirt or other ®bers into the unit's interior. Accessible sleeve surfaces should also be wiped clean.
VENT
FILTER
VENT
DOOR
FIGURE 23 Ð ACCESSING VENT AIR FILTER
FIGURE 24 Ð UNIT FRONT PANEL AND SLEEVE
12
